Deploying the Secure Edge appliance
NAVIGATION Partner Portal > Networking Status > Network Manager > Manage > Secure Edge > Provisioning
This article provides fundamental guidance about how to add a Secure Edge appliance to a client network, provision it for a subscriber, and deploy it at a remote location.

-
Navigate to portal.dattobackup.com
-
Log in with your Partner Portal credentials.
-
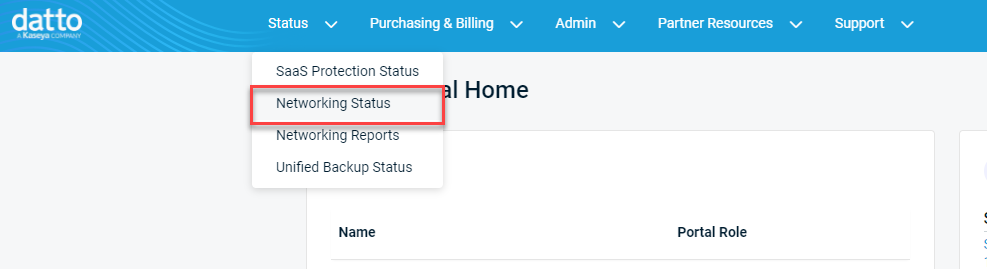
From the header menu, select Status > Networking Status.
-
Select the name of a Network or Launch Network Manager, to load the Network Manager.

-
From the left navigation menu, select Secure Edge to expand the options available.
-
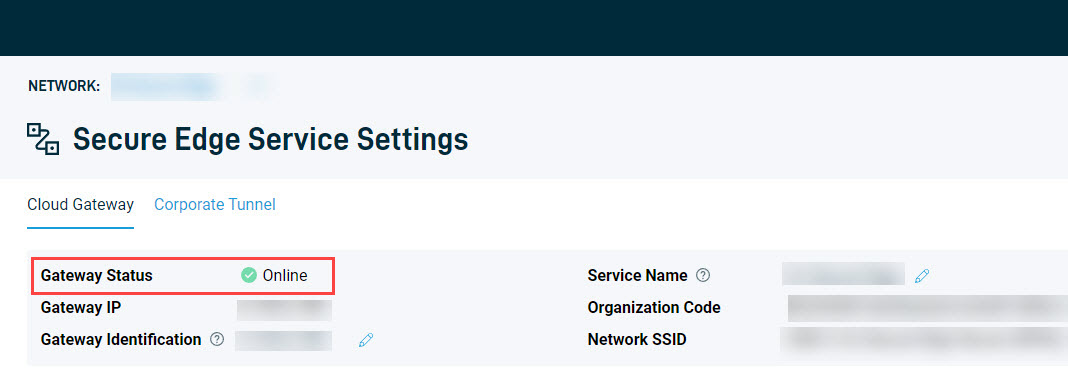
Select Service Settings from the navigation menu, under Secure Edge.
-
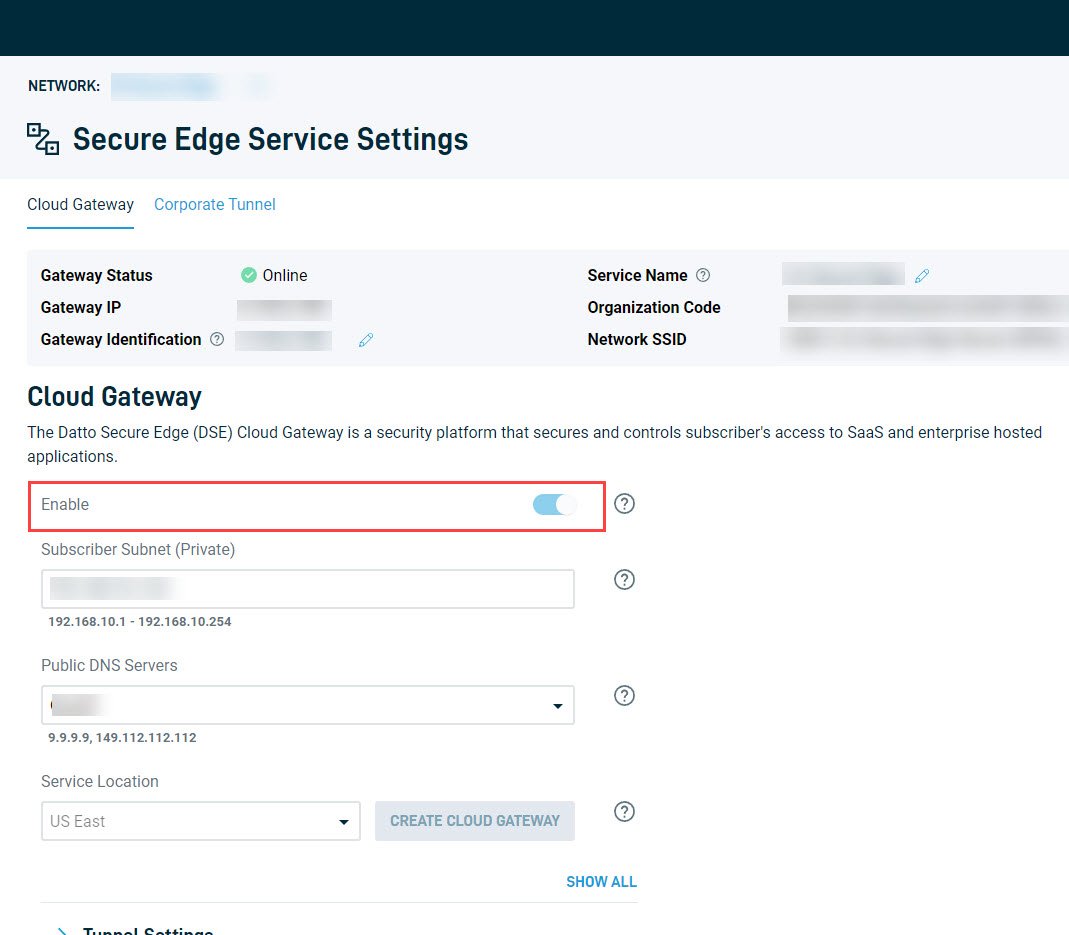
Click the Enable slider.
-
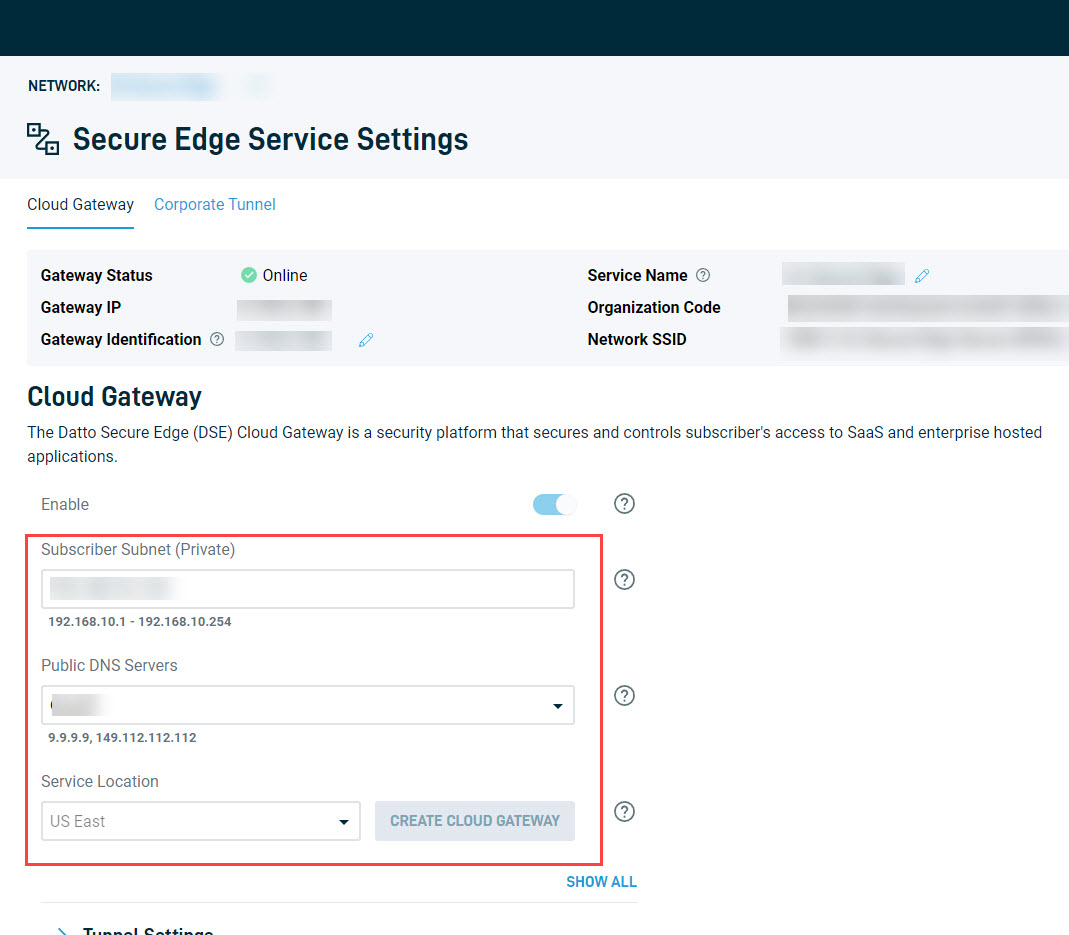
Add the Subscriber Subnet, choose a Public DNS Server, and select a Service Location.When completed, click Create Cloud Gateway.
-
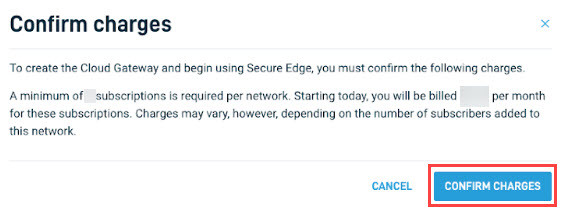
Click Confirm changes.
-
The Gateway Status will begin connecting and change status to Online when completed.
-
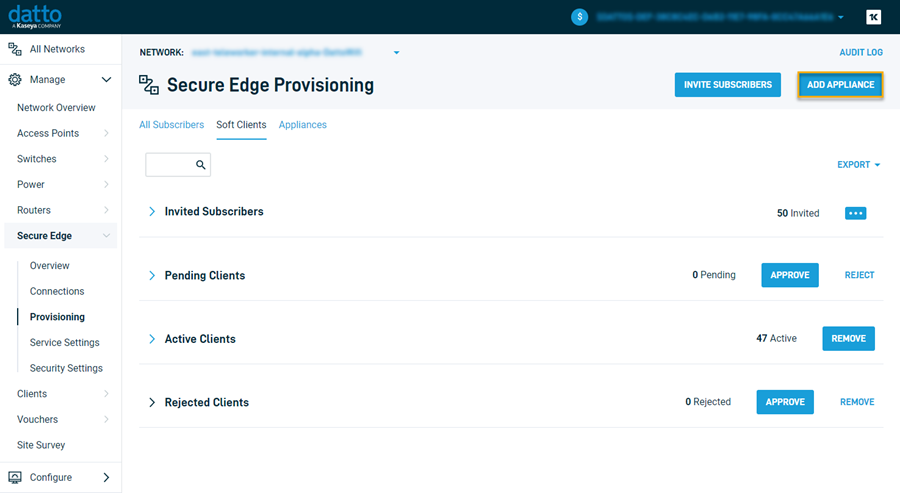
From the left navigation menu, select Provisioning.
-
The Secure Edge Provisioning page loads. Click the Add Appliance button.
-
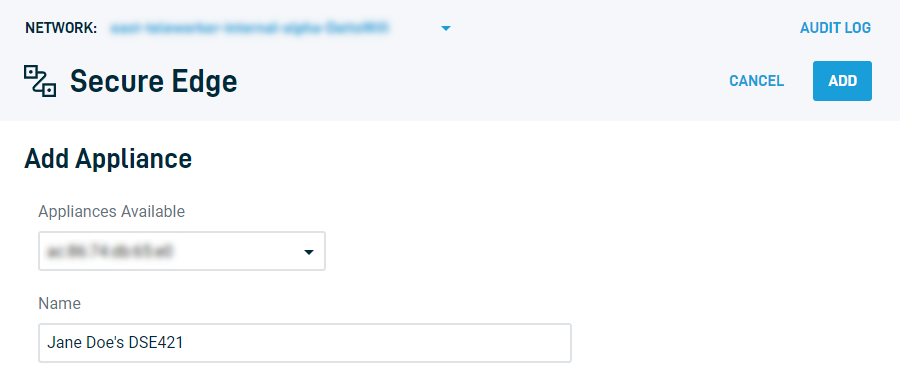
Confirm the Network is the correct one in the top left and change it if necessary.
-
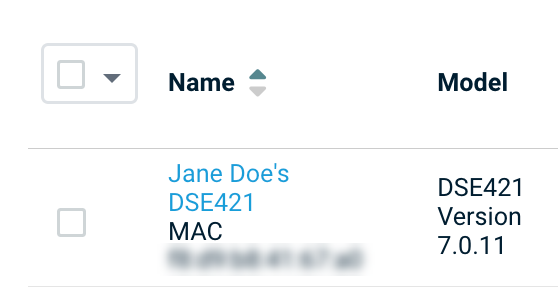
On the Add Appliance page, from the Appliances Available drop-down menu, select the MAC address of the unit you'd like to add to the network.
-
Enter the desired name for the appliance in the Name field.
-
Click the Add button located in the upper right corner of the screen.
-
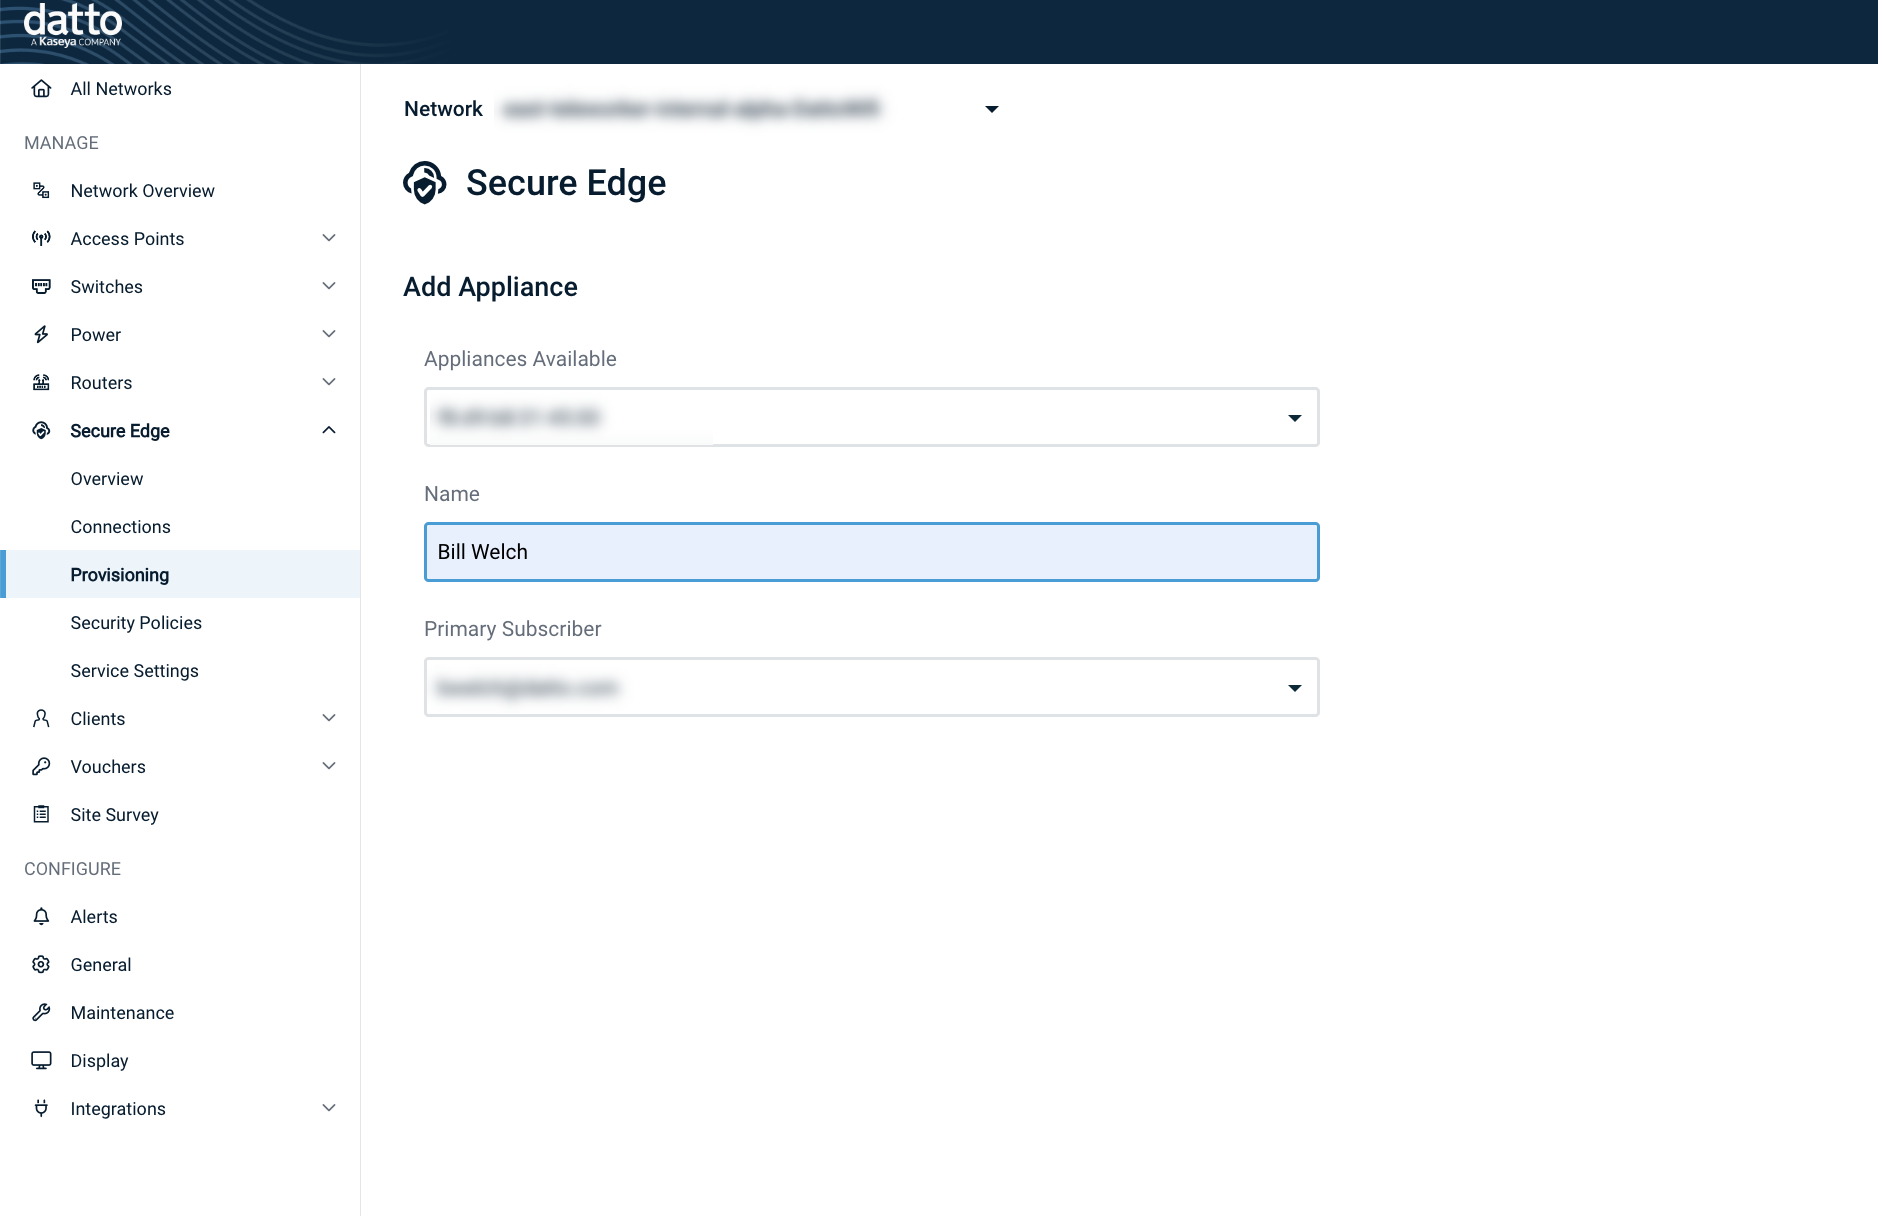
In Network Manager, navigate to Manage > Secure Edge > Provisioning.
-
Locate your new device in the Appliances Available drop-down menu.
-
In the device's Primary Subscriber drop-down menu, define the user to whom this device will be primarily assigned. Then, select Save Changes.
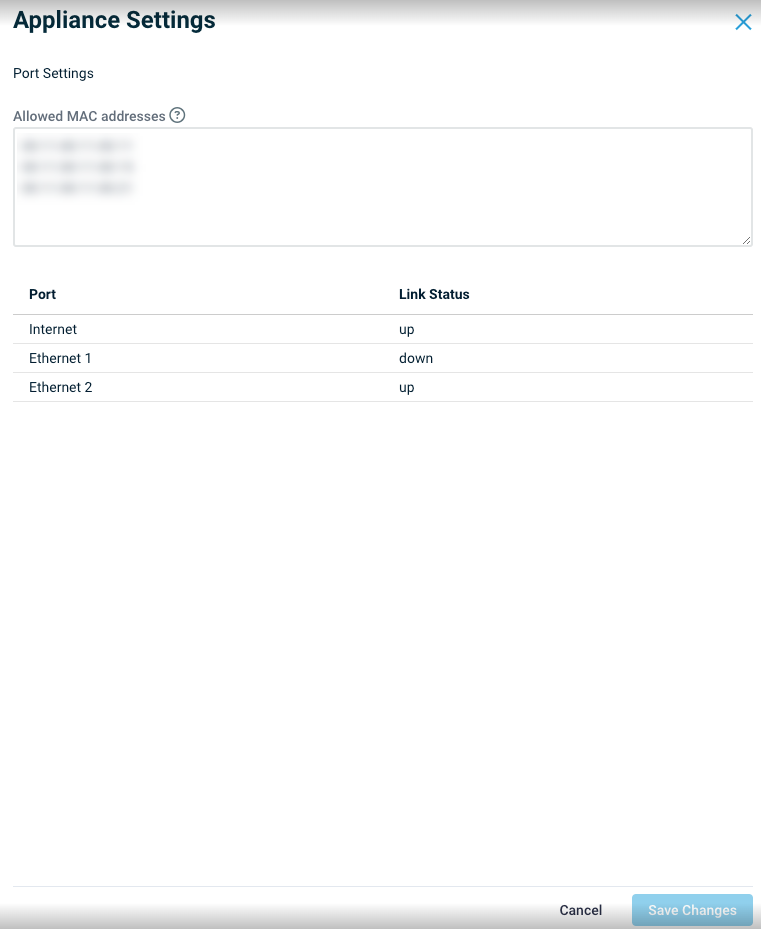
In order to use the Yellow LAN ports on the back of the Secure Edge appliance, you must first add in the MAC addresses of the devices that will connect to LAN ports.
NOTE DSE421 firmware release 7.0.21 is required to use this feature.
-
In Network Manager, navigate to Manage > Secure Edge > Provisioning.
-
Locate the Secure Edge Appliance in the Appliances tab menu at the top.

-
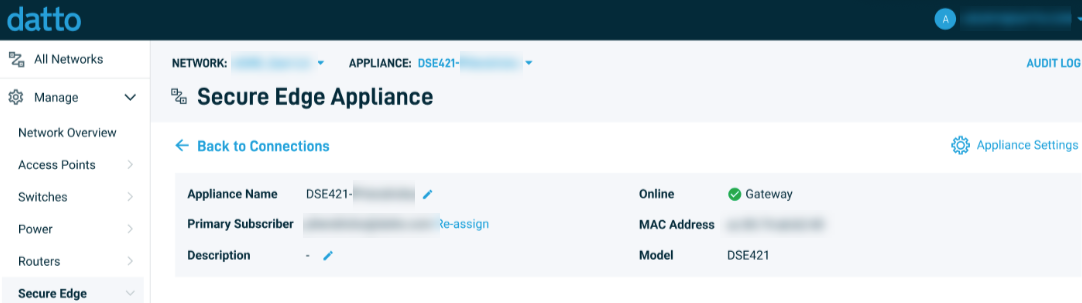
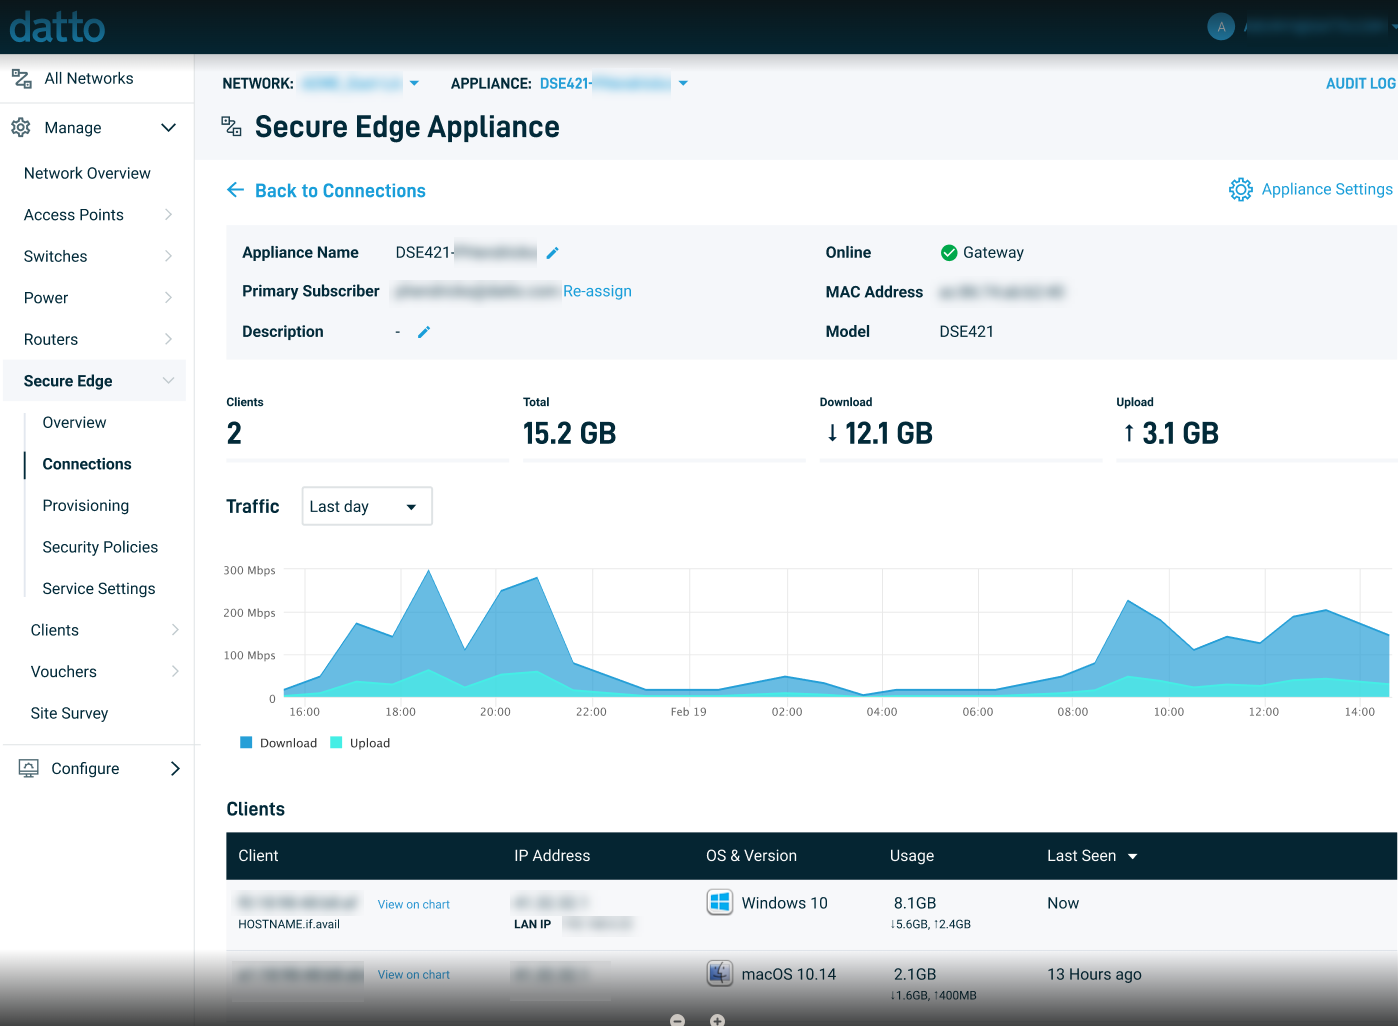
Click the Name of the Secure Edge appliance you are provisioning.
This will open the Secure Edge Appliance page.
-
Then click the Appliance Settings link in the upper right hand part of screen and this screen will appear.
-
Add in the MAC addresses of the devices connected to the LAN ports.
-
Click on Save Changes.
-
Connect the device(s) to the LAN ports and they should be displayed as connected devices.
 Watch
Watch
Getting Started with Datto Secure Edge - DSE421 Unboxing 2:59, Wistia
Deploy
Deployment of the Secure Edge appliance is simple and fast. Once you've installed the device at the remote location, perform the following steps to get your client up and running.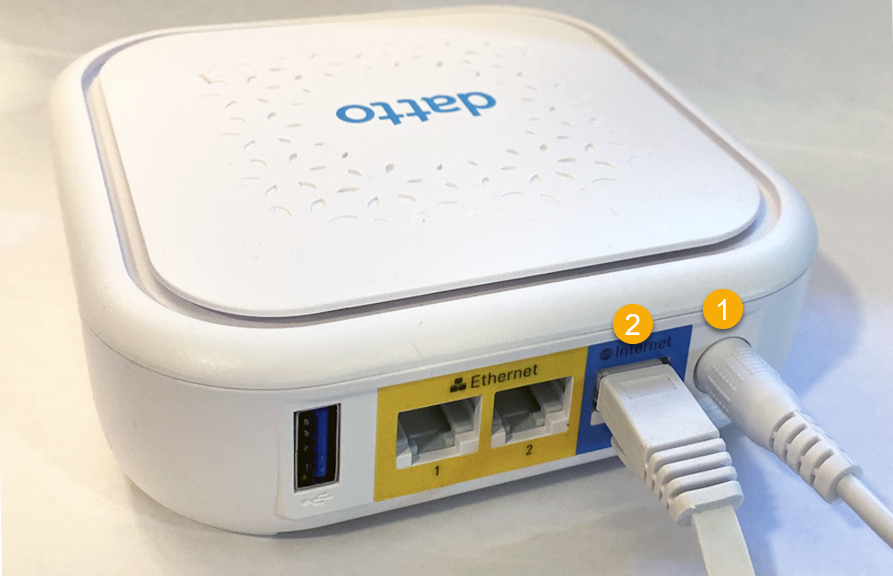
-
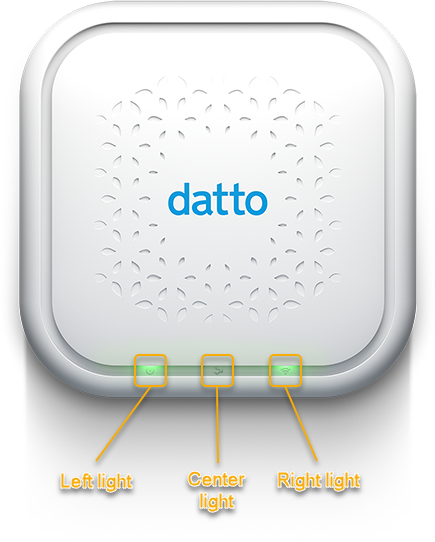
Plug in both ends of the power cable and wait 10 seconds for the left light on the front of the device to turn green. If the left light does not turn green, ensure that the power supply is connected properly.
-
Connect the included Ethernet cable between the blue Internet port on the appliance and any LAN port on the router or modem at the remote site. If this is the first time you've connected the device to the internet, allow at least 10 minutes for the provisioning processes to complete.
-
Once the provisioning finishes, the left-hand power light and the right-hand WiFi light on the front of the device should be solid green, indicating that the appliance is functioning correctly and is connected to the internet. If not, refer to our client troubleshooting guide.
-
Connect the remote site's computer to the Secure Edge device's wireless network. The remote computer will be able to reach the work LAN just like it would in the office.


