Getting started with the Multi-Gig PoE Injector for WiFi-6 access points
This article discusses how to mount and set up the Datto Multigigabit PoE Injector for Datto WiFi-6 access points
Environment 
-
Datto Multigigabit PoE Injector
Description
What's in the box? 
-
1 Multigigabit 802.3at PoE injector
-
1 Ethernet cable
-
1 Regional IEC 60320 C14 power cord
PoE Injector overview
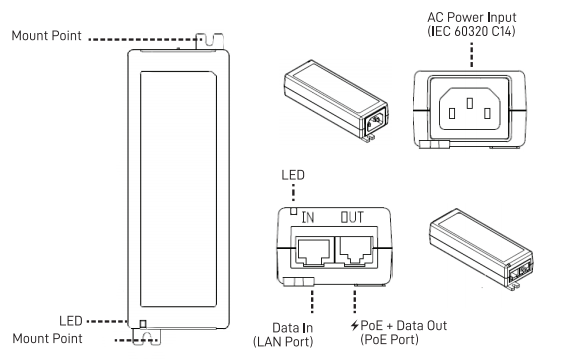
Figure 1: POE overview drawing
Physical installation
1. Connect one end of the included Ethernet cable into the PoE injector's PoE port. Connect the other end of the cable to the PoE port of an 802.3at-compatible access point On Datto Access Points, this port is marked with a lightning bolt symbol.
2. Connect a second Ethernet cable to the PoE injector's LAN port. Connect the other end to a router or switch to provide LAN access. Skip this step if you are using the PoE injector to power a mesh repeater.
3. Connect the power cord to the PoE injector, then plug the other end into an electrical outlet.
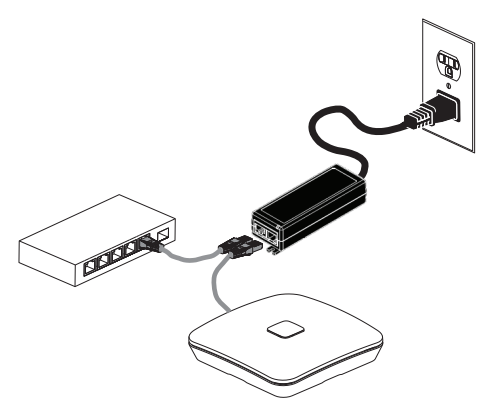
Figure 1: The PoE injector setup
LED light states
| LED state | LED color | Indication |
|---|---|---|
|
Solid |
None |
Injector receiving AC input power |
|
3 blinks |
Green/Yellow |
Incorrect PoE signature |
|
Blink |
Yellow |
Power draw is overloaded (> 30 W) |
|
Solid |
Green |
Powering connected AT device |
Specifications
| Power input | 100 V-240 V AC - 0.8A, 50-60 Hz |
| Power output |
56 V - 0.6A, Pin 3,6: V+ 802.3af/at (30 W), Pin 1,2: V- |
| Supported data rates | 10 M / 100 M / 1G / 2.5 Gbps |
| Operating temperature | -10° to 50° C (14° to 122° F) |
| Storage temperature | -20° to 70° C ( -4° to 158° F) |


