WiFi scheduling
This article describes how to configure WiFi scheduling for your Datto Access Points. Use this article to assist with enabling or disabling the different WiFi scheduling options.
Environment 
- Datto Access Points
Description
Datto WiFi scheduling lets you set the available times for each SSID in your network. With WiFi scheduling enabled, access points will enable or disable the SSID during the check-in process.The SSID enables or disables during the first check-in after the specified time, typically within five or ten minutes.
Enabling WiFi scheduling 
To enable and configure WiFi scheduling, follow these steps:
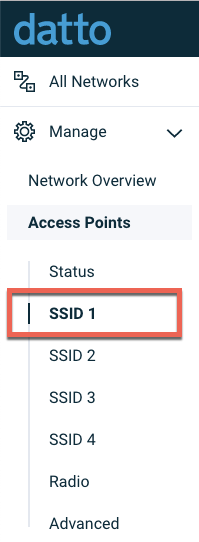
1. In Datto Network Manager's Navigation menu, click Access Points, then click the SSID you wish to schedule.
2. On the SSID's configuration page, click the Availability tab.
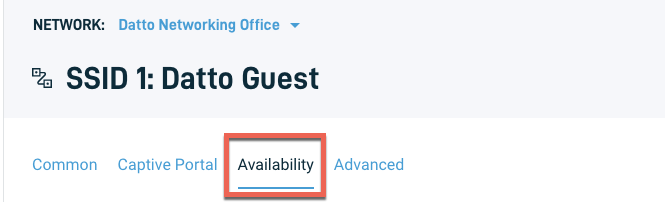
Figure 2: The SSID status page
3. Toggle the Schedule WiFi slider on. Scheduling options will then appear. Use the Preset drop-down menu to select a default schedule, or use the individual sliders under the Days section to adjust availability on a day-by-day basis. Place your mouse cursor over the question mark icon to learn more about WiFi scheduling.
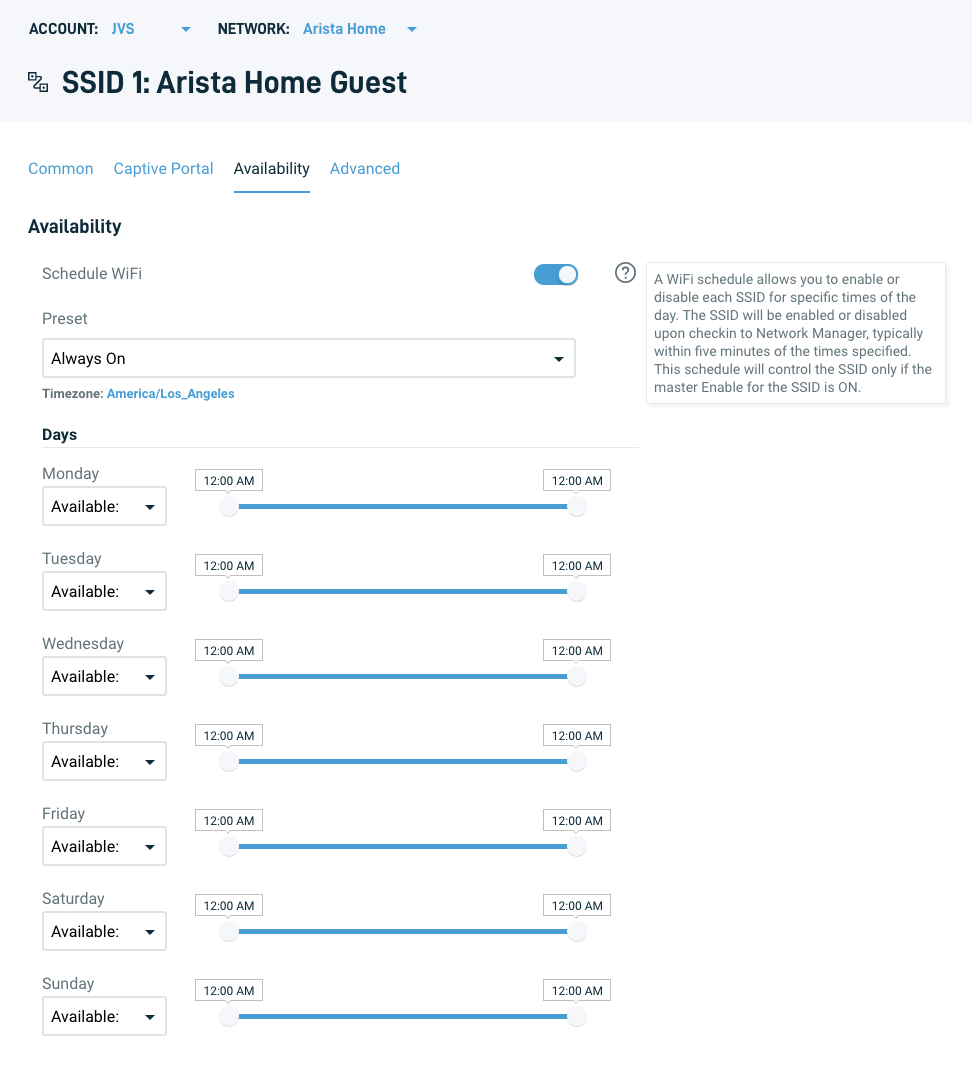
Figure 3: SSID availability options
Advanced scheduling options
Datto Network Manager lets you configure the following advanced options:
- 802.11k:This option reduces the time required to roam by helping the client to predetermine which AP it should roam to next, as well as how to get there. The access point to which the client is currently connected will provide it with information about neighboring APs and their channels. The client can use that saved information when roaming.
- 802.11r: This option reduces the time it takes for users' devices to move their connection from one access point in your network to another, which is important in applications where the connection to the user's device must remain consistent, such as Voice over IP (VoIP).
Enabling advanced scheduling options
1. In Datto Network Manager's Navigation menu, click Access Points, then click the SSID you wish to schedule., as shown in Figure 1.
2. On the SSID's configuration page, click the Advanced tab.
3. Use the slider switches to toggle 802.11k and 802.11r on. Place your mouse cursor over the question mark icons to learn more about these advanced options.
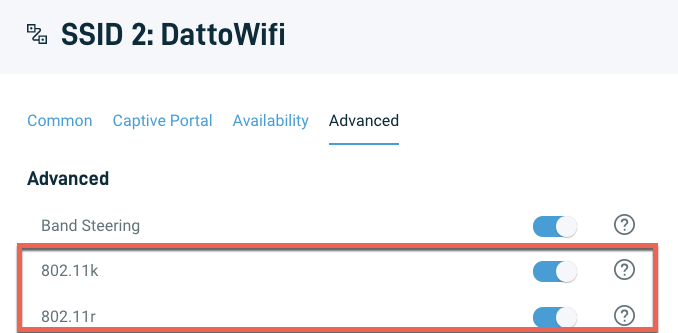
Figure 4: Advanced scheduling options


