Configuring the Datto Networking Autotask integration
NAVIGATION Partner Portal > Networking Status > Network Manager > Configure > Autotask Integration
PERMISSIONS Autotask security level with permission to create tickets. Refer to Service Desk security settings.
The integration between Datto Networking and Autotask enables you to manage select alerts from Datto Network Manager and create Configuration Items (assets) for your networking devices in your Autotask database.
The Datto Networking integration offers the following benefits:
- Your Datto networks are mapped to companies in your Autotask database.
- You can select which Datto Networking alerts will automatically generate tickets in Autotask.
- Alert ticket fields are pre-populated based on the editable settings in the system Datto Networking Alert ticket category.
- Autotask workflow rules can use the Created from Datto Network Manager Alert condition.
- TheCreated from Datto Network Manager Alert condition is available for filtering and display in Autotask widgets and grids.
-
Datto Networking device inventory will seamlessly sync your Autotask Configuration Item inventory as you onboard, move, or offboard networking devices.
This article explains how to set up the integration in Datto Network Manager. For details about how to configure your Autotask instance to support the integration, refer to Autotask Online Help: The Datto Networking Integration. To learn how to re-authenticate an Autotask integration that is no longer syncing as a result of credential changes, review our article.
IMPORTANT This feature is only available to customers who have received the Autotask 2023.4 update. View the release schedule in the Autotask release notes.
Before you begin 
To complete this process, you'll need the following items.
-
Access to the Datto network you'd like to connect to Autotask.
-
An understanding of which Datto networks correspond with each of your Autotask companies.
-
An active Autotask user account with permission to create tickets.
-
Knowledge of the Autotask ticket priorities you will use for Critical, Major, and Minor severity alerts from Datto Network Manager.
Procedure 

This integration leverages an Autotask user account to create Configuration Items and send alerts from Datto Network Manager to your Autotask platform.
You can use any account to do so, but it's important to understand that the resource used to authenticate the account will appear as the user who creates all the Datto Networking Alert tickets in your Autotask database and installs the Datto Networking devices. We recommend that you create a dedicated user in Autotask for this purpose with the minimum level of access necessary to create tickets in your Service Desk queues. Doing so enhances your security and ensures that the account is not used for any other purpose. Giving this user a distinct name, such as DNet Alerts, will also help you easily identify notifications generated by Datto Network Manager.
For more information about user and security level management in Autotask, refer to Managing internal resources and co-managing users and Creating or editing a custom security level.
Once you've created the dedicated user account or identified an existing account you'd like to use, proceed to the next section of this article.

Next, you'll activate the integration in Datto Network Manager and map its networks and alert severity levels to Autotask accounts and ticket priorities. Then, you'll configure the alert types for which you'd like to receive notifications.
IMPORTANT Ensure that you log out of Autotask before completing these steps.
Connect to Autotask
-
Navigate to portal.dattobackup.com
-
Log in with your Partner Portal credentials.
-
Navigate to Configure > Autotask Integration.
-
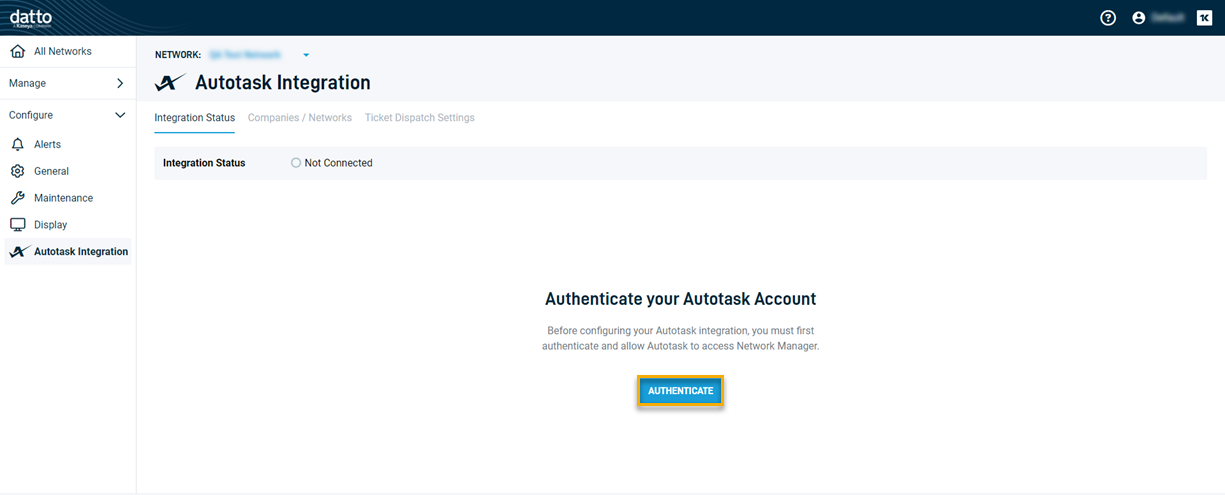
On the Integration Status tab, click Authenticate.
-
The Autotask login page will open in a new browser tab. Enter the username and password of the account you'd like the Datto Networking integration to use for ticket creation.
-
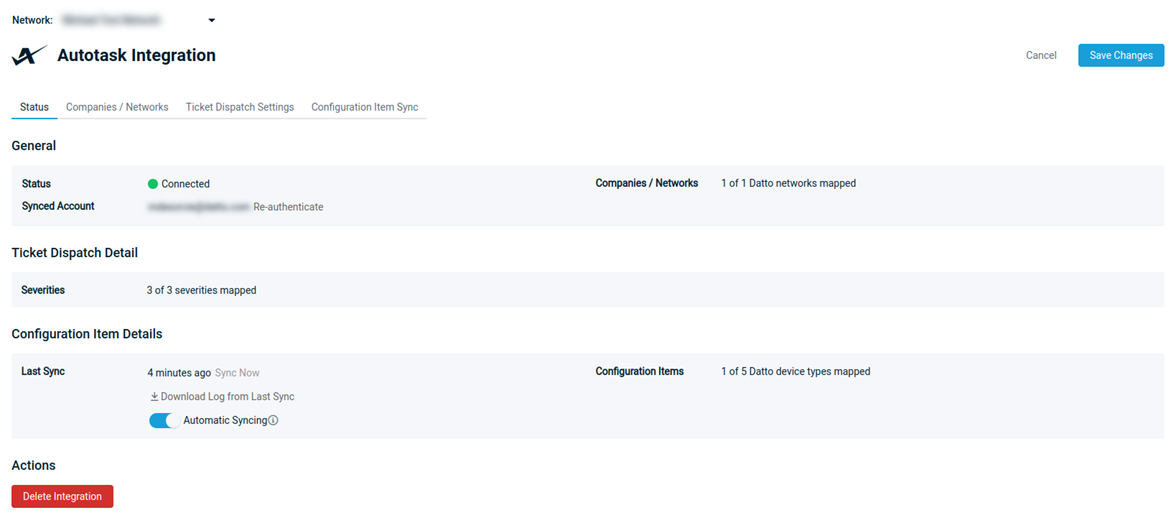
Once the authorization process completes, the Integration Status tab will load, showing a Connected indicator. The Synced Account field will list the username of the authenticated Autotask user.
NOTE If the Synced Account's password changes, you'll need to click the Re-authenticate link to update its credentials. Refer to for more information. To use a different account, click Delete Integration, and repeat the steps in this section of the article.
Map companies
When Autotask receives an alert from Datto Network Manager, the integration will create a ticket for the company to which the alert corresponds. In this part of the setup process, you'll match each of your managed networks to their Autotask companies
-
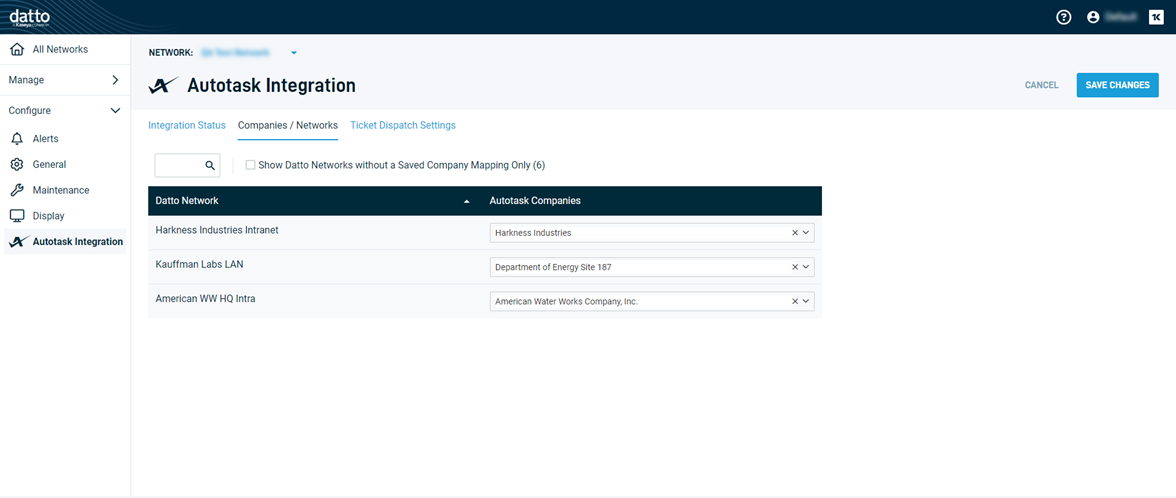
Navigate to the Companies / Networks tab. The page will load, displaying up to 50 of your networks. If the network you'd like to configure does not appear, use the search box above the network list to filter the results.
-
In the Datto Network column, you'll see a list of your managed networks. In the Autotask Companies column, you'll see drop-downs from which you can select your Autotask companies.
-
Map each target group to a corresponding company. To do so, click each drop-down in the Autotask Companies column and begin typing the name of the matching organization. Datto Network Manager will autocomplete the company name once you've entered enough characters.
-
When you're done mapping, click Save Changes.
Define ticket settings
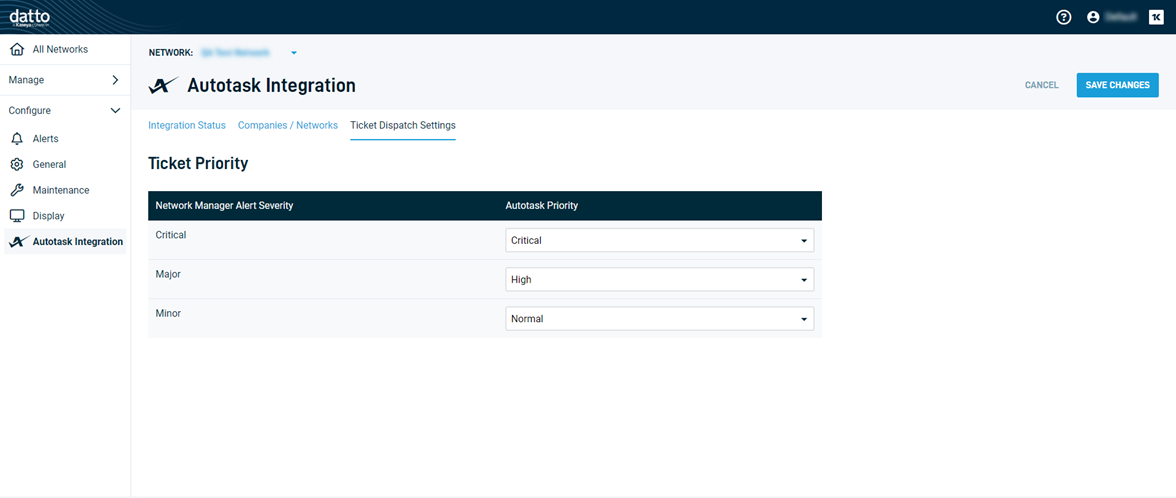
The next part of the initial integration setup process involves designating the ticket priority level that Datto Network Manager will use when creating tickets in Autotask.
-
Navigate to the Ticket Dispatch Settings tab.
-
In the Auotask Priority column, designate the Autotask ticket priority that Datto Network Manager should use for each of its alert severity levels when creating tickets.
-
Once you've completed your customizations, click Save Changes.
Configure alerts
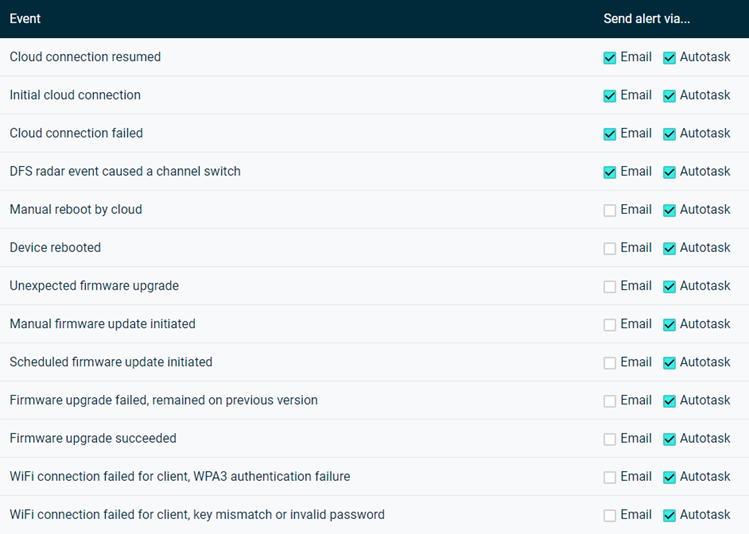
With the integration active, the option to send alerts via Autotask will appear in your alert configuration options. You can define, at the network or global level, the device types and events for which Datto Network Manager should create tickets. To do so, perform the following steps.
-
Navigate to Configure > Alerts.
-
The Network Alert Settings page will open. To customize alerts at the global level, click View Global Alert Settings.
-
In the Device Alerts section of the page, expand each device category.
-
Review the existing alert settings. To add an Autotask alert, check the Autotask box next to each event type for which you'd like to receive a ticket. Clear any check boxes for events that should not create a ticket.
-
After you finish personalizing your alert settings, click Save Changes.
Map Configuration Items
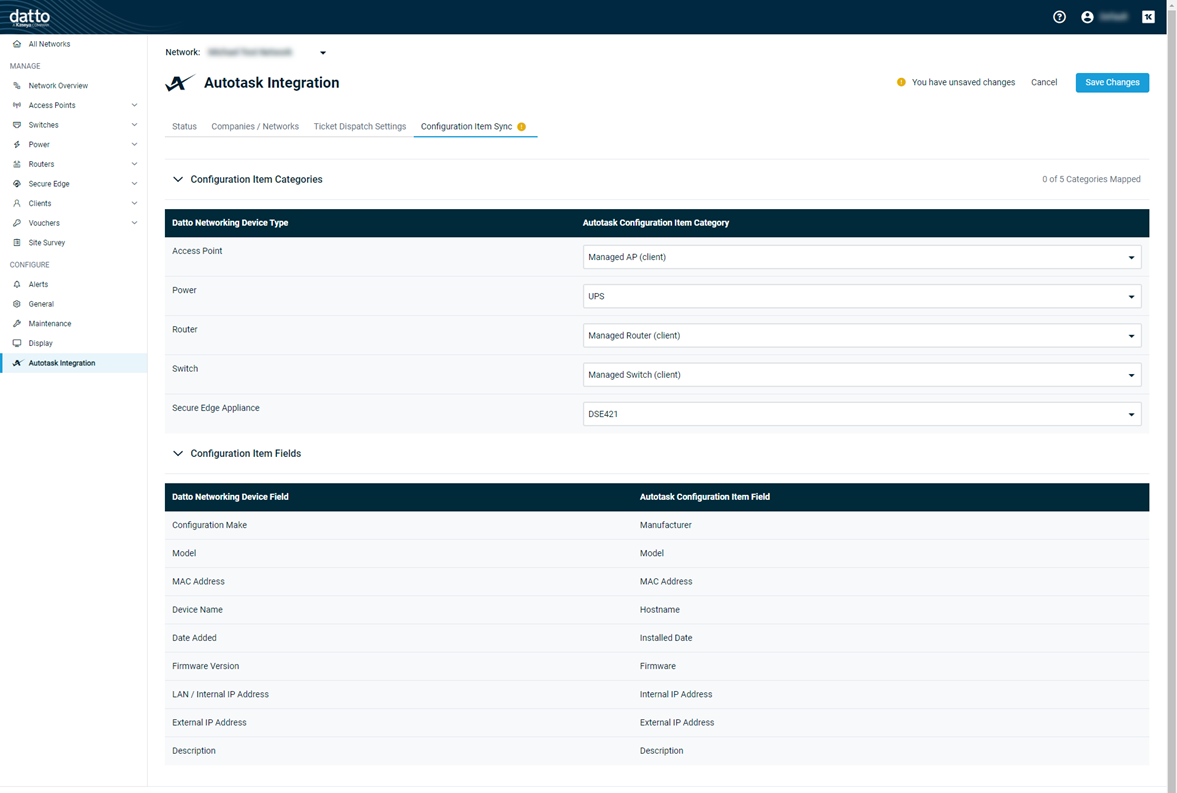
In the final part of the initial integration setup process, you can select which device types to map to Autotask asset categories. This feature will automatically create new Datto Networking device Configuration Items (assets) in Autotask as you add them to Network Manager.
NOTE Configuration Item Sync will initially be an opt-in feature. Contact Datto Networking Support to request access. We plan to make the enhancement available to all customers in Q3 2023.
-
Click the Configuration Item Sync tab.
-
In the Configuration Item Category section of the page, match each of your Datto Networking device types to an Autotask Configuration Item category. The selected category will determine the product applied to the Configuration Item. If there is no default product set up for the Configuration Item category, Autotask will use the Equipment system product.
-
Once you've completed your customizations, click Save Changes. An initial sync will take place. Thereafter, the system will attempt to sync once every 24 hours. To force a manual sync between intervals, click the Sync Now button.
Good to know
The following rules apply to Configuration Item Sync.
-
Devices in Datto Network Manager and Autotask are considered the same appliance if they are associated with the same company and have the same MAC address. Network Manager performs a duplicate check in Autotask for existing MAC addresses to determine if it should create a new Configuration Item record. Therefore, existing records will not be automatically overwritten by the integration until they are manually deleted in Autotask.
-
Any changes made to Configuration Item category mapping will not update existing synced devices.
-
Devices added to Network Manager after your changes are made will use the new mapping when they are synced.
-
Unmapped device types will not be synced.

Once you've set up the integration, it's important to test its functionality. Performing the following basic checks will help ensure that you're always receiving critical information in a real-world alert scenario.
-
Ensure that tickets are created for each alert severity.
-
Verify that you're receiving tickets only for the event and device types you've selected in your alert settings.
-
Confirm that each ticket has a title and that the event details are in the body.
-
Validate that the expected Configuration Item (asset) mappings are represented in the generated tickets.
-
Review the ticket fields to validate that the expected integration maps are represented. These maps include the Autotask priority and company.
-
If you're not receiving the tickets you expect, review your company and priority maps. The integration will not send tickets for networks or priorities that are unmapped.

If the credentials for the user account in autotask change, the integration will stop synchronizing. To update your Autotask user credentials in Datto Network Manager, perform the following steps:
-
Navigate to portal.dattobackup.com
-
Log in with your Partner Portal credentials.
-
Navigate to Configure > Autotask Integration.
-
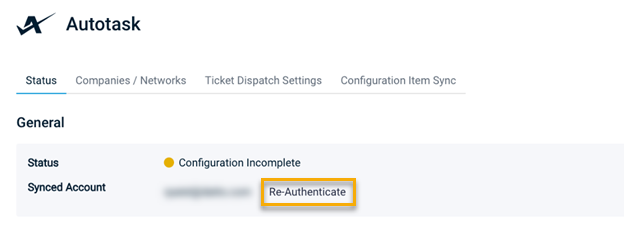
On the Integration Status tab, click Re-Authenticate.
-
The Autotask login page will open. Enter the username and updated password of the synced account.
-
Autotask will prompt you to authenticate the Datto Network Manager's use with the application. Click Reauthorize.
-
Once the process completes, the Integration Status tab will reload. Confirm that the Status field shows Connected indicator. Synchronization will resume automatically.
-
If the integration continues to indicate that the account is not authenticated, or synchronization does not resume as expected, please contact Kaseya Support for assistance.


