Routers: VLAN Settings
This article describes how to configure the VLAN settings for a Datto router.
Environment 
- Datto Routers
- Datto Network Manager
Description
A Virtual LAN (VLAN) is a logical grouping of devices in the same broadcast domain, allowing devices to communicate as if they were on the same LAN, even if they are not connected to the same switch.
The Datto D200 supports the following VLAN configurations:
-
1 untagged LAN / 4 tagged VLANs
-
2 untagged LANs / 3 tagged VLANs
-
3 untagged LANs / 2 tagged VLANs
-
4 untagged LANs / 1 tagged VLAN
VLAN traffic routing
By default, the D200 routes traffic from your created VLAN to all other VLANS on the network. To restrict traffic routing to specific VLANs only, you must configure custom traffic policies in Datto Network Manager.

Figure 1: Custom traffic policies
Procedure 
Navigation
In Datto Network Manager menu, click Routers and then select VLANs from the expanded options.
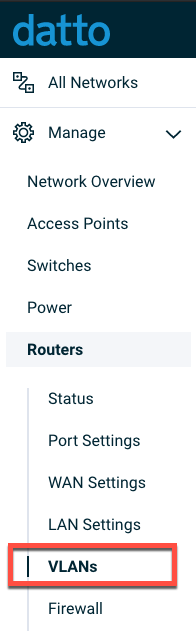
Figure 2: The Navigation menu
Configuration
The Router VLAN settings page contains a table displaying all VLANs associated with a router. The table includes the following information about the router's VLANs:
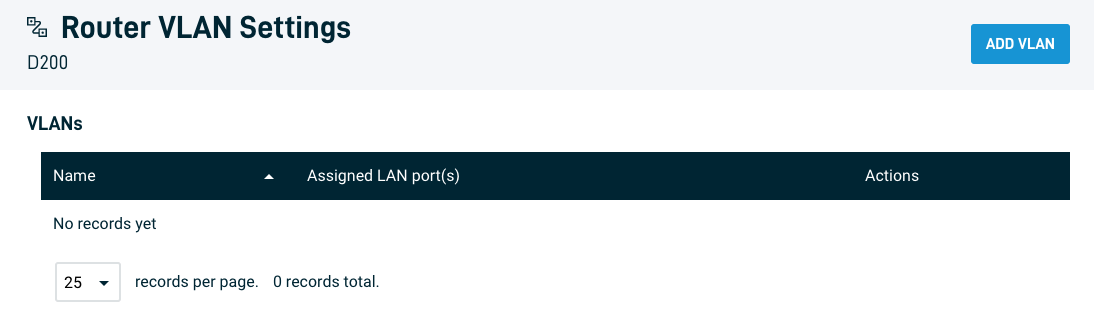
Figure 3: Router VLANs
- Name: Displays the VLAN name
- Assigned VLAN port(s): Displays what ports are assigned and using a VLAN
- Actions: Clicking the ellipsis icon displays a prompt to delete a VLAN
Adding a VLAN
1. Click the Add VLAN button.
2. VLAN NAME and VLAN ID: Enter a VLAN name, if you wish to assign one, then enter the VLAN ID. If previously tagged traffic matches this ID, the port will accept it.
- Valid VLAN IDs are integers between 2 and 4094
- IDs 991 through 994 are permanently reserved for Datto Networking operations
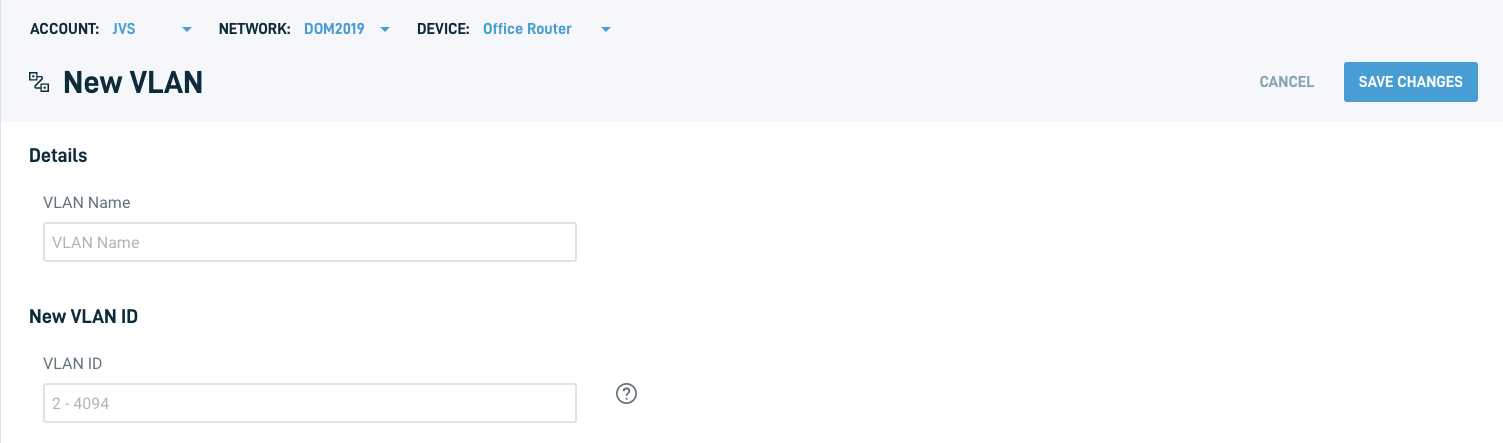
Figure 4: Adding a new VLAN
3. Assign a port to the VLAN by selecting the checkbox next to the port number.
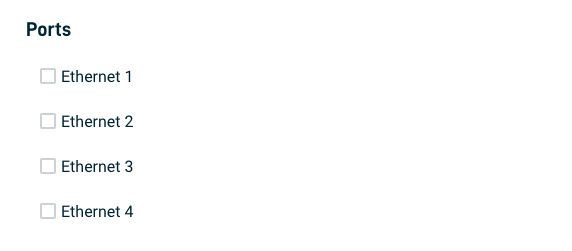
Figure 5: Assigning ports to a new VLAN
4. Under IP Settings, enter the IP addresses for the VLAN's gateway and subnet mask.
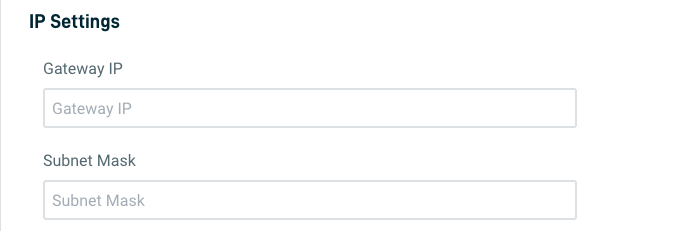
Figure 6: VLAN IP settings
5. Select the Enable DHCP check box to enable and configure DHCP:
- Enter IP addresses for a DHCP pool start and end. A DHCP pool requires a start IP address when setting both a DHCP pool end and a DHCP lease time
- The DHCP lease time is the amount of time (in minutes) a device can use a DHCP-supplied address on the network. Enter a DHCP lease time with a minimum of 5 minutes and a maximum of 10080 minutes (7 days)
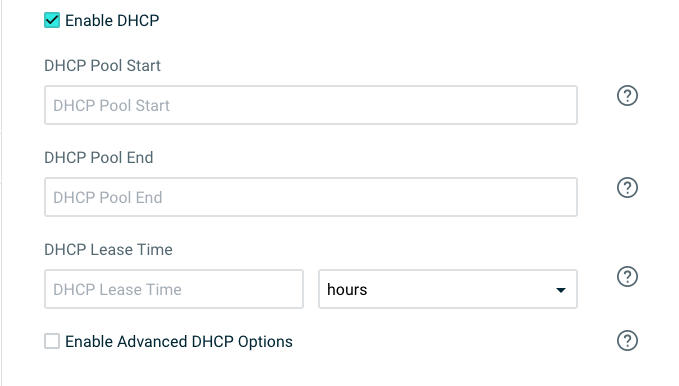
Figure 7: DHCP settings
6. Select the Advanced DHCP Options checkbox to enable and configure the following options:
- Option 66 (TFTP server): Enter a TFTP server IP address, or a URL up to 250 characters.
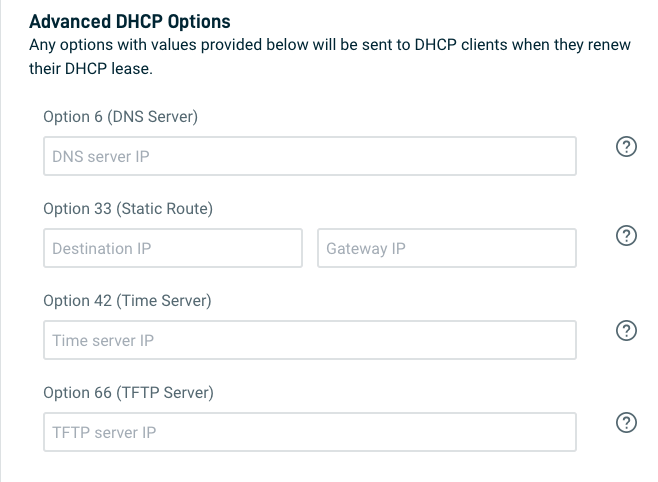
Figure 8: Advanced DHCP settings
DHCP reservations
DHCP reservations let you reserve IP addresses in a DHCP pool for specific devices, ensuring that:
- Only the intended device will have that IP address.
- The address will not be assigned to another device.
To add a DHCP reservation:
- MAC: Enter the device's MAC address.
- Device Name: Enter the device's name.
- IP: Enter an IP address that is part of a configured DHCP pool, and that you would like reserved for the device.
- Add/Remove: Click Add to add the rule. Click Remove to remove an existing rule.

Figure 9: DHCP reservation


