Replacing a networking device without losing the configuration
This article explains how to replace a networking device without erasing the previous devices configuration.
Environment
- Datto Network Manager
Description
The procedures are typically used for RMA replacements. This is not the proper procedure for network transfers. For information on transferring a device between networks, see Datto Network Manager: How do I transfer Datto Networking devices from one network to another?
Index
Replacing routers and managed power devices
This process applies only to the following devices:
- Routers: G200/D200
- Managed Power: MP10, MP60
This process does not apply to Datto Access Points. The access point configuration is bulk-managed in the Access Points menu in Network Manager.
For DNA configuration transfers, contact Datto Networking support for assistance. In this article, we will be using a Datto D200 router as an example device. This process is the same for all other devices listed.
Procedure
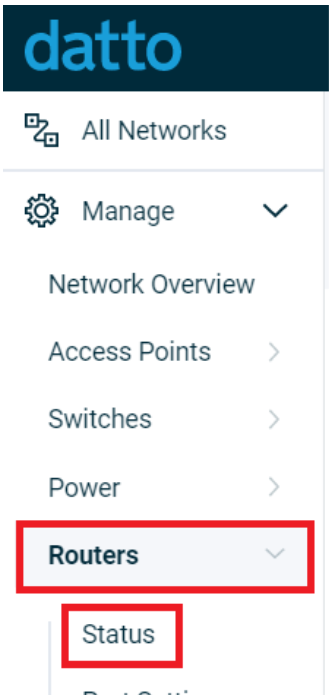
1. In Datto Network Manager, navigate to the devices Status page.
 Figure 1: The Navigation menu
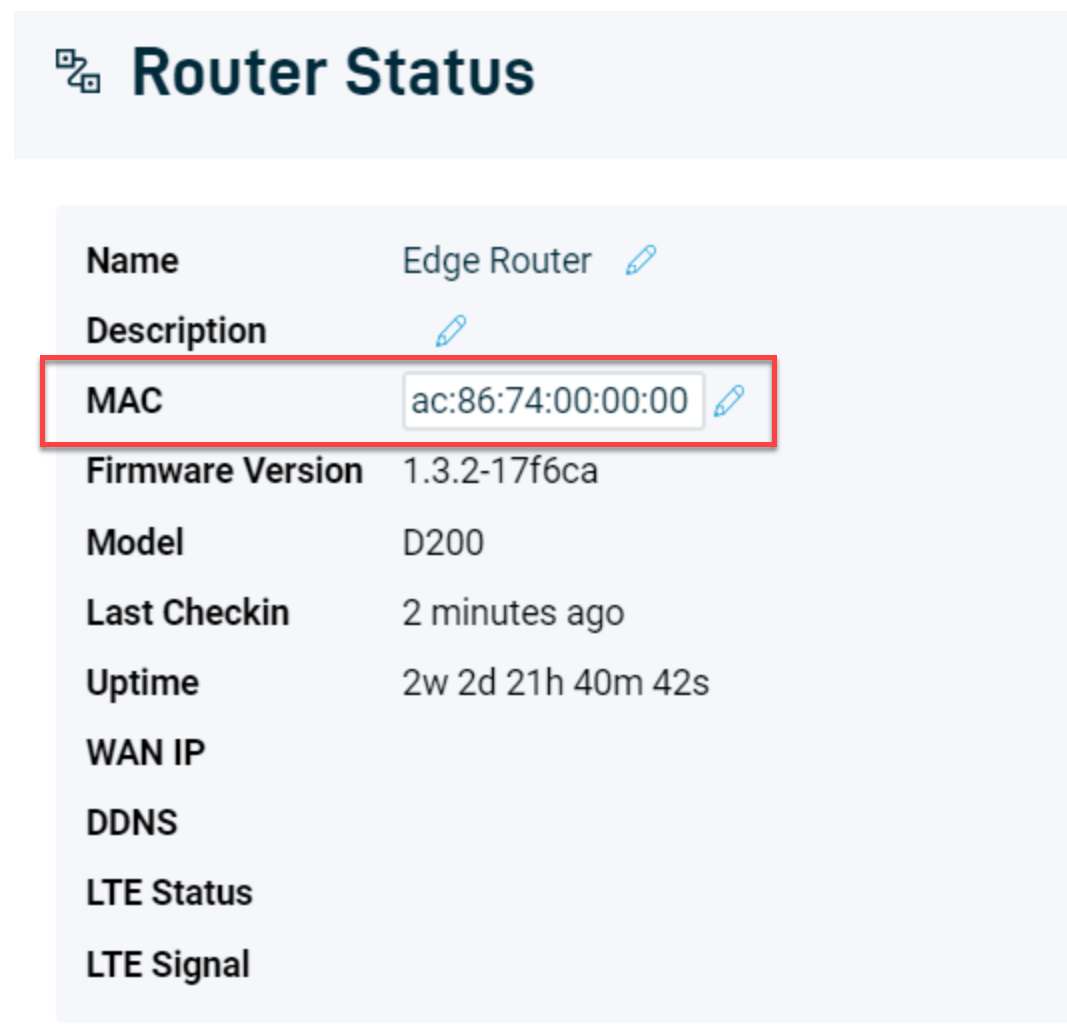
2. In the MAC Address field, enter the MAC address of the new device and save the changes.
 Figure 2: The Router Status page
Once you save the changes, the old device will stop checking in. The new device will begin checking in, then it will download the previous devices configuration and begin functioning as expected. A reboot is not required.
- This method will only let you change the MAC address to a device that is already linked to your partner account, and not registered to another network. If you get an error indicating that the device cannot be added, double-check that the device is listed under networking status as an unregistered device.
Replacing switches
This process applies only to the following switches:
Switches: L8, L24, E8, E24, E48
1. In Datto Network Manager, navigate to the Switches page.

Figure 3: The Switches option in the Navigation menu
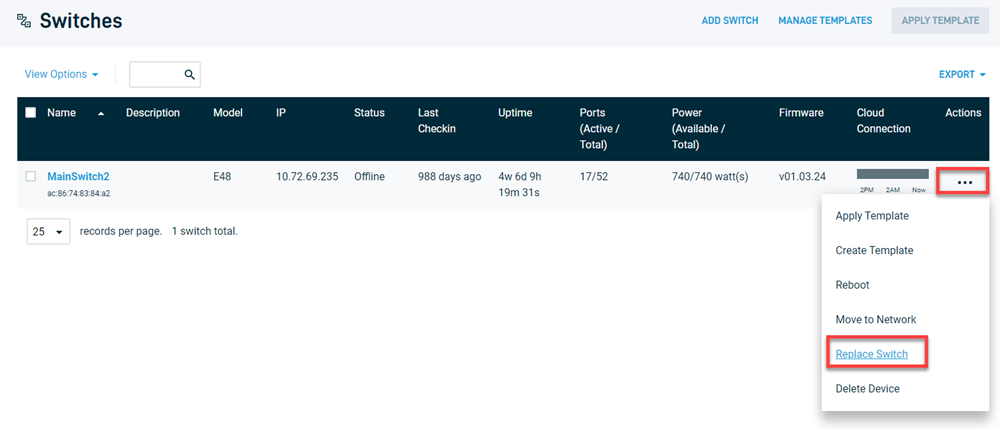
2. Find the switch you wish to replace, and click the ellipsis icon, then select Replace Switch from the drop-down menu.
Figure 4: The Switches page
Enter the replacement MACinto the dialog field, then click the Replace Switch button.


