Configuring a 1:1 NAT
This article describes how to configure a 1:1 NAT on your Datto Networking Appliance (DNA).
Environment 
- Datto Networking Appliance (DNA)
Description 
The Datto Networking Appliance allows you to map traffic from a pool of one or more external IP addresses to a static inbound (internal) IP address through the use of Network Address Translation (NAT). This allows you to run multiple services on the same port, such as some VoIP services and web servers.
Procedure 
To configure a 1:1 NAT on your DNA, perform the following steps.
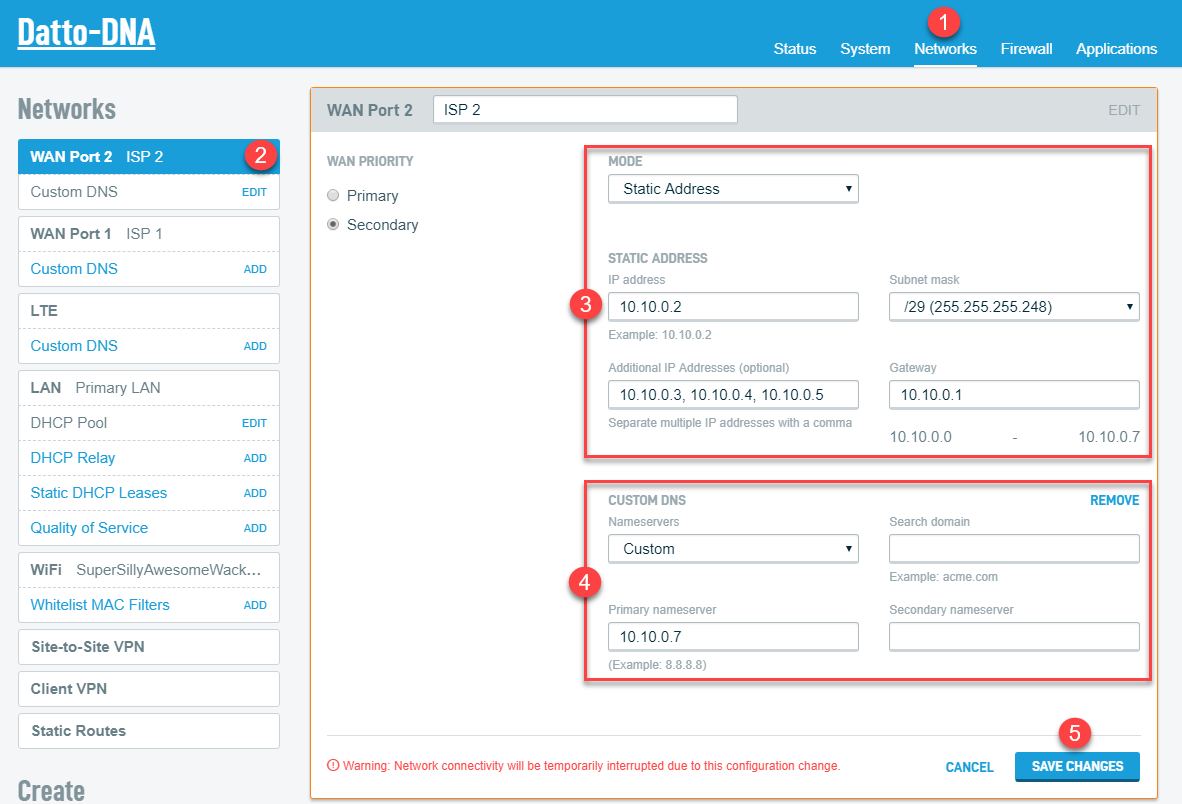
1. Log into the DNA web interface, and click Networks, as shown in Figure 1.
2. A 1:1 NAT requires a static IP address and customized DNS settings. Select Add next to the Custom DNS field for the interface you are configuring.
3. On the WAN Port card, complete the Static Address fields. The fields are:
- IP address: Allows you to specify the public IP address of your Datto Networking Appliance.
- Additional IP Addresses (optional): Allows you to define additional public IP addresses for the appliance. Separate multiple IP addresses with a comma. This field is not required.
- Subnet mask: This field allows you to define the Subnet mask for your networking environment.
- Gateway: Defines the gateway address for your network environment.
4. Complete the Custom DNS fields. The fields are:
- Nameservers: Allows you to customize the namesever that your Datto Networking Appliance should use for address resolution.
- Search domain: Allows you specify your network's DNS search domain.
5. Click Save Changes.
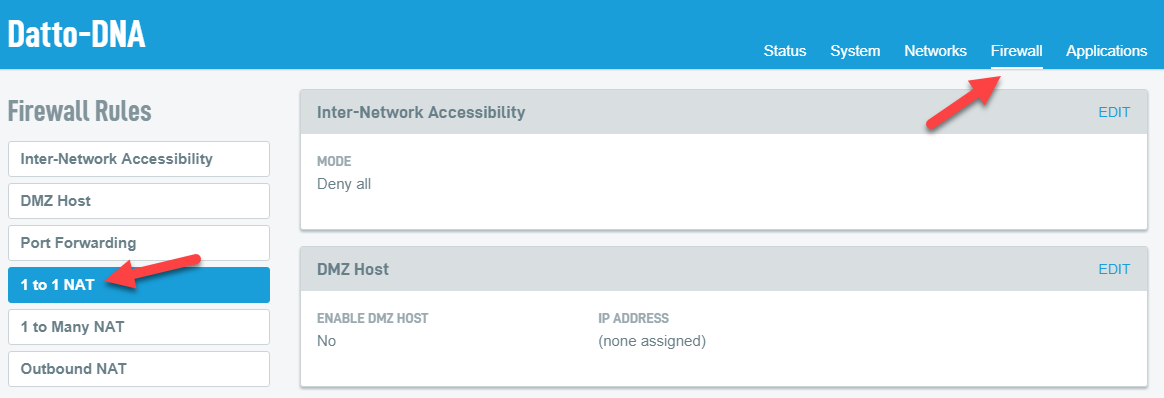
6. Click the Firewall tab. Then, click 1 to 1 NAT.
 Figure 2: Firewall ? 1 to 1 NAT
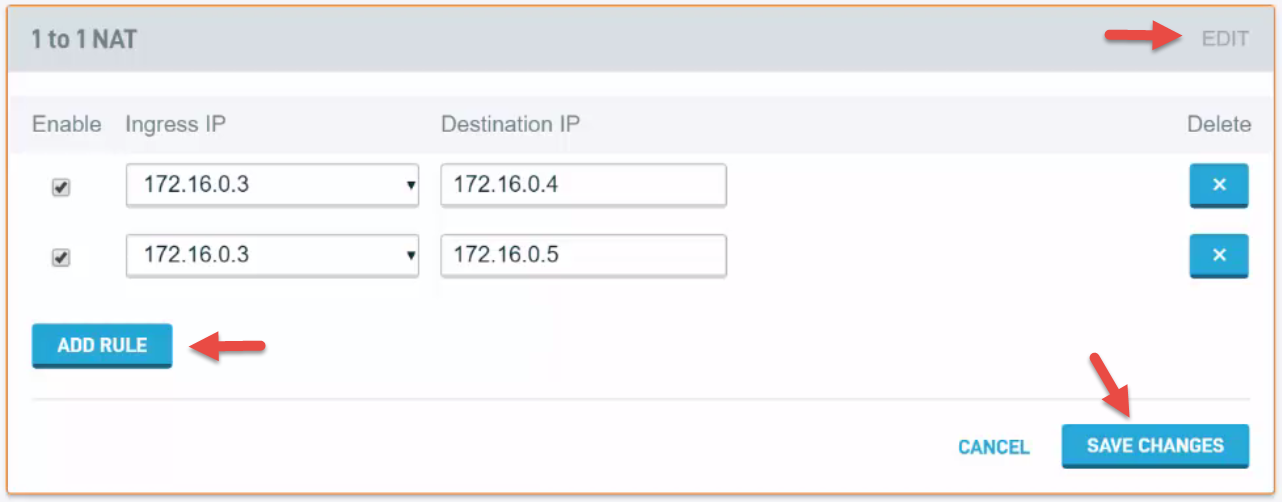
7. On the 1 to 1 NAT card, click Edit. Then, click Add Rule. Choose the Ingress IP (the inbound public IP you would like to forward). Then, enter the Destination IP (the IP address you would like to forward the Ingress IP to). You may specify multiple Ingress IP addresses by clicking Add Rule for each IP address you wish to forward. You can enable or disable forwarding to these IP addresses by checking the Enable box.
8. When you are finished configuring the 1:1 NAT, click Save Changes.


