Legacy Open Mesh: MAC ACLs
This article describes configuring MAC ACLs in CloudTrax.
Environment 
- CloudTrax
Description
MAC-based Access Control is one way of controlling the entry of certain types of traffic into your network, based on predefined layer-2 rules. MAC Access Control List (ACL) configuration, is the process of defining a set of rules that tell the switch how to make decisions about whether to allow or deny entry to (drop) a given packet, based on its MAC address.
The OM S series switches allow you to specify multiple ACLs, with multiple rules (also called Access Control List Entries) within each ACL. Each ACL is identified by its Name and all the individual entries within the same ACL, use the same ACL name. The switches can support up to 3000 total ACL entries with up to 256 entries per ACL.
Configuring MAC ACLs on the OM S series switches is a simple, two-step process.
- Build the global list of MAC ACL entries (once per network)
- Assign prebuilt MAC ACLs to ports (once per switch port)
Step 1: Build the global list of MAC ACL entries
Navigate to the Configure > Switches page and click on the "show" link next to "Access Control Lists (ACLs)"
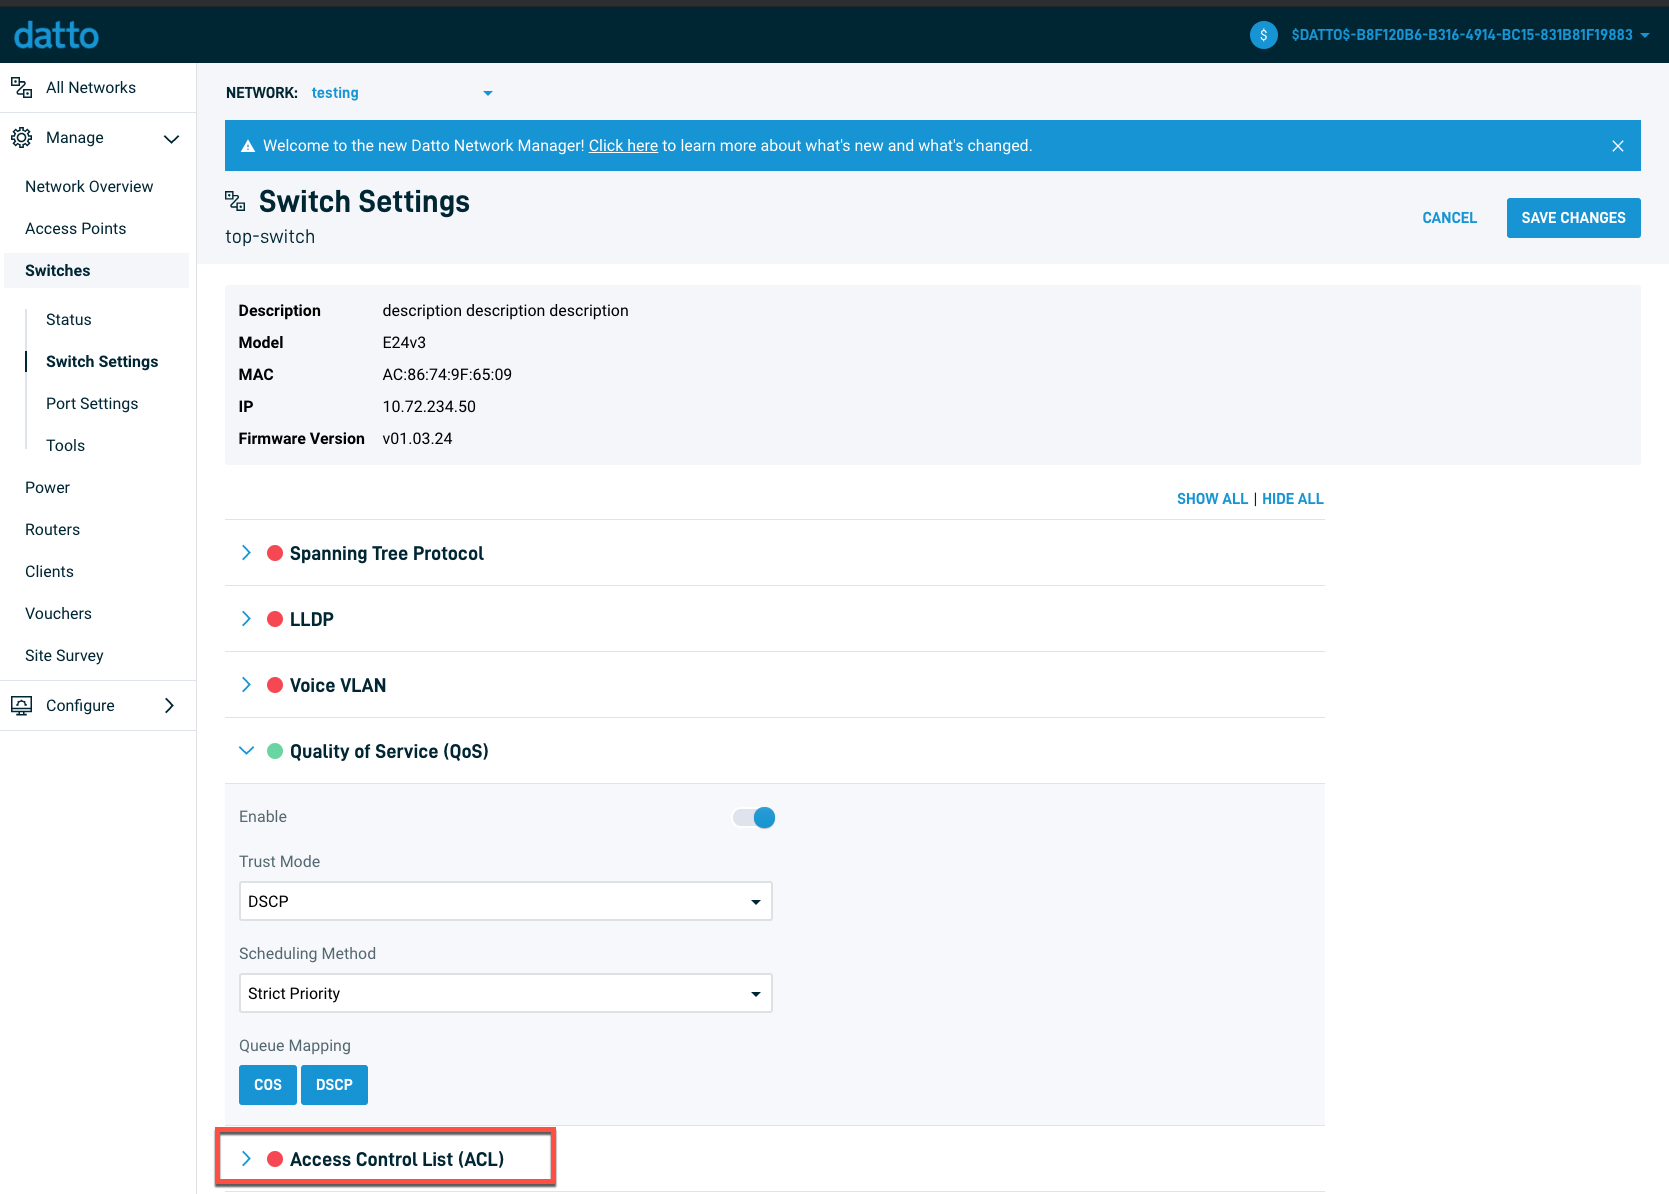
Look under the section for "MAC based" ACLs
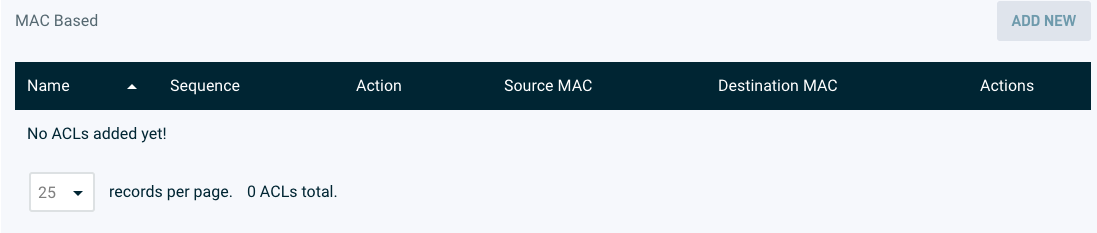
To add a new rule click the "Add New" button.
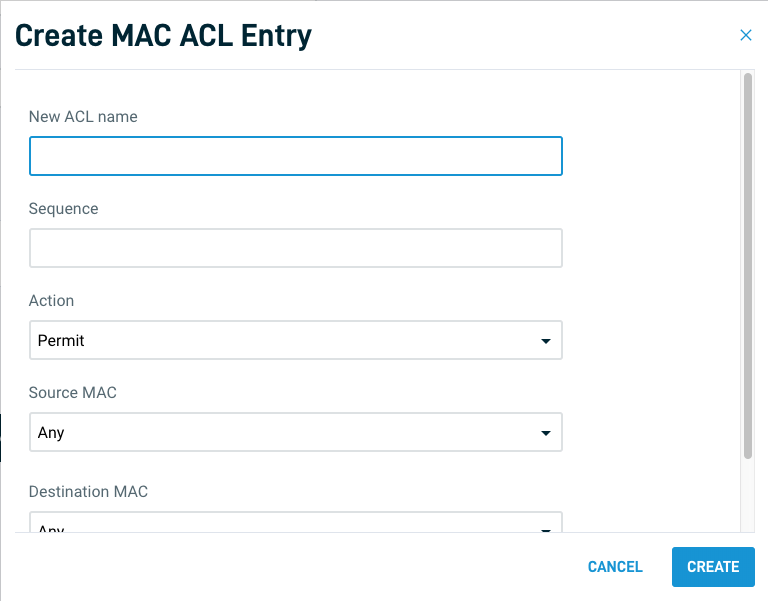
ACL and ACL Name: As mentioned earlier, each ACL can have multiple entries so when creating a new entry you have the option of either associating it with an existing ACL or creating a new ACL that it will be the very first entry of. Note that ACL names cannot be changed by editing the entries. They must be deleted and recreated with a new name, if the name change is essential.
Sequence: Since ACLs can have multiple entries, the sequence number is used by the switch to determine what order to apply those rules to incoming packets. Note that sequence of an ACLs entry cannot be changed by editing it, after it has been created and saved.
Action: Is used to specify whether the packets (identified by the source and destination MACs next) should be allowed or denied entry.
Source MAC: Source MAC address of the incoming packet. To specify a wildcard, use the '*' symbol as shown above and enter "Any" in the text field or leave it blank, to apply it to all MAC addresses.
Destination MAC: Destination MAC address of the incoming packet. To specify a wildcard, use the '*' symbol as shown above and enter "Any" in the text field or leave it blank, to apply it to all MAC addresses.
Once you have created your MAC ACLs, you are ready to move to the next step, of assigning those rules to specific ports that will then enforce those rules on packets that come into them
Step 2: Assign MAC ACLs to ports
To assign ACLs to ports, head over to the Manage > Switches page and bring up the specific switch's configuration pane by clicking on its name. Once there, pick the specific port or ports that you want to implement MAC ACL on and then assign the predefined MAC ACL rule to it by selecting it from the drop down list under the "MAC ACL" column for that specific port (row). Hit save on the pane and you're done!


