This article describes implementing both MAC and IPv4 based access control lists (ACLs) on Open Mesh Switches.
Environment 
- Open Mesh Switches
Description
Access Control Lists (ACLs) let you set rules that tell a switch how to decide whether to allow or drop a given packet based on its MAC address or IP address.
Open Mesh switches allow for multiple ACLs, with multiple rules (access control list entries) within each ACL.
- Each ACL is identified by its name.
- All entries within the same ACL use the same ACL name.
- Up to 3000 total ACL entries are supported, with up to 256 entries per ACL.
Procedure
1. Navigate to Manage ? Switches and select a switch.
2. Click on Switch Settings.
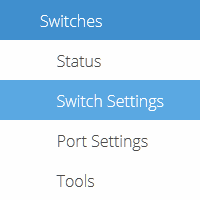 Figure 1: Switch Settings
3. Click the Enable checkbox in the Access Control List row.

Figure 2: Enabling ACL
Creating MAC-based ACLs 
1. Click the Add New button above the MAC Based table.

Figure 3: The Add New MAC Based ACL button
2. Complete the following fields:
A. New ACL name: Enter the name of your ACL. If an existing ACL is present on the switch, you can either add an additional entry to that ACL or create a new ACL altogether. ACL names cannot be renamed once created; the ACL must be deleted and recreated.
B. Sequence: Enter the sequence number of the ACL entry. Multiple entries in an ACL will be processed in order based on this number. The sequence number cannot be modified once created; the ACL must be deleted and recreated.
C. Action: Specify whether packets associated with MAC addresses defined in this ACL will be permitted or denied.
D. Source MAC: Specify the source MAC address of the incoming packet. Choose Custom to enter a specific MAC address. To specify a wildcard, use the '*' symbol. Enter Any in the text field or leave the field following Custom blank to apply to all MAC addresses.
E. Destination MAC: Specify the destination MAC address of the incoming packet. Choose Custom to enter a specific MAC address. To specify a wildcard, use the '*' symbol. Enter Any in the text field or leave the field following Custom blank to apply to all MAC addresses.
 Figure 4: Create MAC ACL Entry
3. Click the Create button.
Creating IPv4-Based ACLs
1. Click the Add New button.

Figure 5: The Add New IPv4 Based ACL button
2. Complete the following fields:
A. New ACL name: Enter the name of your ACL. If an existing ACL is present on the switch, you can either add an additional entry to that ACL or create a new ACL altogether. ACL names cannot be renamed once created; the ACL must be deleted and recreated.
B. Sequence: Enter the sequence number of the ACL entry. Multiple entries in an ACL will be processed in order based on this number. The sequence number cannot be modified once created; the ACL must be deleted and recreated.
C. Protocol: Specify if this ACL will permit or deny TCP, UDP, or all packets associated with the defined IP addresses.
D. Action: Specify if this ACL will permit or deny packets associated with the IP addresses defined in this ACL.
E. Source IP: Specify the source IP address of the incoming packet. Choose Custom to enter a specific IP address. To specify a wildcard, use the '*' symbol. Enter Any in the text field or leave the field following Custom blank to apply to all IP addresses.
F. Destination IP: Specify the destination IP address of the incoming packet. Choose Custom to enter a specific IP address. To specify a wildcard, use the '*' symbol. Enter Any in the text field or leave the field following Custom blank to apply to all IP addresses.
 Figure 6: Create IPv4 ACL Entry
3. Click the Create button.


