Configuring a site-to-site VPN on a D200
This article describes how to configure a site-to-site VPN on a Datto D200 router.
Environment 
- Datto Network Manager
- D200
Description 
A site-to-site VPN can establish a secure connection over the internet between multiple networking appliances, letting your users connect to resources across various remote locations.
Index 
- Prerequisites
- Navigating to site-to-site VPN options
- Configuring a D200 site-to-site VPN
- Configuring a custom site-to-site VPN
- Viewing custom site-to-site VPN information
- Recommended IPsec peer settings
Prerequisites 
For a D200 to D200 setup
- If the D200 needs to be the listener or receiver in the VPN topology, you must first enable the VPN server at Routers > VPN > VPN Server.
- You must configure the primary D200 as the initiator hosting the VPN server.
- Configured D200 subnets cannot overlap.
- The WAN IP address of each D200 must be reachable from the internet.
For a custom site-to-site setup
- You will need a third-party router supporting IPSec VPN, with all devices configured for IKEv1 or IKEv2 before configuring the D200.
- All D200 routers must be on firmware version 1.3.0 or higher.
- The WAN IP address of each router must be reachable from the internet.
- The D200 does not support Dynamic Phase 2. Be sure to disable Dynamic Phase 2 on the D200's peer.
D200s do not support IPSEC-NAT-T and will only permit IPsec traffic with a source port of 500 or 4500.
Navigating to site-to-site VPN options 
1. In Datto Network Manager's Navigation menu, click Routers, then click VPN in the expanded options.
2. In the DEVICE drop-down menu at the top of the screen, select the router you wish to use.
Configuring a D200 site-to-site VPN 
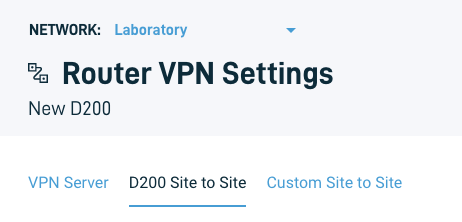
1. Click D200 Site to Site.

Figure 3: D200 Site-to-Site VPN selection
2. Select a D200 using the Incoming Client Router drop-down menu, then click the Add button.

Figure 4: Incoming client router selection
3. After adding the incoming client router, a Remove button will appear. Click this button to remove the VPN connection.
Configuring a custom site-to-site VPN 
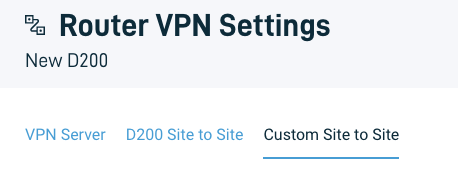
1. Click Custom Site to Site.

Figure 5: Custom Site-to-site VPN selection
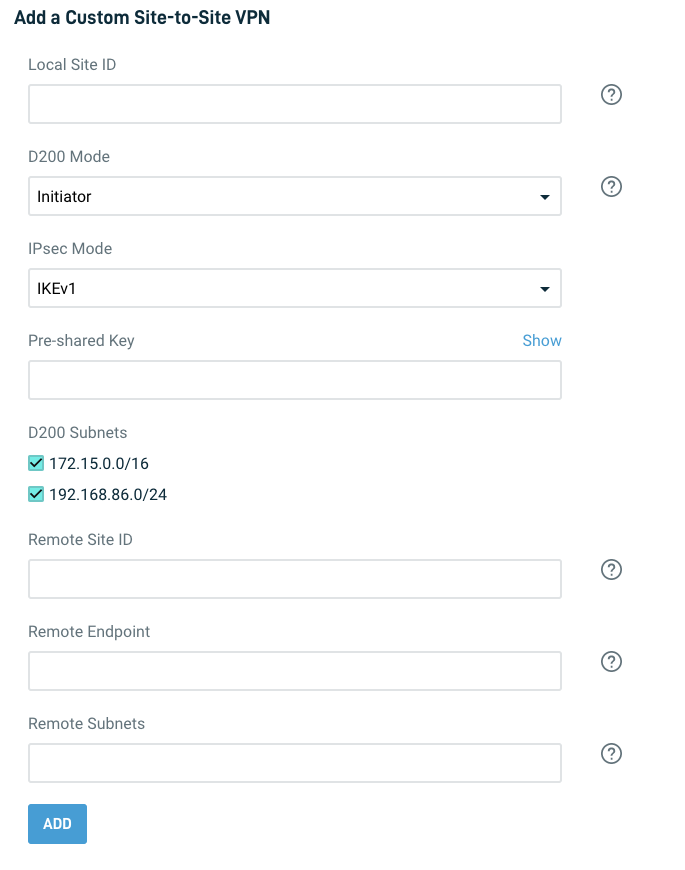
2: Enter information in the following fields:
- Local Site ID: Enter the local site ID.
- D200 Mode: Specify whether this router will be the initiator (hub) or receiver (client).
- IPsec Mode: Select IKEv1 or IKEv2 as your IPsec mode.
- Pre-shared Key: Enter the VPN tunnel's pre-shared key if applicable.
- D200 Subnets: Select which subnets the router can access.
- Remote Site ID: Enter the remote site ID; this value is required and must be unique. Do not use spaces. We recommend using either the public DDNS or public IP address for the remote site ID.
- Remote Endpoint: Enter the IP address of the remote endpoint.
- Remote Subnets: Enter the remote subnets as comma-separated subnet strings using CIDR notation (i.e., 192.168.2.0/24).
When finished, click the Add button.

Figure 6: Custom Site-to-site VPN configuration
The hard coded limit for site-to-site VPN's on a D200 is 8.
Viewing custom site-to-site VPN information 
An entry for your custom site-to-site VPN, with a summary of its connection preferences, will appear in the Clients table.

Figure 7: The Custom Site-to-Site VPN Clients table
Required IPsec peer settings 
| Parameter | Value |
| Phase 1 Encryption | AES-256 |
| Phase 1 Integrity Hash | SHA1 |
| Phase 1 DH Group | Group 14 / 2048-bit Modulus |
| Phase 1 Lifetime | 86,400 sec |
| Phase 2 Encryption | AES-256 |
| Phase 2 Integrity Hash | SHA1 |
| Phase 2 DH Group | None |
| Phase 2 Lifetime | 86,400 sec |
|
Dead peer detection timeout |
15 seconds |


