802.1X Port Security
This article describes the Port Security feature for Generation 2 Datto Networking Switches.
Environment 
- DSW100-8p-2G
- DSW250-8p-2X
- DSW100-24p-4X
- DSW100-48p-4X
Description
802.1X port security refers to a network access control mechanism based on the IEEE 802.1X standard that authenticates devices before allowing them to access a network port. This ensures only authorized users or devices can connect to a network by requiring authentication before any data traffic is allowed.
The 802.1X Port Security feature will need to be enabled at the switch level before it can be configured for individual ports.
Prerequisites
You will need to configure a RADIUS server that can be reached by the switches on your network prior to enabling the 802.1X port security.

The following steps are required; additional setup details will be specific to the type of RADIUS server you are using.
If you already have a configured RADIUS server, you may use it without configuring another server.
-
Set up the RADIUS server. RADIUS servers are available from the FreeRADIUS project. Microsoft Windows Server includes RADIUS technology.
-
Configure the RADIUS server to provide access for the users that you need to authenticate. You must provide a Username and Password for each.
-
Add each DSW100-8p-2G, DSW100-24p-4X, DSW100-48p-4X & DSW250-8p-2X switch that you intend to enable 802.1X on as a authenticator in the RADIUS server configuration. Please refer to your RADIUS server’s documentation and note that different vendors may use different terms as follows:
802.1X Standard Authenticator Windows NPS RADIUS Client FreeRADIUS RADIUS Client / Client Cisco ISE NAD (Network Access Device) RADIUS Protocol (Logs) NAS (Network Access Server) -
Note the IP address and the server secret of the RADIUS server. You will need them in the following steps.
Switch Settings
-
Navigate to portal.dattobackup.com
-
Log in with your Partner Portal credentials.
-
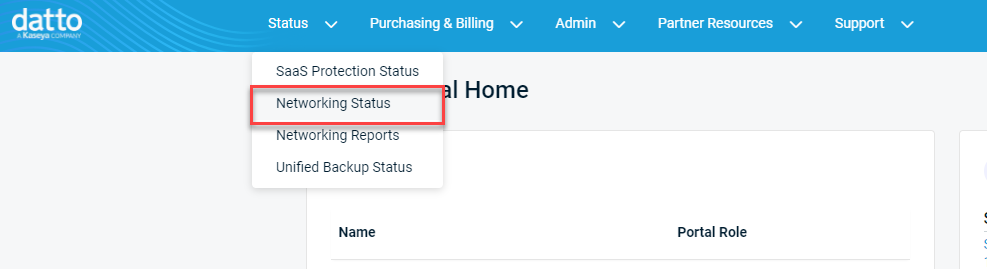
From the header menu, select Status > Networking Status.
-
Select the name of a Network or Launch Network Manager, to load the Network Manager.

-
From the side navigation menu, under Switches, select Switch Settings.
-
Select the desired switch from the drop down at the top of the page.
-
Scroll Down to 802.1X and enable the setting using the toggle.
-
Fill out the following configuration information:
-
Server IP: Fill out the IP of the authentication server
-
Authorized Port: Confirm the port used by the server.
-
Guest VLAN: Select the VLAN from the drop down menu.
-
Key String: Enter the authentication pass-phrase
-
Timeout Reply: Set the time allowed before timeout, in seconds.
-
Retry Attempts: Set the number of allowed attempts.
-
-
Save the settings.
Port Settings
Once 802.1X is enabled on the switch, it can be configured for individual ports.
-
From the side navigation menu, under Switches, select Port Settings.
-
Select the Port Security Settings (802.1X) tab.
NOTE If 802.1X is currently disabled on the switch, the only option presented will be to Enable 802.1X. Selecting this option will bring you directly to the Switch Settings page for the switch.
-
A table will display all of the ports with their current configuration:
- Port
- Description
- Mode
- Authorized Status
- Radius VLAN
- Guest VLAN State
- Re-Authentication Period
-
Select the desired ports to edit, then click Configure. Expand the 802.1X section to edit the port authentication.
-
Fill out the fields below based on your desired configuration.
-
Mode: Select the desired authentication mode from the drop down.
-
Enable Port Re-Authentication (toggle): Enable to force the port to re-authenticate after a desired amount of time.
-
Re-Authentication Period: Set the time period allocated in seconds.
-
Quiet Period: Set the time period allocated in seconds.
-
Supplicant Period: Set the time period allocated in seconds.
-
Enable Guest VLAN (toggle): If enabled, devices that fail authentication or don’t support 802.1X at all are placed into a designated guest VLAN instead of being completely blocked.
-
Enable RADIUS VLAN Assignment (toggle): The RADIUS server dynamically tells the switch which VLAN to place the device in after successful authentication.
-
-
Once set, save the changes.


