Switches: Voice VLAN
This article describes how to configure Voice VLANs using Datto Switches.
Environment 
- Datto Switches
Overview 
The Voice VLAN feature configures switches to automatically allow and prioritize voice traffic over a designated VLAN. This keeps voice traffic separate and prioritized over other traffic types.
Procedure 
You must define and configure the voice traffic VLAN as permitted, tagged or untagged, on one or more switch ports before following these steps.
Navigation 
-
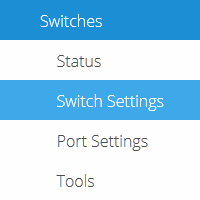
Navigate to a device web session for your switch.
-
Click the Voice VLAN dropdown to reveal settings, and click the Enable checkbox to interact with them.

-
Click Save Switch Settings to save all modified settings.
Configuration 
The following Voice VLAN settings are available:
- Switch Voice VLAN: Allows you to choose what VLAN is used for Voice VLAN. Read the Datto Switches: VLAN article for more information on VLAN setup.
- QoS Priority: Lets you to define whether the switch will use the Quality of Service CoS value of the incoming packet, or tag the packet with a CoS value between 1-7.
- Mode: Allows you to define the Voice VLAN mode.
Voice VLAN Modes 
The switch has two Voice VLAN modes: Static (OUI List), and Dynamic (LLDP-MED). We recommend using the LLDP-Med Protocol option.
Static (OUI List)
You must tag traffic with the VLAN ID defined in Switch Voice VLAN by configuring the client device to tag incoming and outgoing packets with this VLAN ID.
-
In Voice VLAN settings, choose Static (OUI List).
-
Input the OUI address of your device.
-
Input a brief description of your device.
Dynamic (LLDP-MED)
To automatically advertise the Voice VLAN to connected devices via the LLDP-MED protocol, select Dynamic (LLDP-MED) in Voice VLAN settings.


