Datto Access Point radio settings
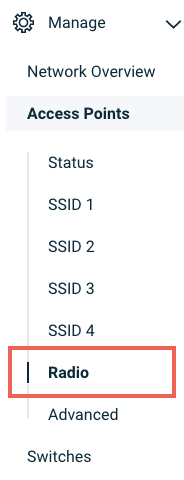
This article describes the Radio settings page in Datto Network Manager for Datto Access Points.
Environment
- Datto Access Points
- Datto Network Manager
Description
All Datto Access Points share the radio settings in a network. Radio settings control available frequency bands, what channel the access point uses, and other global configurations.
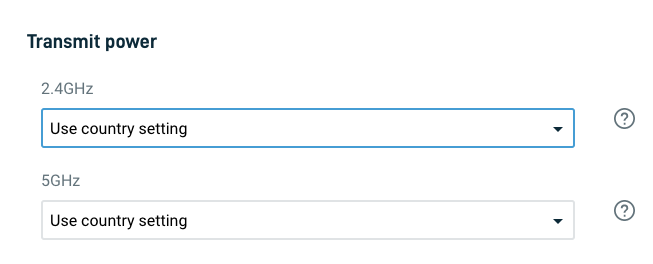
The transmit power setting lets you configure the frequency bands used by all access points in your network. The default selection is Use country setting, which limits the maximum transmission power to the network's country as per its regulations. Use the drop-down to select a power in milliwatts (mW), which then broadcasts its maximum relative received signal strength (RSSI), or signal strength in decibels (dB). Consider reducing power in dense indoor networks with other high power devices.
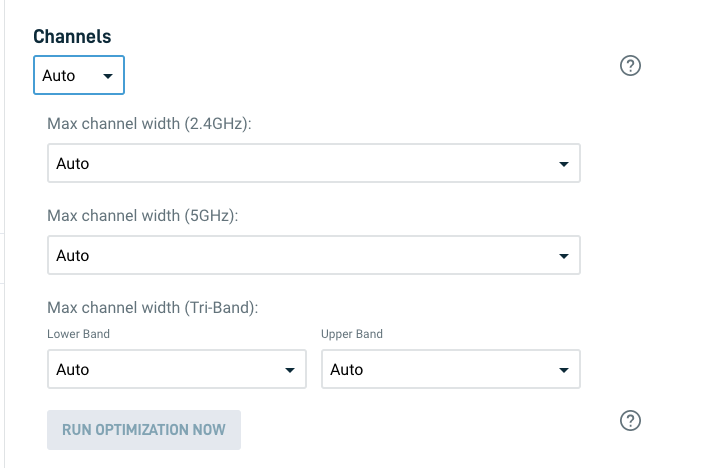
Datto Networking offers two options for channel setting configuration: Auto and Manual.
When you select Auto, Datto Networking configures channel settings daily for your network. This configuration takes mesh repeaters, nearby access points, and sources of interference into consideration. You can also manually set the Max channel width for each radio when using Auto; you cannot set the channel itself.
Channel settings update only during the network's maintenance window to avoid potential service disruptions. To force an update, click the Run optimization now button.
When selecting Manual, you set channels and maximum channel widths for all access points in a network. We recommend not setting broad channel widths for environments with excessive interference. 
A + icon next to a channel indicates that it is a 40MHz wide channel instead of the standard 20MHz wide WiFi Channel. So Channel 1+ is going to cover all of the channel space for both channels 1 and 6. This will get you faster speeds but if you are in a dense WiFi environment (like an apartment building) you will run into more interference and cause more interference for your neighbors. Because of these factors, we recommend you use wide channels on more isolated networks.
Because the 5GHz band is less congested, all channels are wide and will be designated with a +.
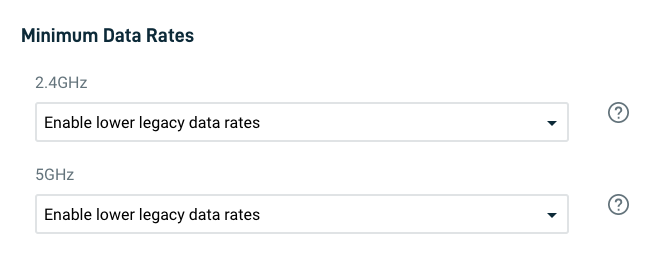
Setting Minimum Data Rates can improve both roaming and overall WiFi network performance. This improvement involves disabling legacy client rates, which reduces overhead. For more information, read the Client Device Roaming article.
When you enable Internet check, the access points' SSIDs will broadcast only when there is an active internet connection. When you disable Internet check, they will continue broadcasting even when there is no internet connection. This feature lets local resources, such as printers and shared drives, continue to function.
If AP Mesh is enabled and the Access Point loses internet is lost, regardless of the Internet Check setting, it will stop broadcasting. This will bring down the SSID until either:
- Internet connection is restored.
- The AP checks in as a repeater.
For more information, see AP Mesh.
IMPORTANT The Internet Check option is only functional on devices running firmware version 6xx and below. It has no effect on devices running version 7xx and newer.
This feature allows Datto Access Points to automatically adjust the power based on scans performed by the devices to other Datto APs in the vicinity.
- WiFi6 APs collect this data routinely, as they have dedicates scanning radios that allow for such scanning without causing downtime for clients.
- WiFi5 APs (AP42, AP62) do not have such radios. As a result, they will collect such data within the maintenance window only, to prevent downtime for clients.
- The APs send this data to Network Manager, which takes this data and determines where APs are seeing too much signal from adjacent APs. It performs simulations to determine the optimal TX power arrangement on each AP, in relation to each other.
- Once confident that the optimal signal strength values have been computed, Network Manager sends the new values to the APs and will apply the changes during the network’s next maintenance window, when such changes are permitted to take place.
Enabling AutoTX
The AutoTX feature is not enabled by default. Currently support will need to assist in enabling or disabling the feature.
Please contact support if:
- The feature should be enabled or disabled on any Datto Access Point.
- The feature is enabled and the client is experiencing any connectivity issues.


