Client VPN
This article provides Client VPN configuration instructions for the Datto Networking Appliance (DNA).
Environment 
- Datto Networking Appliance (DNA)
Description
-
To configure Client VPN, log into the DNA web interface, and click Networks.

-
On the Networks page, click the Client VPN option in the left pane.
-
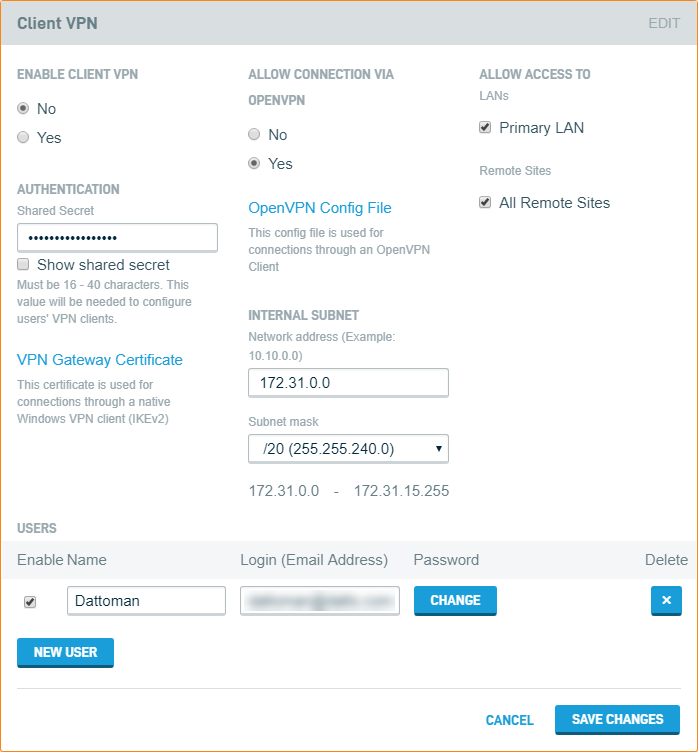
Enter the Shared Secret (password) of your choice. The password must be between 16 and 40 characters long.
-
The configuration will depend on the client VPN chosen and the operating system that you are connecting from. Expand the section and follow the steps for the appropriate client VPN below:
 OpenVPN / Tunnelblick
This feature allows a user to configure an SSL Client VPN connection using the same client VPN feature currently in place.
When enabled, the subnet is divided in two, allowing half of the subnet to use IPSec IKEv1 or IKEv2 client VPN connectivity, while allowing the other half of addresses to be configured for SSL (OpenVPN) client connectivity.
Requirements
- DNA firmware v0.9.0.64 or higher
- OpenVPN installed on the PC you will be using to connect to the DNA
- You must use the actual OpenVPN client. OpenVPN Connect will not function properly.
Follow the process for the operating system you will be connecting from.
Windows
-
Follow the steps described in DNA: Client VPN to configure your Datto Networking Appliance.
-
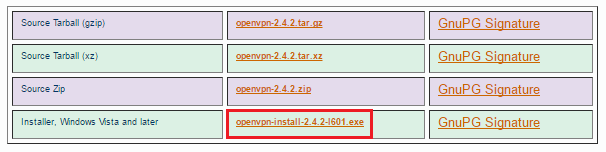
Install the VPN Client via the method described for your operating system. Download and install the OpenVPN Windows installer (external link).
-
Download the OpenVPN config file from the DNA to the target computer by clicking the OpenVPN Config File on the Client VPN card.

Save the file to
%systemroot%\Program Files\OpenVPN\config. -
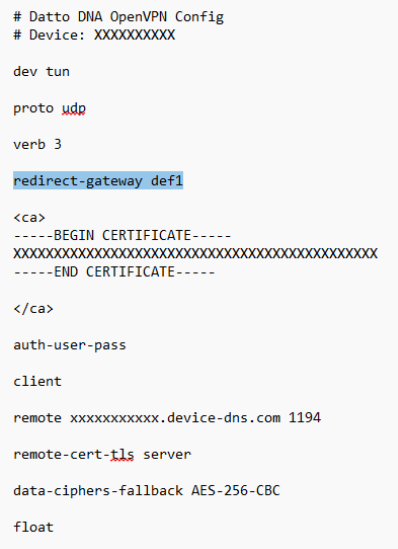
By default, it will use a split tunnel. If you would like to change it to a full tunnel, add redirect-gateway def1 to the config file above the certificate.
-
Open the OpenVPNclient and click connect.
-
Log in using the credentials you created in the DNA: Client VPN article.
Linux
-
Follow the steps described in DNA: Client VPN to configure your Datto Networking Appliance.
-
Install the VPN Client via the method described for your operating system.
sudo apt-get install openvpn
-
Download the OpenVPN config file from the DNA to the target computer by clicking the OpenVPN Config File on the Client VPN card.
Save the file to the desktop.
-
By default, it will use a split tunnel. If you would like to change it to a full tunnel, add redirect-gateway def1 to the config file above the certificate.
-
To connect to the VPN client, launch OpenVPN with the --config argument to specify the configuration file to use:
openvpn --config client.ovpn
-
Log in using the credentials you created in the DNA: Client VPN article.
Mac
-
Follow the steps described in DNA: Client VPN to configure your Datto Networking Appliance.
-
For Mac, you will need to install Tunnelblick (external link), instead of OpenVPN.
-
Download the OpenVPN config file from the DNA to the target computer by clicking the OpenVPN Config File on the Client VPN card.
Save the file to the desktop.
-
By default, it will use a split tunnel. If you would like to change it to a full tunnel, add redirect-gateway def1 to the config file above the certificate.
-
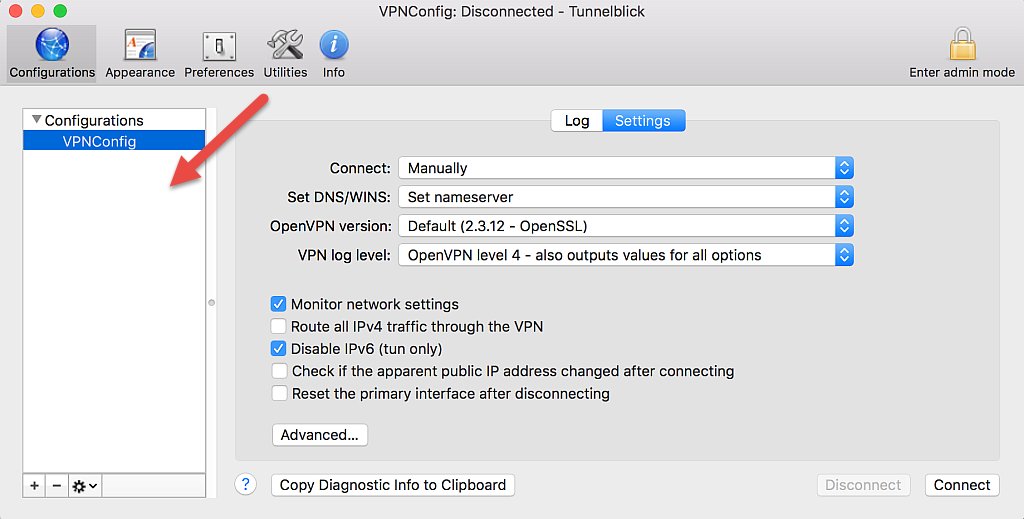
Add the config file you saved in the Download the OpenVPN Config File section of this article to Tunnelblick by dragging it from the desktop into the left-hand pane.
-
Select the configuration in the Configurations sidebar, and click Connect.
-
Log in using the credentials you created in the DNA: Client VPN article.
Windows IKEv2 Client VPN
On the client machine
-
From an Admin user account, open Microsoft Management Console (search for or run "mmc.exe").
-
In the Console dialog box, select File → Add or Remove Snap-in.
-
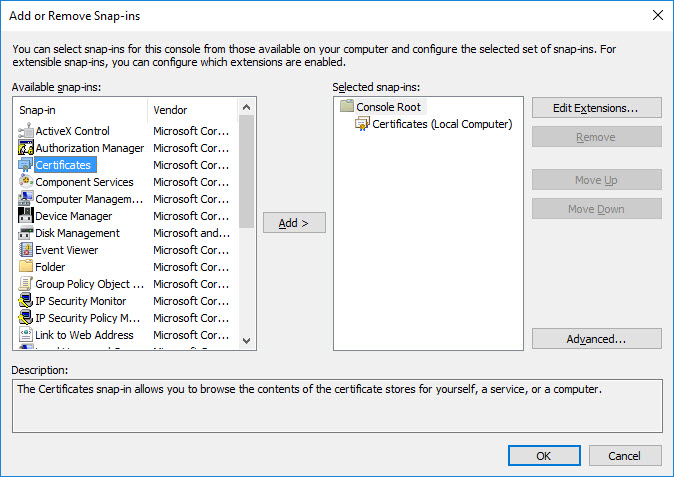
From the Available snap-ins list, select Certificates, then click Add.
-
In the resulting window, select Computer Account and click Next.
-
Select Local Computer and click Finish.
-
Click OK to close the Add or Remove Snap-ins dialog.
-
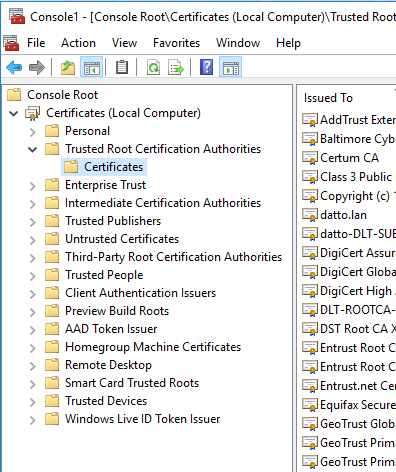
In the Console1 dialog, expand the Certificates category and navigate to Trusted Root Certification Authorities → Certificates.
-
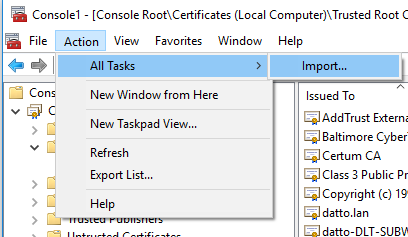
Choose Action in the menu bar, then navigate to All tasks → Import.
-
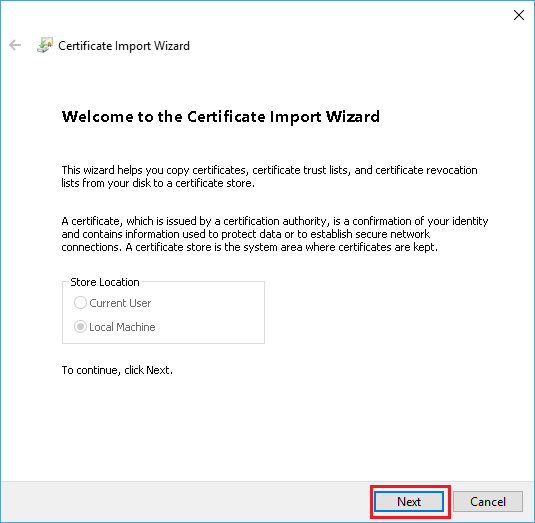
Click Next on the Welcome screen.
-
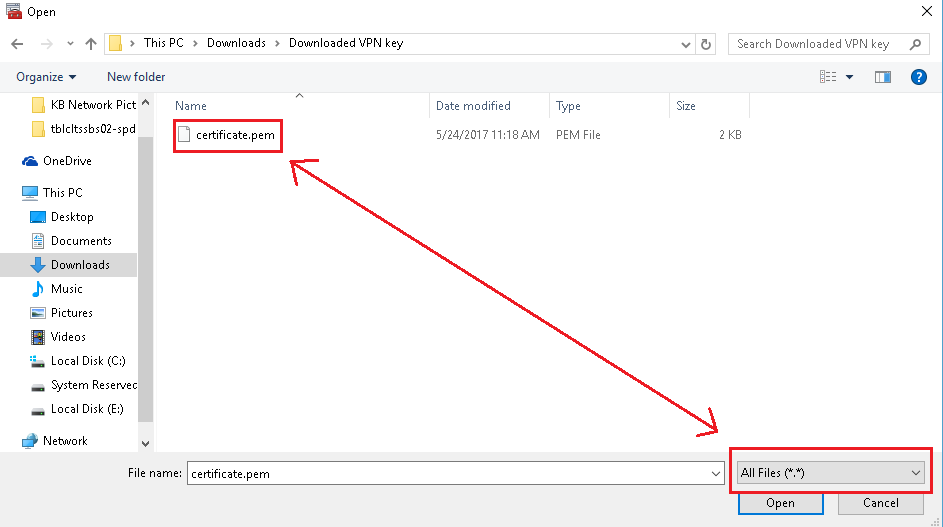
Click Browse and make sure the drop-down for File type is set to All Files, then choose the Certificate you saved earlier and click Open. Click Next and then Finished.
-
Click the Windows start button and type "network." From the list of options, choose Network and Sharing Center.
-
Select Set Up a new Connection or Network, then navigate to Connect to a Workplace → Use my Internet Connection (VPN).

-
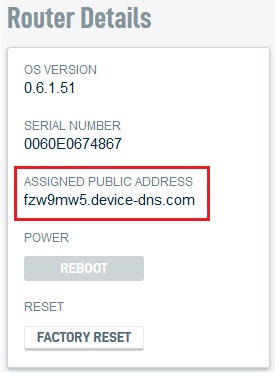
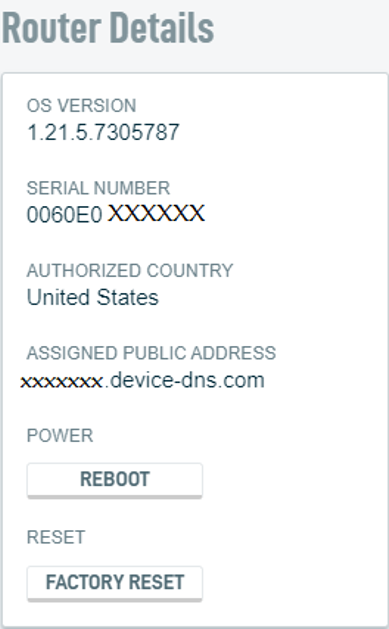
Enter the DNA's assigned public address. You can find this address in the DNA UI on the Network Overview tab under Router Details.
-
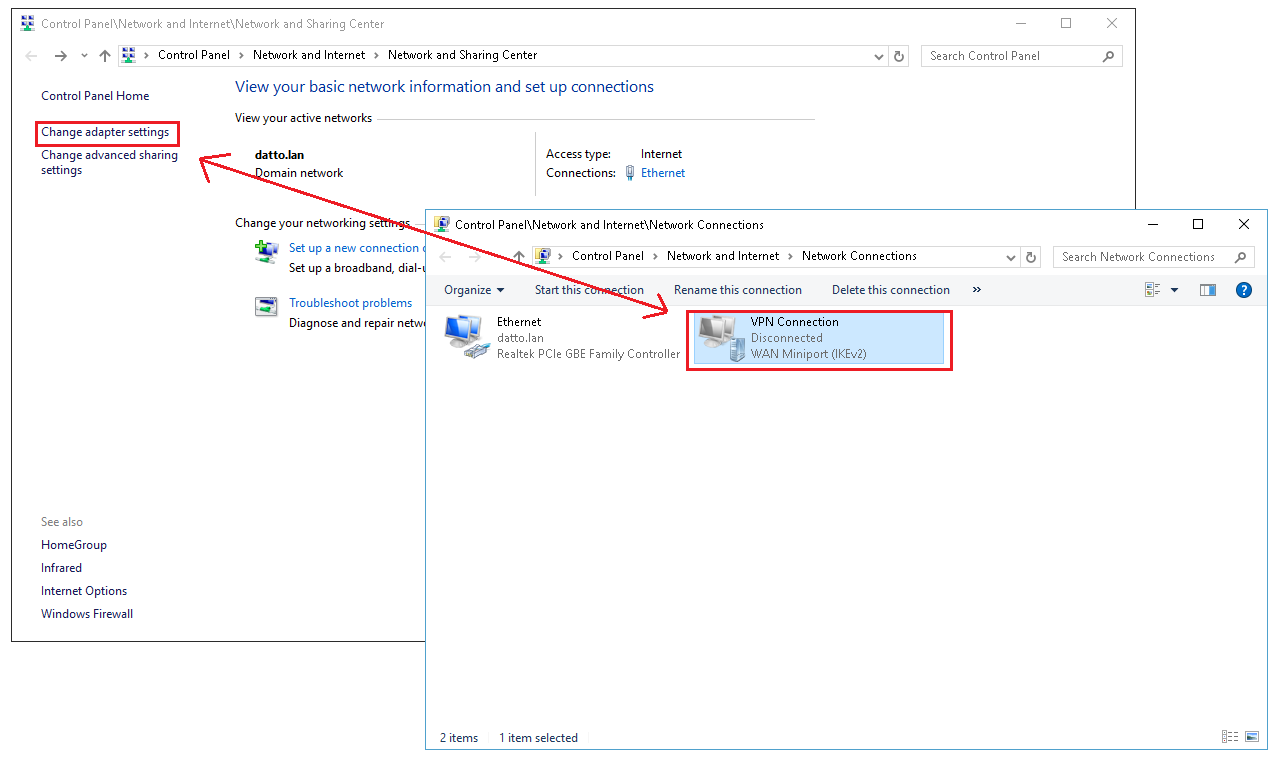
On the Network and Sharing Center screen, click Change Adapter Settings, then right-click on the VPN Connection and click properties.
-
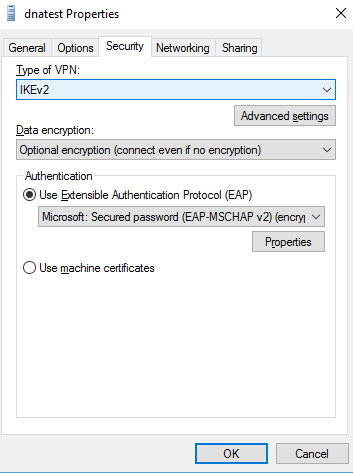
Click the Security tab and choose IKEv2 in the Type of VPN drop-down menu. For Authentication, choose Microsoft: Secured Password (EAP-MSCHAP v2) (encryption enabled)
-
Click the Networking tab, then select IPv4.
-
Click Properties, then select Advanced and verify that Use default gateway is checked. Click OK to and exit all dialogue boxes.
You should now be able to connect to the VPN. When you click Connect for the first time, it will prompt you for the login credentials you set on the DNA client VPN page.

Using ClientVPN with Windows IKEv2
To configure IKEv2 settings will to work with Client VPN, you must change the VPN connection's default ciphers.
-
Open PowerShell.
-
Run the following command:
Set-VPNConnectionIPsecConfiguration -Name "[Connection Name]" -AuthenticationTransformConstants SHA1 -CipherTransformConstants AES256 -EncryptionMethod AES256 -IntegrityCheckMethod SHA256 -PfsGroup None -DHGroup ECP384
macOS client VPN
In macOS
-
Navigate to System Preferences > Network.
-
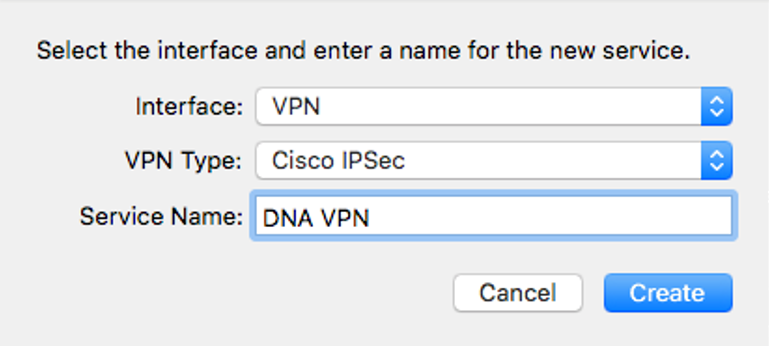
Click + to create a new network connection.
-
Select VPN from the Interface drop-down menu.
-
Select Cisco IPSec in the VPN Type field.
-
In the Service Name field, enter a connection name that clearly identifies the interface's purpose.
-
Click Create.
In Network Manager
-
Click the Status tab.
-
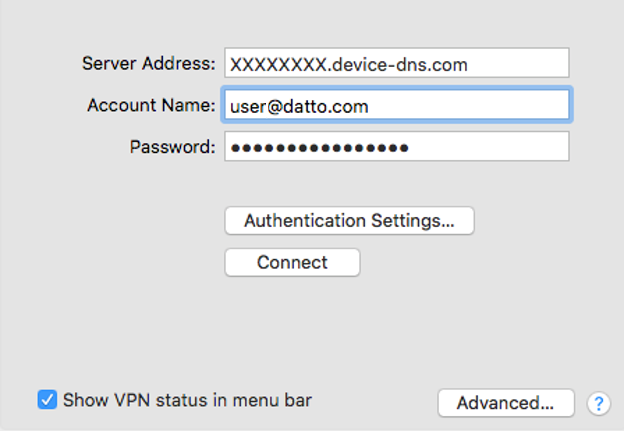
Make a note of your DNA's Assigned Public IP Address value. Enter it in the Server Address field of the macOS VPN connection settings.
-
Navigate to Network > Client VPN. Make a note of the username and password of the account you'd like to use to authenticate the VPN connection. Enter these value in the Account Name and Password fields of the macOS VPN connection settings.
-
Copy the Authentication Shared Secret value from the Client VPN page. In the macOS VPN connection settings, click Authentication Settings. Paste the Authentication Shared Secret into the Machine Authentication: Shared Secret field.
-
Apply the settings. You can now connect to the DNA as an IPSec VPN client.
-
Enter the subnet to assign to VPN users and select the appropriate option from the Subnet Mask drop-down menu.
-
Under Allow Access To, select the internal networks to whom you'd liketo assign VPN users access. If you'd like, you can also allow access to all Remote Sites, but note that all remote sites must allow access to a common local subnet for this to work correctly.
-
Click the New User button to begin adding users.
-
With your users entered, select Yes under Enable Client VPN to activate Client VPN.
-
Click Save Changes to complete the process.
VPN performance limitations
The DNA has no set limitations on the number of clients that can connect via VPN at any time. However, performance for client connections are subject to the ISP resources and bandwidth available, as well as the size of the subnet in use.


