Setting up a Windows IKEv2 Client VPN
Topic
This article explains how to set up a Windows IKEv2 client VPN on a Datto DNA.
NOTE To learn how to set up client VPN in macOS, refer to Configuring DNA client VPN for macOS.
Environment
Datto DNA
Description
Procedure
Download the VPN gateway certificate
1. Log into the DNA and choose the Security tab.
2. Choose the Client VPN tab from the left pane and download the VPN gateway certificate to the desired machine.
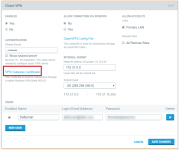
Figure 1: The Client VPN tab in the DNA UI
Add the Snap-in
1. From an Admin user account, open Microsoft Management Console (search for or run "mmc.exe").
2. In the Console dialog box, select File → Add or Remove Snap-in.
3. From the Available snap-ins list, select Certificates, then click Add.
4. In the resulting window, select Computer Account and click Next.
5. Select Local Computer and click Finish.
6. Click OK to close the Add or Remove Snap-ins dialog.

Figure 2: The Add or Remove Snap-in screen
Import the certificate
1. In the Console1 dialog, expand the Certificates category and navigate to Trusted Root Certification Authorities → Certificates.
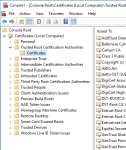
Figure 3: The Console1 dialog box
2. Choose Action in the menu bar, then navigate to All tasks → Import.

Figure 4: The Console1 Action menu
3. Click Next on the Welcome screen.
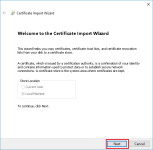
Figure 5: The Certificate Import Wizard
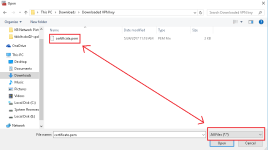
4. Click Browse and make sure the drop-down for File type is set to All Files, then choose the Certificate you saved earlier and click Open. Click Next and then Finished.
Set up the connection
1. Click the Windows start button and type "network." From the list of options, choose Network and Sharing Center.
2. Select Set Up a new Connection or Network, then navigate to Connect to a Workplace → Use my Internet Connection (VPN)
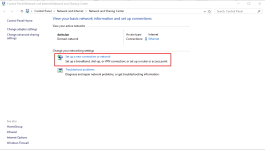
Figure 7: The Network and Sharing Center
3. Enter the DNA's assigned public address. You can find this address in the DNA UI on the Network Overview tab under Router Details, as shown in Figure 9.
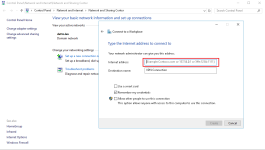
Figure 8: The Connection dialog box

Figure 9: The assigned public address in the DNA UI
4. On the Network and Sharing Center screen, click Change Adapter Settings, then right-click on the VPN Connection and click properties.
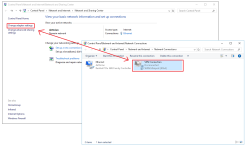
Figure 10: VPN adapter settings
5. Click the Security tab and choose IKEv2 in the Type of VPN drop-down menu. For Authentication, choose Microsoft: Secured Password (EAP-MSCHAP v2) (encryption enabled)
6. Click the Networking tab, then select IPv4.
7. Click Properties, then select Advanced and verify that Use default gateway is checked. Click OK to and exit all dialogue boxes.
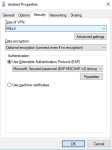
Figure 11: Security properties
You should now be able to connect to the VPN. When you click Connect for the first time, it will prompt you for the login credentials you set on the DNA client VPN page.

Figure 12: The VPN Connections screen in Windows 10
Using ClientVPN with Windows IKEv2
To configure IKEv2 settings will to work with Client VPN, you must change the VPN connection's default ciphers.
1. Open PowerShell.
2. Run the following command:
Set-VPNConnectionIPsecConfiguration -Name "[Connection Name]" -AuthenticationTransformConstants SHA1 -CipherTransformConstants AES256 -EncryptionMethod AES256 -IntegrityCheckMethod SHA256 -PfsGroup None -DHGroup ECP384
