Configuring DNA client VPN for macOS
NAVIGATION Partner Portal > Networking Status > Device Web > Status
This article describes the process to set up IPSec VPN with the Datto Networking Appliance (DNA) on macOS.
NOTE To learn how to set up client VPN in Windows, refer to Setting up a Windows IKEv2 Client VPN.
Procedure
In macOS
-
Navigate to System Preferences > Network.
-
Click + to create a new network connection.
-
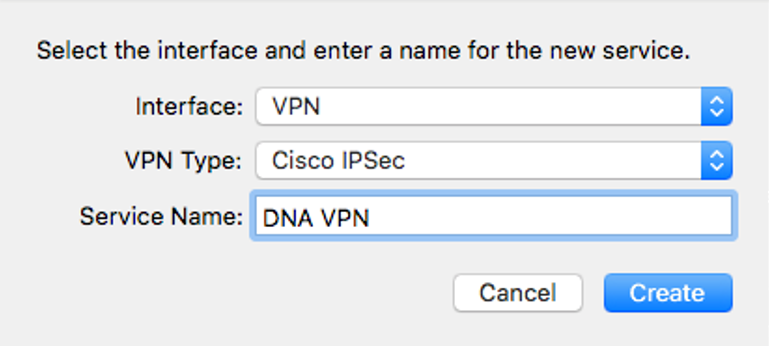
Select VPN from the Interface drop-down menu.
-
Select Cisco IPSec in the VPN Type field.
-
In the Service Name field, enter a connection name that clearly identifies the interface's purpose.
-
Click Create.

In Network Manager
-
Navigate to portal.dattobackup.com and log in with your Partner Portal credentials.
-
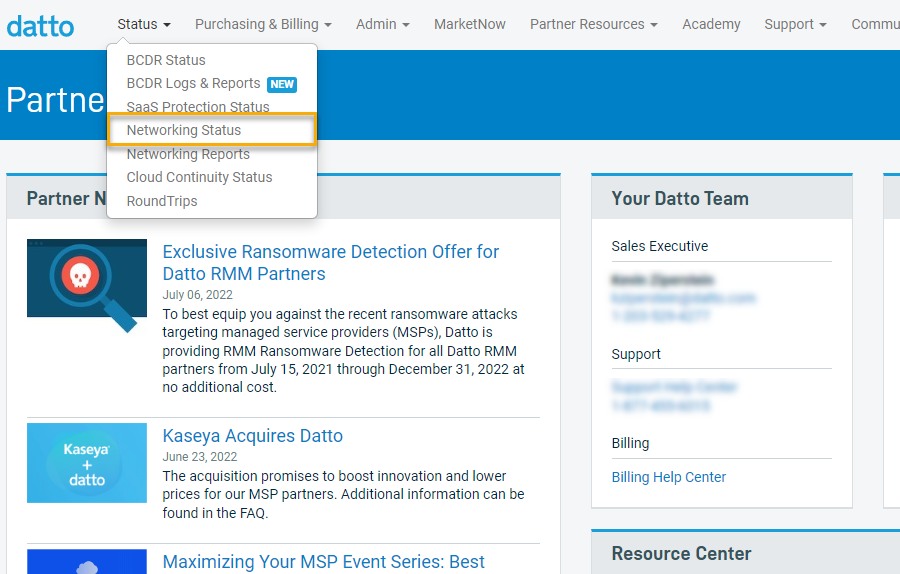
From the header menu, select Status > Networking Status.

- Once on the Networking Status page, click the device web link of the DNA you'd like to manage.
- The DNA web interface will load.
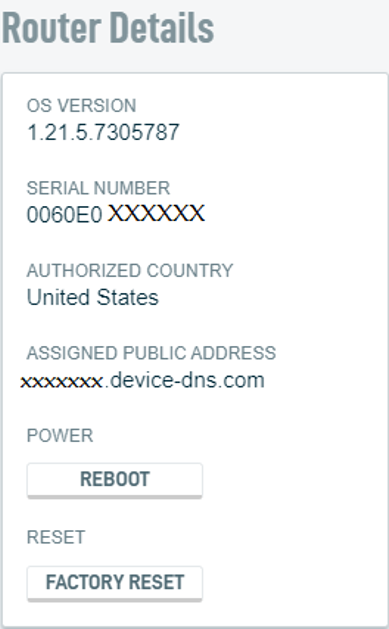
- Click the Status tab.
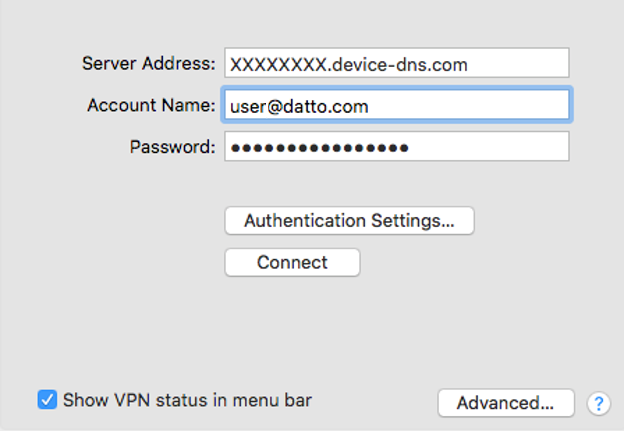
- Make a note of your DNA's Assigned Public IP Address value. Enter it in the Server Address field of the macOS VPN connection settings.

- Navigate to Network > Client VPN. Make a note of the username and password of the account you'd like to use to authenticate the VPN connection. Enter these value in the Account Name and Password fields of the macOS VPN connection settings.

- Copy the Authentication Shared Secret value from the Client VPN page. In the macOS VPN connection settings, click Authentication Settings. Paste the Authentication Shared Secret into the Machine Authentication: Shared Secret field.
- Apply the settings. You can now connect to the DNA as an IPSec VPN client.


