Adding Another LAN
This article explains how to add and configure up to three additional LAN networks using the extra LAN ports on the back of your Datto Networking Appliance (DNA).
Environment 
- Datto Networking Appliance (DNA)
Description 
The DNA allows you to configure multiple LANs using the additional LAN ports on the back of the DNA. You can also allow intercommunication of these LAN Networks by turning off Inter-Network Accessibility.
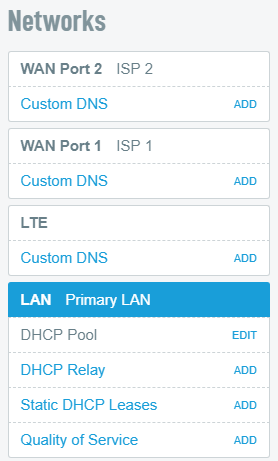
To manage your LANs, log in to the DNA web interface, and click Networks.

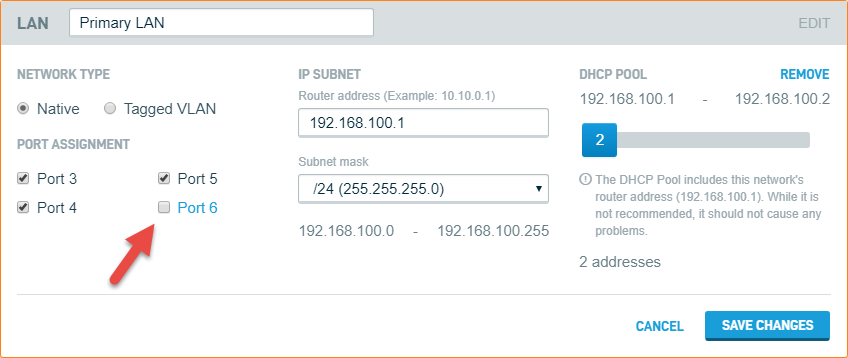
Setting up a second LAN requires unassigning one of the ports from the Primary LAN. The Primary LAN is configured to use ports 3, 4, 5, and 6 by default.
-
On the Primary LAN card, deselect the port you will be using for your second LAN network, and then click Save Changes.
NOTE The port numbers correlate to the physical ports on the back of the Datto. In this example, we will use Port 6.
You can mouse over each port number to verify if a cable is connected.

-
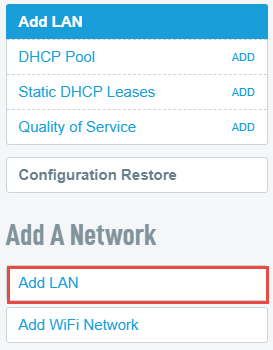
From the Manage card, select Add LAN from under the Add a Network section of the left pane. This will create a new card at the bottom of the page where you can configure the second LAN.
-
Name the second LAN to distinguish it from the Primary LAN and configure the remaining settings:
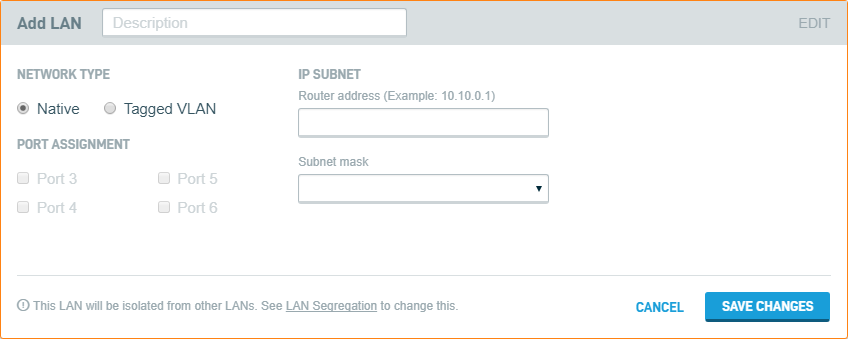
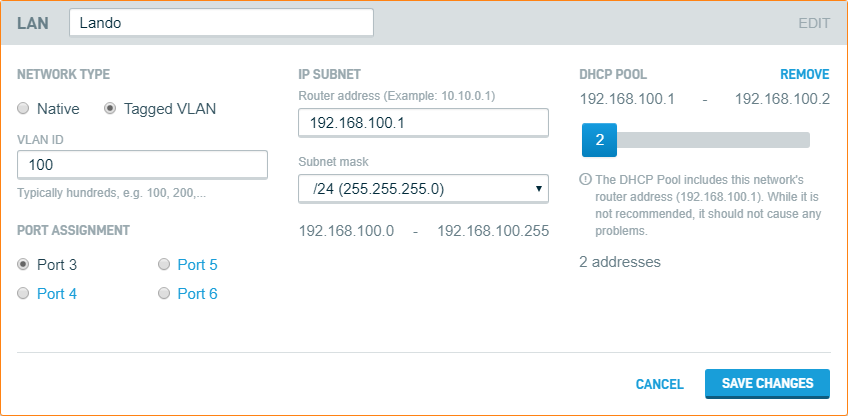
- Network Type: Select Native or Tagged VLAN. If you selected Tagged VLAN, see the Configuring Tagged VLANs section of this article to continue. For Native network types, continue to the next step.
- Port Assignment: Select the port(s) to associate with the new LAN. Tagged VLANs can only exist on one of the DNA's ports at a time.
- IP Subnet:
- Router address: The gateway IP for the second LAN. For example, if you plan to use a 10.10.0.0/24 network, normally the gateway will be 10.10.0.1.
- Subnet mask: Select the subnet for the second LAN
-
Click Save Changes. This will add the new LAN to the left pane under Configured Networks.

-
Click the corresponding options on the left side of the page under the newly configured LAN.
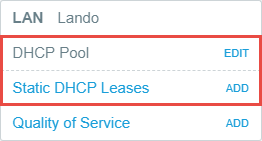
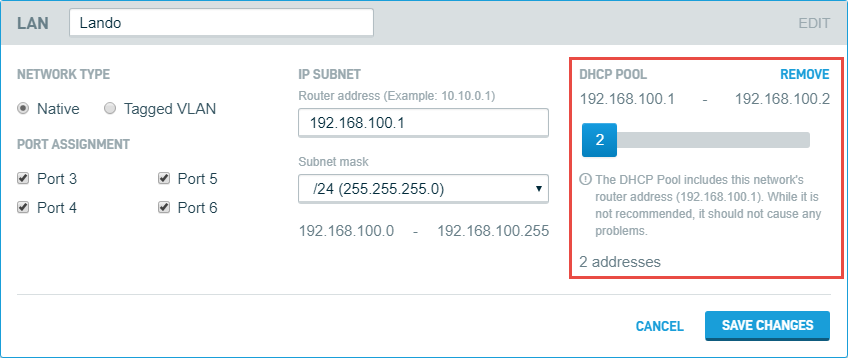
- DHCP Pool: This option reveals a DHCP Pool slider where you can adjust the range of IP addresses to hand out on the LAN. Click Save Changes to apply.
- Static DHCP Leases: Clicking this option will reveal an option to create a new reservation.
- MAC Address: Enter the MAC address of the device to receive a specific IP.
- Device Name: Enter the hostname of the receiving machine. Do not include spaces or special characters.
- IP Address: The IP address to assign to the receiving devices.
- DHCP Pool: This option reveals a DHCP Pool slider where you can adjust the range of IP addresses to hand out on the LAN. Click Save Changes to apply.
-
Click Save Changes to apply.

The Datto Networking Appliance features the ability to assign multiple subnets to a single NIC through the use of VLAN tagging. To configure this feature:
-
From the Manage card, select Add VLAN from the Add a Network section of the left pane. This will create a new card at the bottom of the page where you can configure the second VLAN.
- VLAN ID: Enter the ID you will be associating with this VLAN connection.
- Network Type: Select Tagged VLAN.
- Port Assignment: Select the port to associate with the new VLAN.
- IP Subnet:
- Router address: The gateway IP for the second VLAN. For example, if you plan to use a 10.10.0.0/24 network, normally the gateway will be 10.10.0.1.
- Subnet mask: Select the subnet for the second VLAN.
-
Click Save Changes.
For more information about VLAN tagging, see Fundamentals of 802.1Q VLAN Tagging (external link).