WAN Port Settings
This article describes the process to configure WAN ports on the Datto Networking Appliance (DNA). The Datto Networking Appliance can accept both IPv4 and IPv6 addresses from its ISP connection.
Environment 
- Datto Networking Appliance (DNA)
Description 
To manage your DNA's WAN ports, log into the DNA web interface, and click Networks.
You will see the cards for WAN Port 1 and WAN Port 2 displayed on the left column of the page.
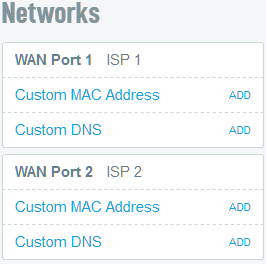
Figure 2: Networks pane, showing WAN Port 1 and WAN Port 2
Index 
- Labeling WAN Ports
- Changing the Connection Mode
- Changing the Primary and Secondary WAN Connections
- Setting a Static IP
- Setting Custom DNS
- Setting the MTU
Labeling WAN Ports 
1. Choose the desired WAN Port from the Configured Networks pane.
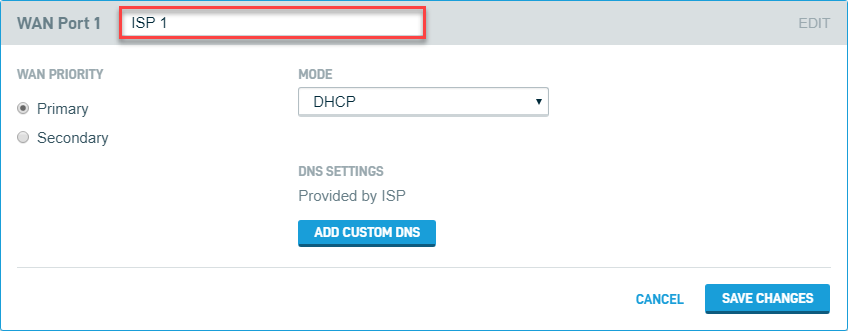
2. At the top of the selected WAN port's card, enter a custom label. By default, each WAN port is labeled ISP 1 or ISP 2.
3. Click the Save Changes button.
Changing the Connection Mode 
1. Choose the desired WAN Port from the Configured Networks pane.
2. Click the Mode dropdown, and select the desired connection type.
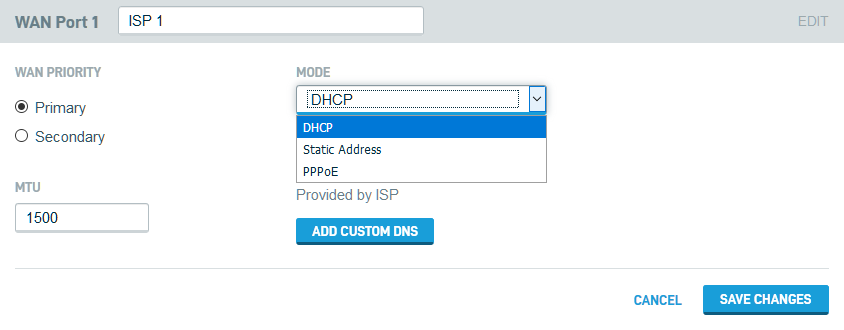
Figure 4: Connection mode drop-down
The following IP address modes are available:
- DHCP: The DNA will attempt to assign a dynamic IP address to the port.
- Static Address: The DNA will prompt you to assign the port a static IP address. See the Setting a Static IP section of this article for more information.
- PPPoE: DSL connections commonly use this mode. If selected, the DNA will prompt you for the username and password used to connect to your ISP.
When you are finished configuring your connection, click the Save Changes button.
Changing the Primary and Secondary WAN Connections 
1. Select the desired WAN Port from the Configured Networks pane.
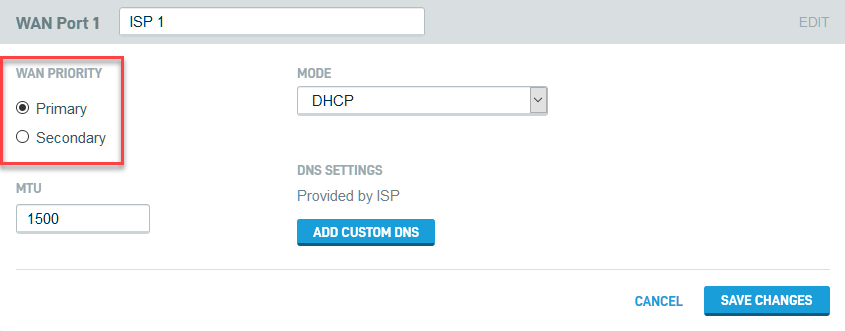
2. Click the Primary or Secondary radio button, depending on which value you would like to set for each port.
3. Click the Save Changes button.
Setting a Static IP 
1. On the selected WAN card, choose the Static Address option from the Mode dropdown.
2. Complete all fields required by your ISP, and then click Save Changes.
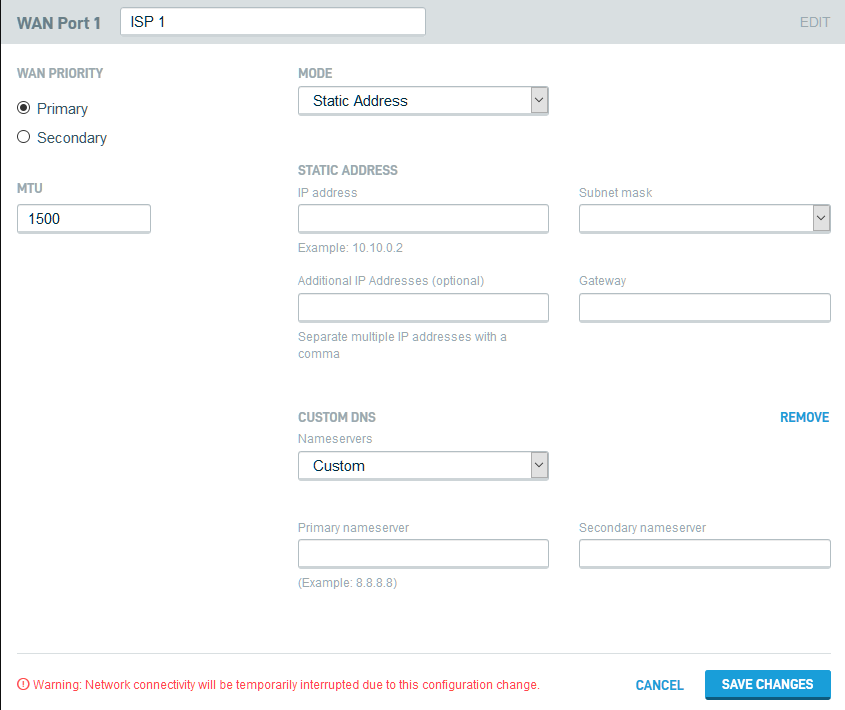
Figure 6: Static IP address configuration
IMPORTANT When using the Additional IP Address option, input the lowest possible value in the block as the Primary IP address value. Failure to do so will prevent the DNA from correctly routing VPN connections.
Setting Custom DNS 
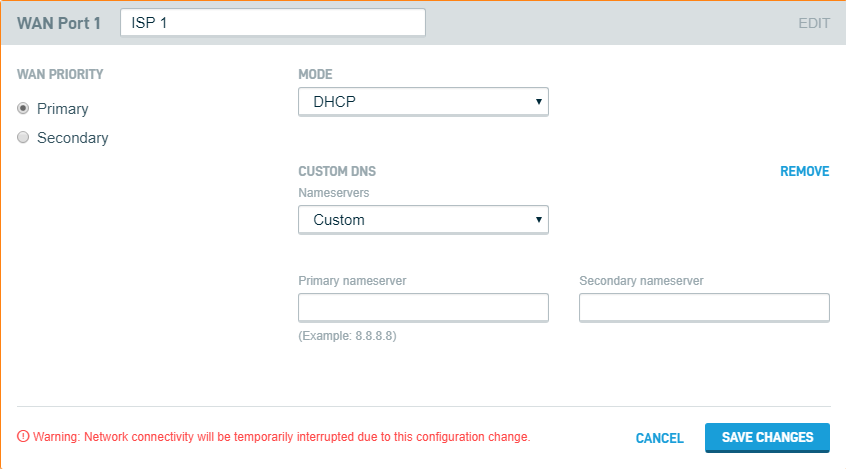
1. On the selected WAN card, click the Add Custom DNS option.
2. Choose Google Public DNS, OpenDNS, or Custom from the Nameservers dropdown. If you select Custom, you will be prompted to enter the information manually.
3. Click the Save Changes button.
Setting Custom MAC Address 
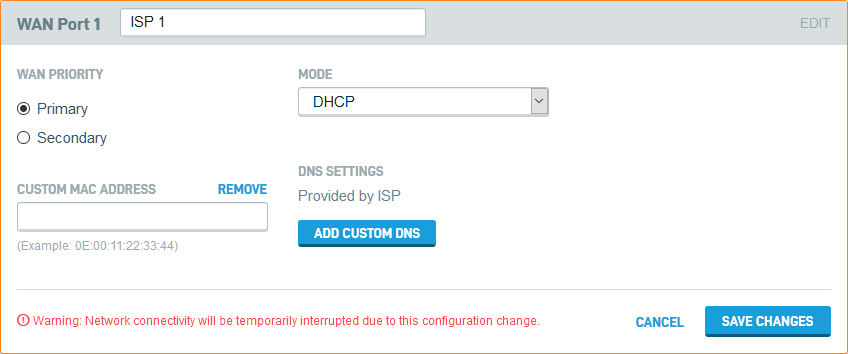
1. On the selected WAN card, click the Custom MAC Address option.
2. Enter a valid MAC address in the Custom MAC Address field. You can enter the MAC address as colon-separated or purely alphanumeric.
3. Click the Save Changes button.
Setting the MTU

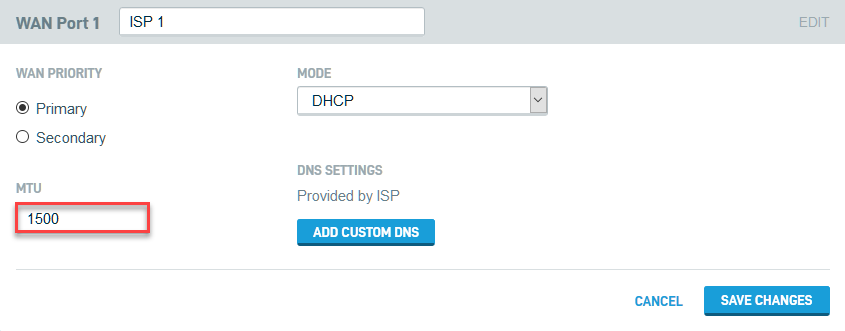
1. Input an MTU value between 68 and 1500. 1500 is the default value for all WAN interfaces.
2. Click Save Changes.

