Web Filters
This article describes the Web Filters feature of the Datto Networking Appliance (DNA).
Environment 
- Datto Networking Appliance (DNA)
Description
You can check your appliance's firmware version from its Router Details card.

The DNA uses web filtering logic that proactively assesses and halts threats prior to entering your network at the DNS level, and prevents malware and ransomware attacks.
If this is your first time using the Web Filtering feature, you will need to accept its Terms of Service. Any existing web filtering settings will automatically migrate over when accepting the Terms of Service.
Enabling web filtering will override any custom WAN DNS settings defined on the DNA due to the feature using its own DNS. Setting LAN DHCP DNS rules will allow clients in the subnet to bypass the DNA DNS Filter. If a custom WAN DNS is required, you must disable web filtering.
To access the Web Filtering card, log into the DNA web interface, and click Applications.
Once on the Applications page, click the Web Filters link. You will see the Web Filters management card shown.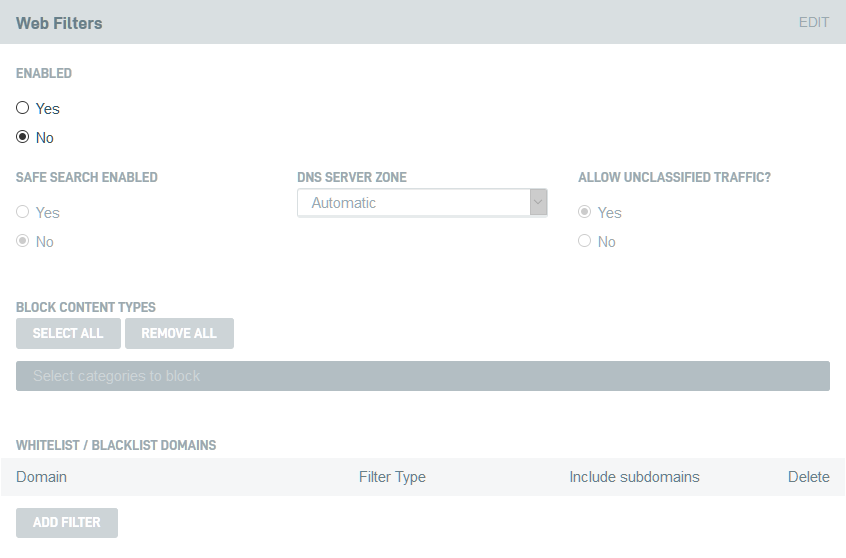
You can toggle web filtering on or off by using the Yes and No radio buttons under the Enable heading.
You can also toggle Safe Search on and off by using its respective Yes and No buttons. Safe Search allows you to force users to use the safe search functions within several major search engines including Google, Yahoo and Bing.
You can choose the DNS server's geographic location by selecting one under the DNS Server Zone header, or by choosing Automatic to have the DNA select the closest one to it.
Unclassified websites, or traffic not categorized by an explicit content type, can be permitted or blocked by toggling the Yes or No radio buttons under Allow Classified Traffic.
In the Block Content Types section, you can choose the types of content you would like to filter. Click Select All to select all categories at once, and Remove All to remove all selected categories.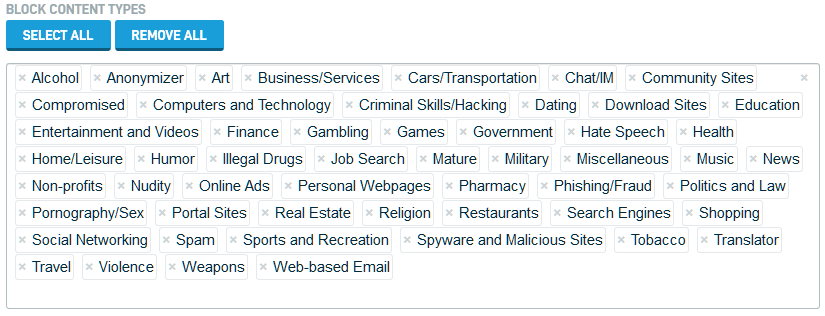
You can allowlist / blocklist domains by clicking the Add Filter button. Input a domain, choose a filter type to specify allowlisting or blocklisting, and specify if subdomains are included in the filter.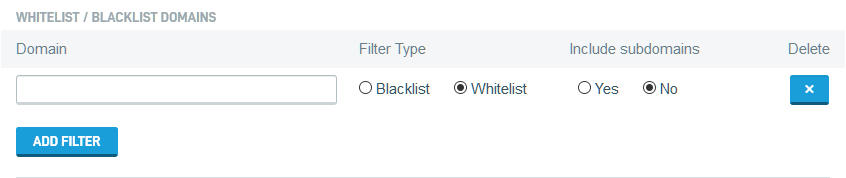
You can also choose to blocklist a category, but allow certain sites from the blocklisted category through the filter. For example, if you wanted to block all social media sites except for Instagram and LinkedIn, you would block the Social Media content type, and then add allowlist entries for instagram.com and linkedin.com in the allowlist / blocklist Domains category.
When allowlisting a site, you may need to add the www. prefix to its URL if it is not filtered correctly.
If you are on firmware 1.14 and below, the following web filtering settings are available. Access the Web Filters card the same way as if you were on 1.14: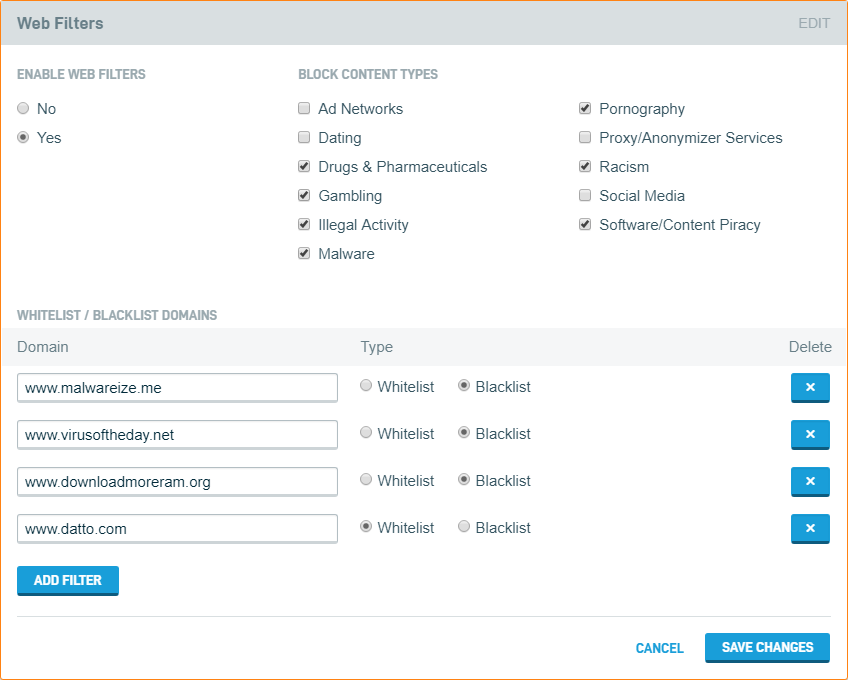
You can toggle web filtering on or off by using the Yes and No radio buttons under the Enable Web Filters heading. In the Block Content Types section, you can choose the types of content you would like to filter.
You can also choose to blocklist a category, but allow certain sites from the blocklisted category through the filter. For example, if you wanted to block all social media sites except for Instagram and LinkedIn, you would block the Social Media content type, and then add allowlist entries for instagram.com and linkedin.com in the allowlist / blocklist Domains category.
Alternatively, you can allowlist a category, and block only specific sites within that category.


