Deploying the Secure Edge softclient
NAVIGATION downloads.datto.com
This article describes the basic steps for manually downloading, installing, and applying your organization's configuration to the Secure Edge softclient on a customer endpoint. To learn how to deploy the softclient via RMM tools, refer to Deploying the Secure Edge softclient via Datto RMM and Managing Secure Edge softclient deployments with VSA 10.
BEFORE YOU BEGIN Using third-party VPN and DNS filtering applications with the Secure Edge solution may cause unexpected or undesirable behavior. We recommend disabling these utilities for endpoints that leverage the Secure Edge client.
Download and install the application 
-
A new subscriber will need to be invited from within the Network Manager. For more information on inviting a new user, please review: User subscriptions. As long as the check box was used to Send download link and instructions, a welcome email will be sent to the new subscriber that includes the Organization Code and a link to the Datto download page.
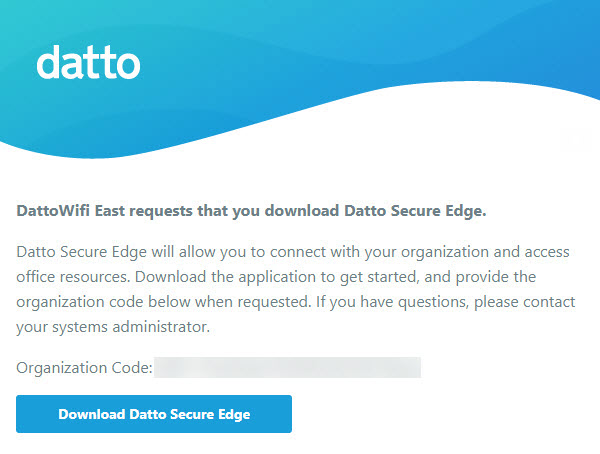
NOTE If the end user will be doing the installation, a condensed installation guide can be provided here: User installation guide.
-
If you are installing the Secure Edge software on a Windows or MacOS machine:
-
Access the Datto's download page.
-
Agree to the notice and navigate to the Datto Networking tab.
-
Install the software client using the appropriate download link provided under Secure Edge Client.
If you are installing the client software on a iOS or iPadOS device:
-
From the device, search for Secure Edge client on the device's App Store and install the application from the App Store.
-
Alternatively, scan the QR code to open the page in the App Store.

If you are installing the client software on an Android device:
-
Download the application from the Google Play Store.
-
Alternatively, scan the QR code to open the page in the Play Store.

-
-
When prompted enter the organization code and click Next. The organizational code is provided in the Welcome email or can be access in the Network Manager under: Secure Edge > Service Settings.
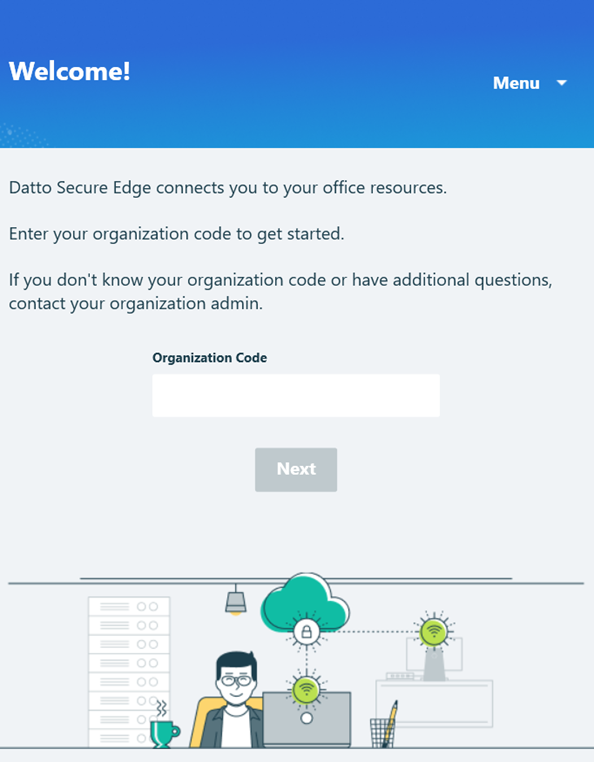
NOTE When using IdP, an additional prompt for the credentials will be required. For more information on the Authentication Settings, please review: Authentication Settings.
Alternatively, the softclient may be installed remotely without the GUI inputs on Windows and MacOS, through the command line.
 Windows
MSIEXEC (Windows installer), use the following argument:
msiexec.exe /package SecureEdge.msi /qn /norestart ORGANIZATION_CODE=<org_code>
Replace <org_code> with your organizational code.
-
If you're directly installing the Secure Edge softclient, run the installer as a local administrator.
MacOS
Run the following from the command line to install the softclient for use device wide:
sudo defaults write com.datto.SecureEdge.LaunchDaemon FirstInstallOrganizationCode <org_code>
Run the following from the command line to install the softclient for the user running the command:
defaults write com.datto.SecureEdge FirstInstallOrganizationCode <org_code>
Replace <org_code> with your organizational code.
-
-
If you're an administrator, navigate to Partner Portal > Networking Status > Network Manager > Manage > Secure Edge > Provisioning > Pending Clients. Then, select the boxes next to the clients you'd like to approve.
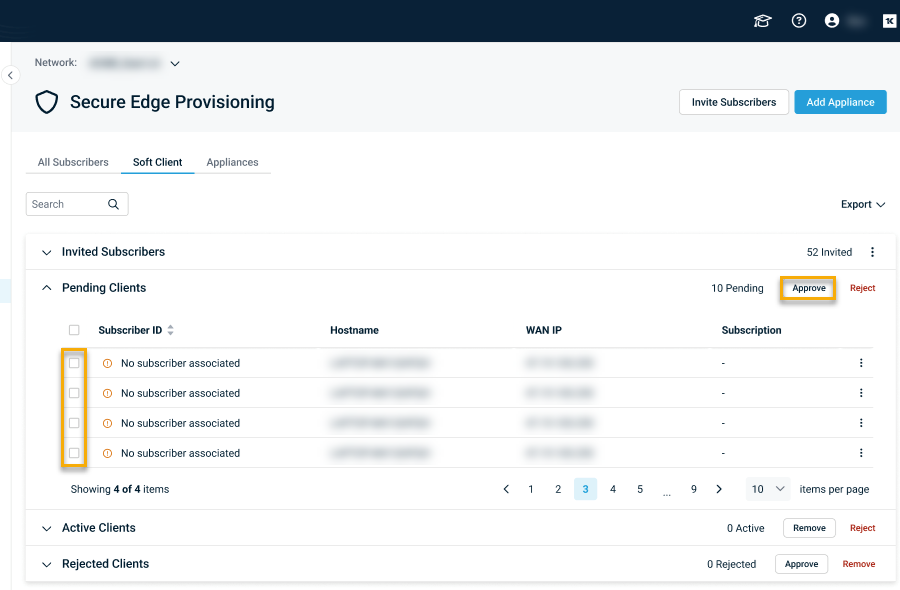
This extra step is a security measure to prevent the creation of unwanted softclients.
-
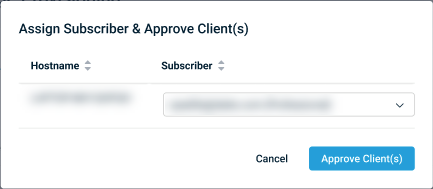
Select Approve and the Assign Subscriber & Approve Client(s) modal will appear. Ensure that each client listed in the Hostname drop-down menu has a corresponding subscriber assigned in the Subscriber drop-down menu.
-
When you've completed your review, click Approve Client(s).
-
Return to the newly-added workstations. Within five minutes, the softclient will connect to the service. The subscriber is now protected by Secure Edge.
After the user has been provisioned, the count in the Subscriptions in Use section of the Network Manager will be increased accordingly.
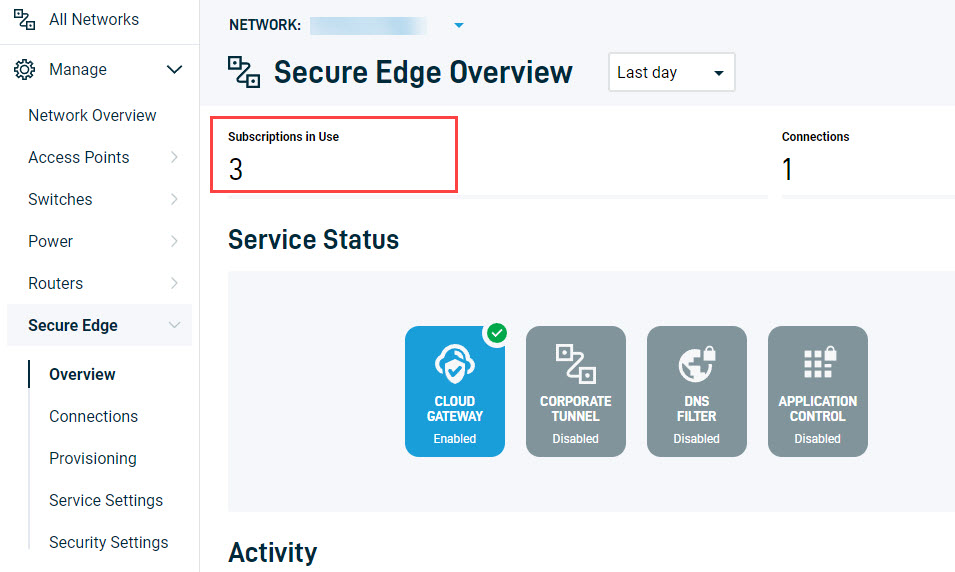
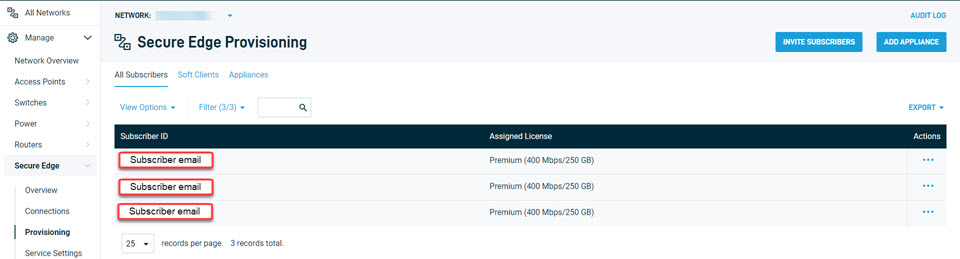
The User will also be listed under the Provisioning section, where it can be managed.
Considerations
The Secure Edge soft-client may not work correctly with specific programs or services on the workstation are interfering with its normal operations. Some of these conflicting operations include:
-
Creating a competing VPN connection (Nord, ProtonVPN, Certain browsers using a VPN connection window).
-
Running through a proxy connection (Firefox does this by default, some apps also do this on tablets).
-
Using manual DNS on the network interface or in the program settings.
-
Using a DNS filtering program.
-
Using a DNS filtering cloud service (ie: Cisco Umbrella).
-
AV may block some of DSE functionality if not properly excluded.
-
Software management solutions may not install Datto Secure Edge correctly if not allowed.
-
Domain settings may prevent the Datto Secure Edge from working correctly.


