Datto Access Point SSID Settings
This article describes the SSID settings available for Datto Access Points.
Environment
- Datto Network Manager
Description
Each Datto access point can broadcast four unique SSIDs to which users can connect. A network will configure every access point to transmit the same SSID and use the same settings.
Procedure
Navigation
-
Navigate to portal.dattobackup.com.
-
Log in with your Partner Portal credentials.
-
Select the name of a Network or Launch Network Manager, to load the Networking Manager.

-
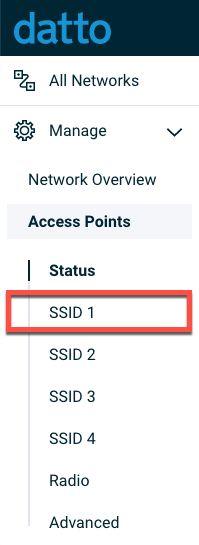
In the Navigation menu, click Access Points, then click an SSID.

Configuration
Each SSID contains the following settings and options:
- Common settings
- Captive Portal
- Availability
- Advanced settings
Common settings
-
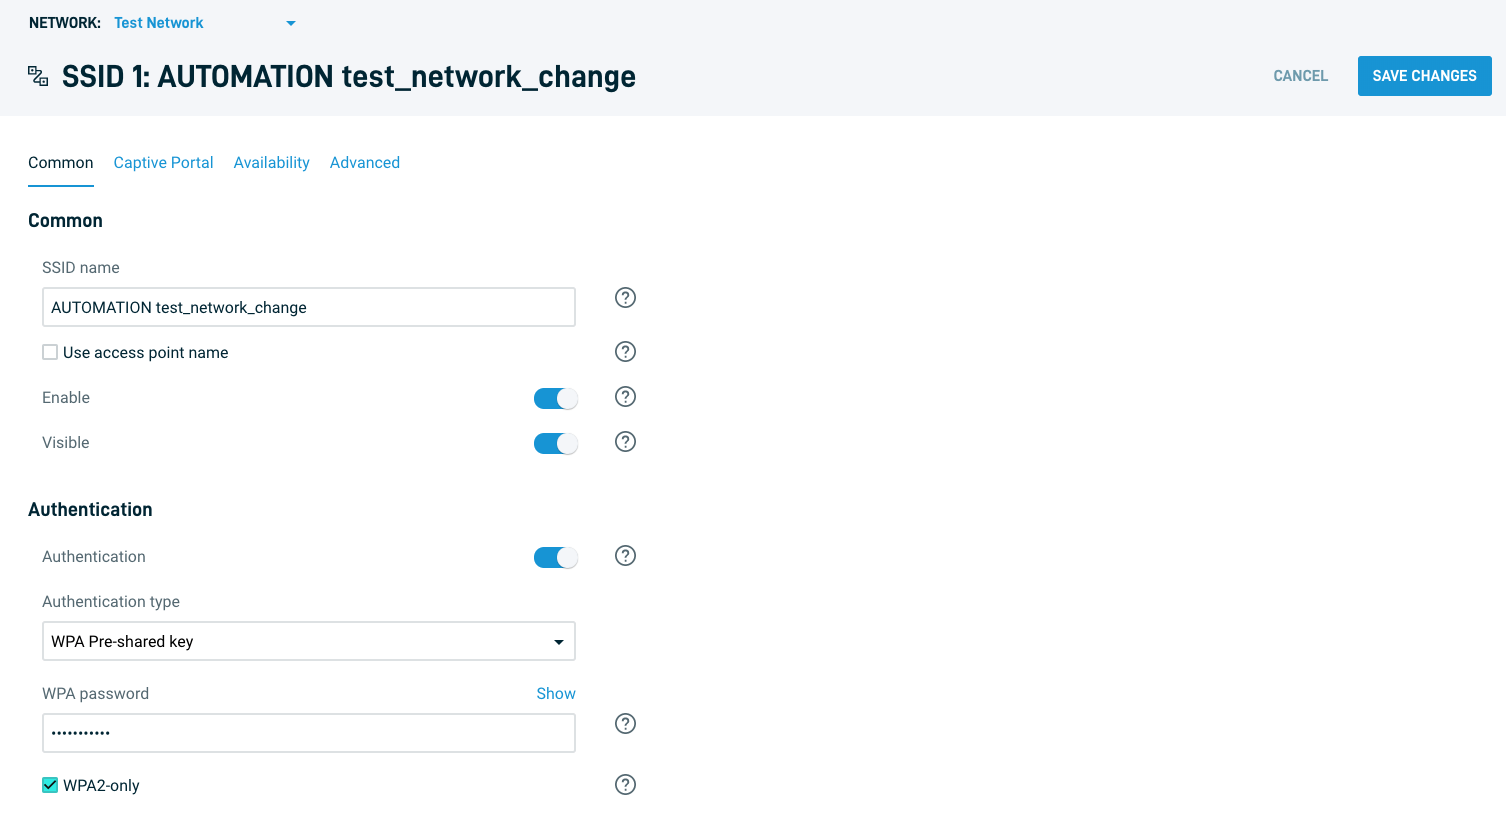
SSID name: Enter the name users will see and connect to using their device. You can also select the checkbox for Use access point name to combine both the SSID and access point names.
-
Enable: When toggled on, an SSID will broadcast on all access points in this network. When toggled off, the SSID will not broadcast, and users cannot connect to it even when entering the name manually.
-
Visible: When toggled on, an SSID will advertise itself publicly so users can select it from their list of available networks. When toggled off, users must enter the SSID name manually.
-
Band: Access points broadcast their signal on specific radio frequencies. Use the Band drop-down to control what radio and frequency an SSID will use. You can select from the following options:
- Both - Combined SSID: Both 2.4 GHz and 5 GHz SSID broadcasts will use the same name. Client devices will make their own roaming decisions on the frequency to which they will connect.
- Both - Unique SSIDs: Each radio will broadcast a unique SSID, even if the access point has multiple radios using the same frequency. For example, an access point that has two radios using the 5 GHz frequency will have two fields: SSID name (5GHz #1), and SSID name (5GHz #2).
- 2.4 GHz only: An SSID will only use the 2.4 GHz frequency.
- 5 GHz only: An SSID will only use the 5 GHz frequency.
-
Authentication: Enable this to authenticate users as they connect to an SSID. You can choose from one of the following authentication methods:
-
Pre-shared key (Password): Users will enter a password when connecting to an SSID. Enter a password in the WPA password field. It must be eight characters or longer, with no spaces. Selecting the WPA2-only checkbox will only authenticate client devices supporting WPA2.
-
WPA Enterprise: Users will enter a username and password defined in a server configured for 802.1x authentication. All connecting client devices must support WPA2. For more information on configuring 802.1x, read our WPA Enterprise/802.1x Setup with Windows Server article.
-
Captive Portal
The Captive Portal allows you to configure splash pages, custom authentication settings, and more. The following parameters and options are available:
-
Bandwidth throttling: When enabled, each client device on an SSID will have its speed throttled. Use the Download and Upload sliders to set the throttled speed, or enter the values in Mbps. Bandwidth throttling is required if you are configuring throttling on vouchers, RADIUS, and HTTP Authentication using Datto Networking.
-
Splash page: When enabled, you can configure the page that users will see when connecting to an SSID. Datto Networking offers multiple splash page options that can integrate with third-party services, such as BlueSnap. You can also create and host a splash page using Datto Networking's built-in editor. While enabled the following ports are used:
- TCP ports 8081 - 8084: Splash page for SSIDs 1 - 4.
For more information on networking requirements, refer to: Datto Networking firewall requirements.
The following articles describe all splash page options available:
-
Blocked devices: Enter the MAC addresses of devices that you wish to prevent from connecting to an SSID.
-
Block message: Enter a message that will display when a blocked device attempts to connect to an SSID.
Availability
Each SSID has a WiFi schedule that allows you to enable or disable it during specific times of the day. For more information, read our WiFi Scheduling article.
Advanced Settings
-
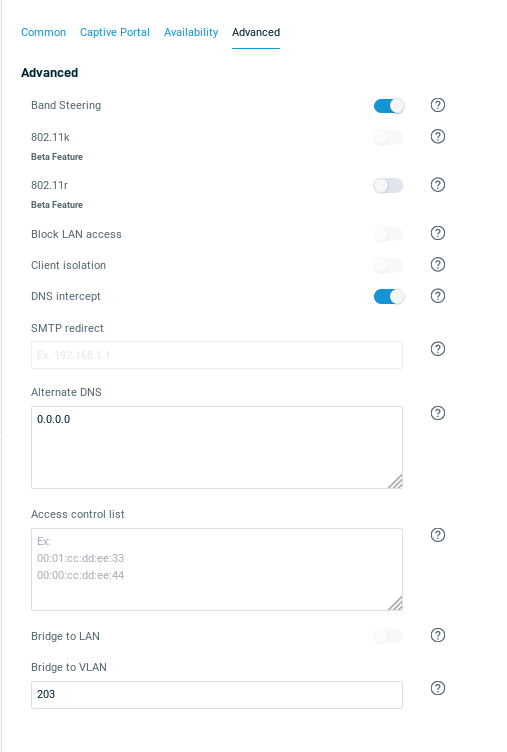
Band Steering: Toggle band steering on or off.
-
802.11k: This option improves client device roaming performance by providing client devices with a list of selectable neighboring access points and their channels. This option is available on Datto Access Point firmware version 6.5.2 and newer. For more information, read our Client Device Roaming article.
-
802.11r: This option improves client device roaming by reducing the handoff delay in situations where client devices roam from one access point to another. 802.11r is only available if an SSID has WPA authentication enabled. 802.11r is available on Datto Access Point firmware version 6.4.15 and newer.
-
Block LAN Access: This option prevents users on this wireless network from accessing your wired LAN.
-
Client isolation: This option prevents your wireless users from accessing other local users and machines.
-
DNS Intercept: This option prevents client devices from overriding the DNS settings of the SSID, and instead uses the default gateway DNS, or the Alternate DNS address when set. Disabling this feature will also disable Block Clients, Splash Pages, and Alternate DNS. While enabled the following ports are also used:
- TCP & UDP ports 1101 - 1104: DNS Intercept for SSIDs 1 - 4.
For more information on networking requirements, refer to: Datto Networking firewall requirements.
-
Alternate DNS: This option allows you to enter alternate DNS server IP addresses, one per line, for an SSID; this will override any other alternate DNS servers configured on other SSIDs.
-
Access Control List: This option lets you enter MAC addresses that can use an SSID, and prevent un-included users from using an SSID.
-
Bridge to LAN: This option gives client devices connecting to an SSID access to your local LAN, letting users use local services and devices, such as printers and locally hosted file servers.
-
Bridge to VLAN: This option allows you to enter a VLAN ID from 2-4094 for an SSID, and will bridge and tag traffic to that VLAN ID. Using a VLAN automatically bridges the SSID to the LAN.


