Getting started with the Datto D200
This article gives an overview of the Datto D200 Router's features. For a detailed list of hardware specifications and features, see the D200: hardware and specifications article.
Environment
- Datto D200 Router
- Datto Network Manager
Description
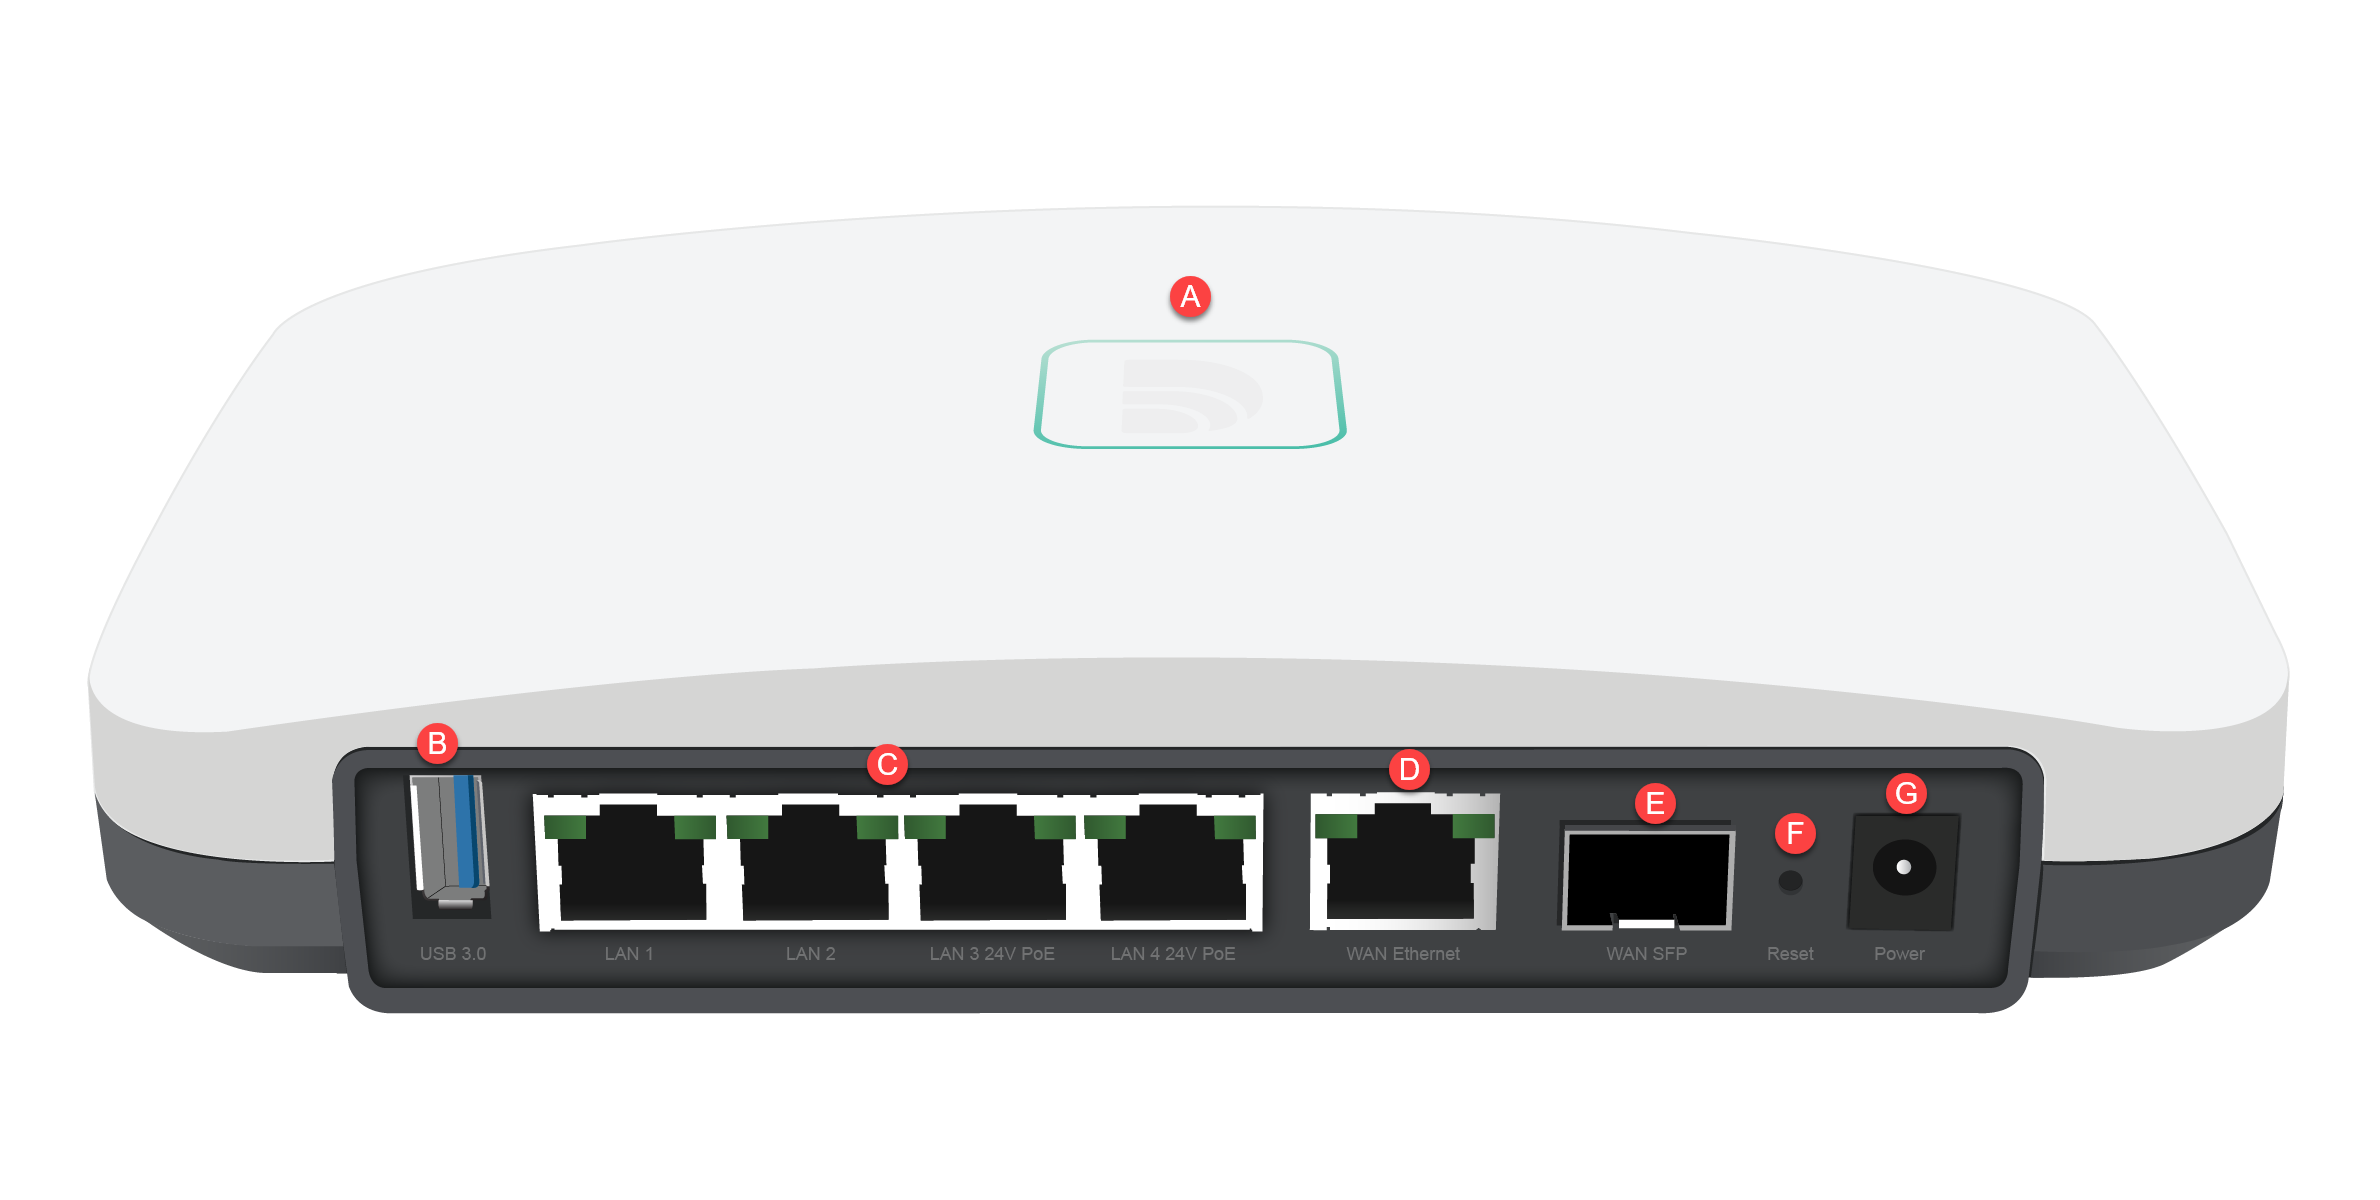
Hardware Legend
A. LED indicator
B. USB 3.0 port
C. LAN ports 1-4; LAN ports 3-4 have 24V Passive PoE
D. WAN Ethernet port
E. WAN SFP port
F. Reset pin
G. DC power in
Registering your router
If this is a new router, you must register it through the Datto Partner Portal. Once registered, you can add the router to your network.
Accessing the router interface
The router's management interface is in the Datto Networking Portal. Follow the steps in the Partner Portal: Networking Status & Accessing your Networking device to access Datto Network Manager using the Networking Status page.
Navigating the Interface
The router's configuration and management features are segmented across several pages in Datto Network Manager. Click a page name to learn more:
- Routers
- Router Status
- Router Port Settings
- Router WAN Settings
- Router LAN Settings
- Router VLAN Settings
- Router Firewall Settings
- Router VPN Settings
- Router QoS Settings
- Web Content Filtering Settings
Routers
The Routers page lists all routers within your network and lets you add and configure new routers. Read the Routers: Managing Routers article to learn more.
Router Status
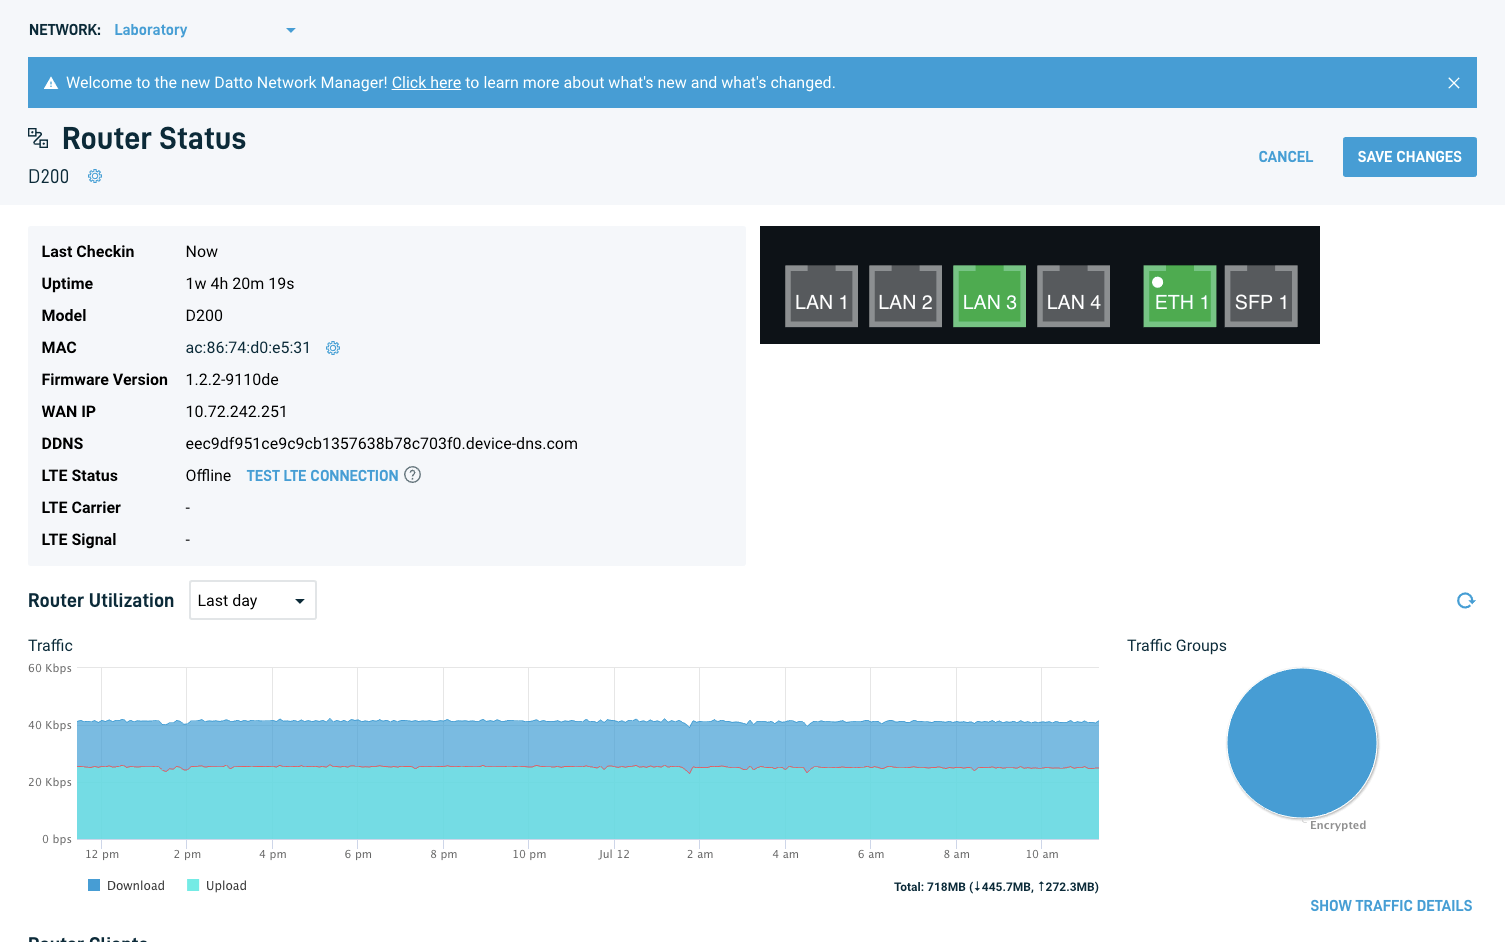
The Router Status page provides a graphical overview of your router. It shows system information and metrics, such as bandwidth utilization and traffic groups.
Router Port Settings
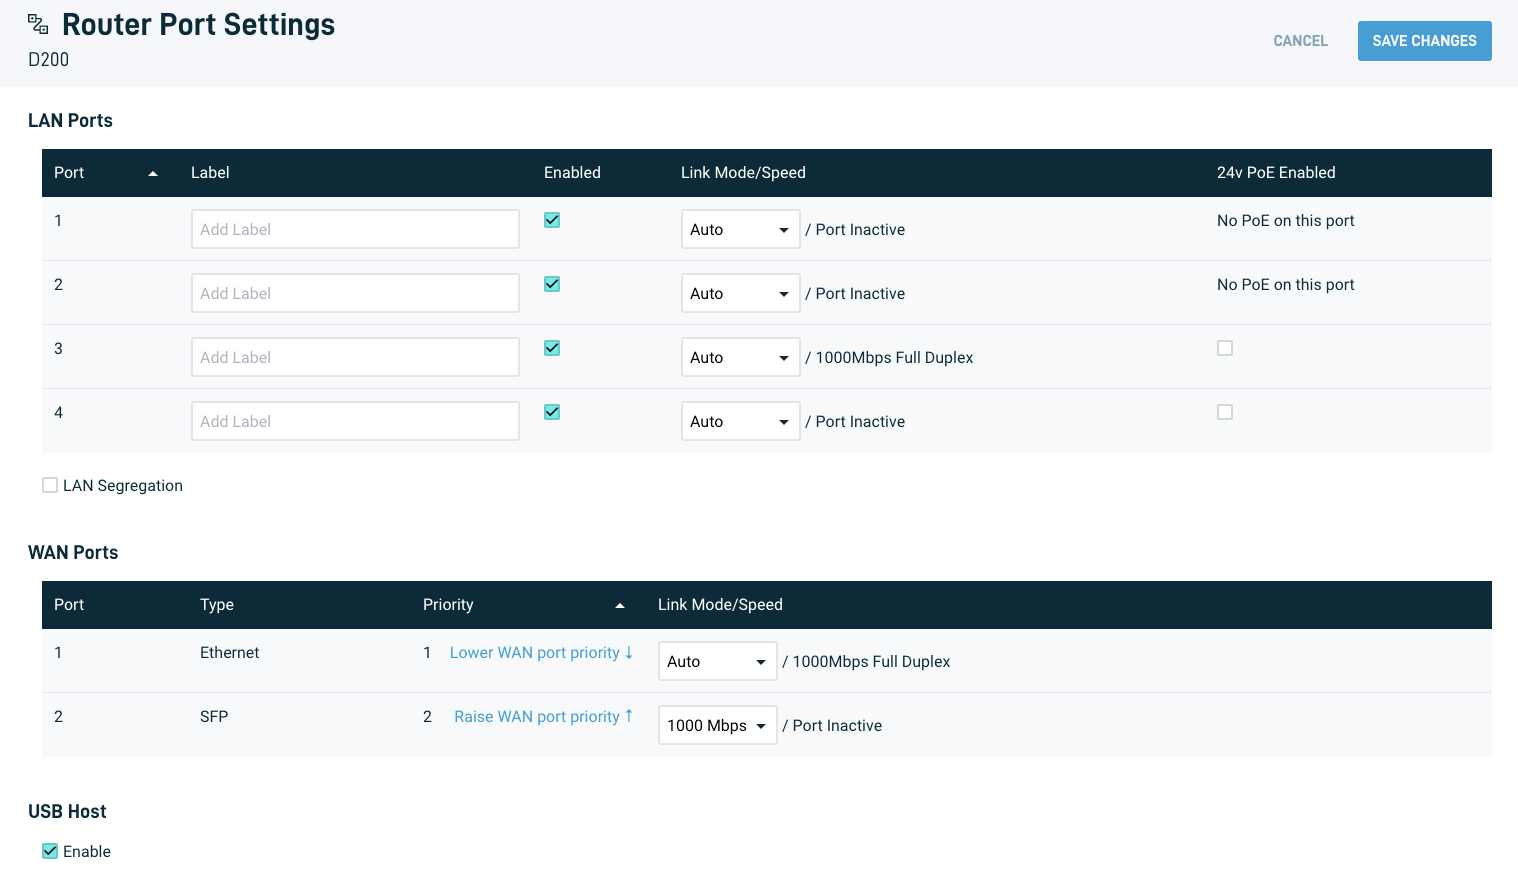
The Router Port Settings page lets you configure settings for each LAN and WAN port on the router. You can also set other global settings, such as enabling LTE functionality, on this page. Read the Routers: Port Settings article to learn more.
Router WAN Settings
The Router WAN Settings page lets you set networking parameters for your router, including IP address, subnet mask, gateway, and 1:1 NAT. These settings are available for both static and DHCP configurations. Read the Routers: WAN Settings article to learn more.
Router LAN Settings
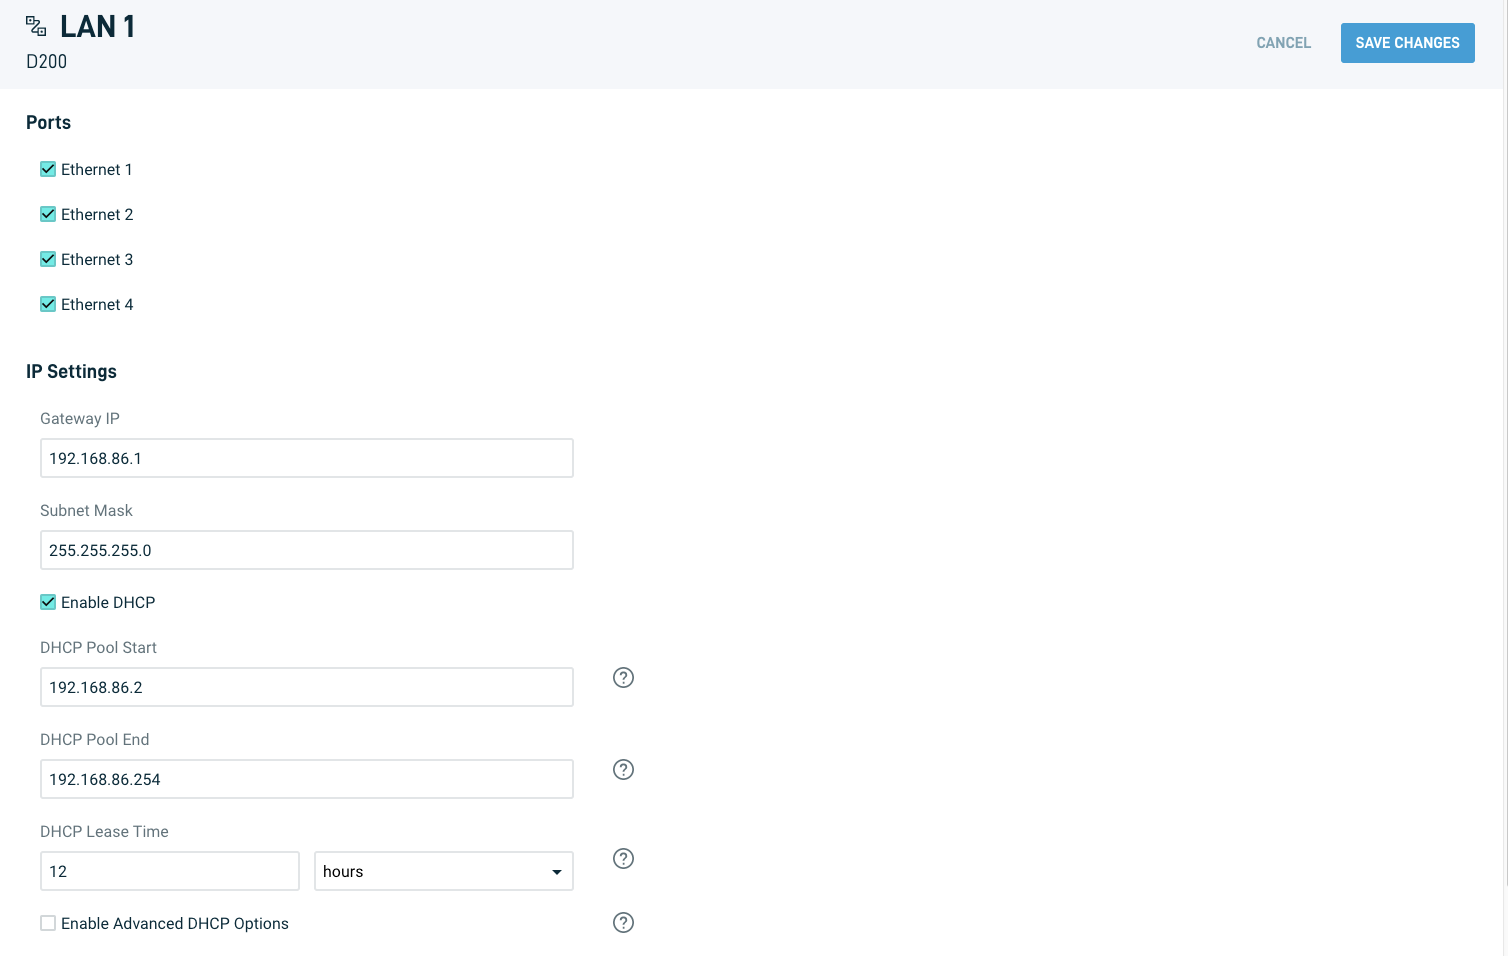
The Router LAN Settings page lets you add and configure LAN networks for each port on the router. You can define the LAN gateway IP address, set up a DHCP pool, and more. Read the Routers: LAN Settings article to learn more.
Router VLAN Settings

Figure 7: Router VLAN Settings
The Router VLAN Settings page lets you add and configure VLANs to create multiple subnets and group traffic as if they were on a physical LAN. Read the Routers: VLAN Settings article to learn more.
Router Firewall Settings
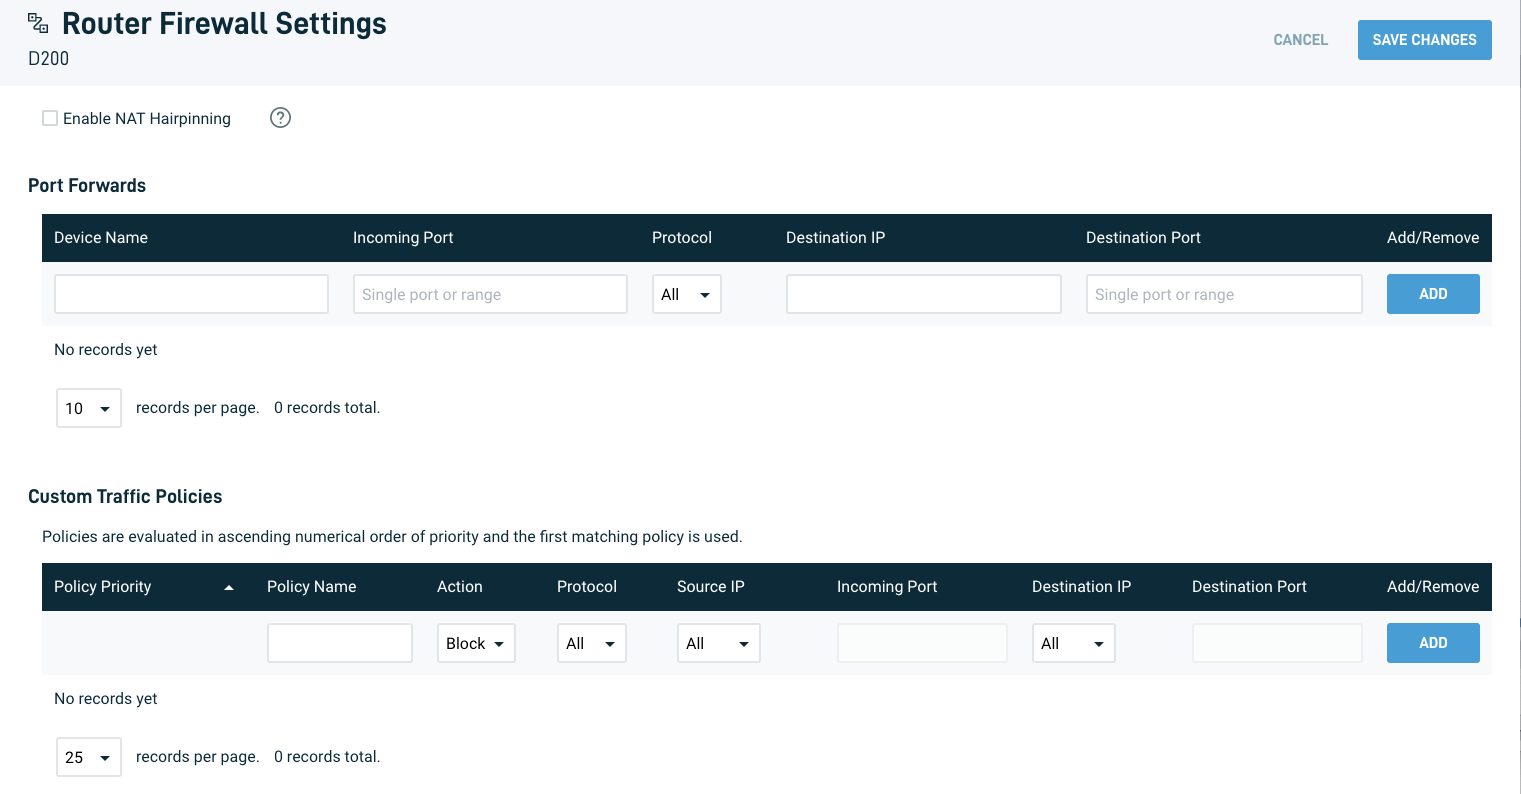
Figure 8: Router Firewall Settings
The Router Firewall Settings page allows you to create and configure port forwarding and set custom traffic policies to control incoming and outgoing traffic in your network. Click on a feature to learn more:
Router VPN Settings
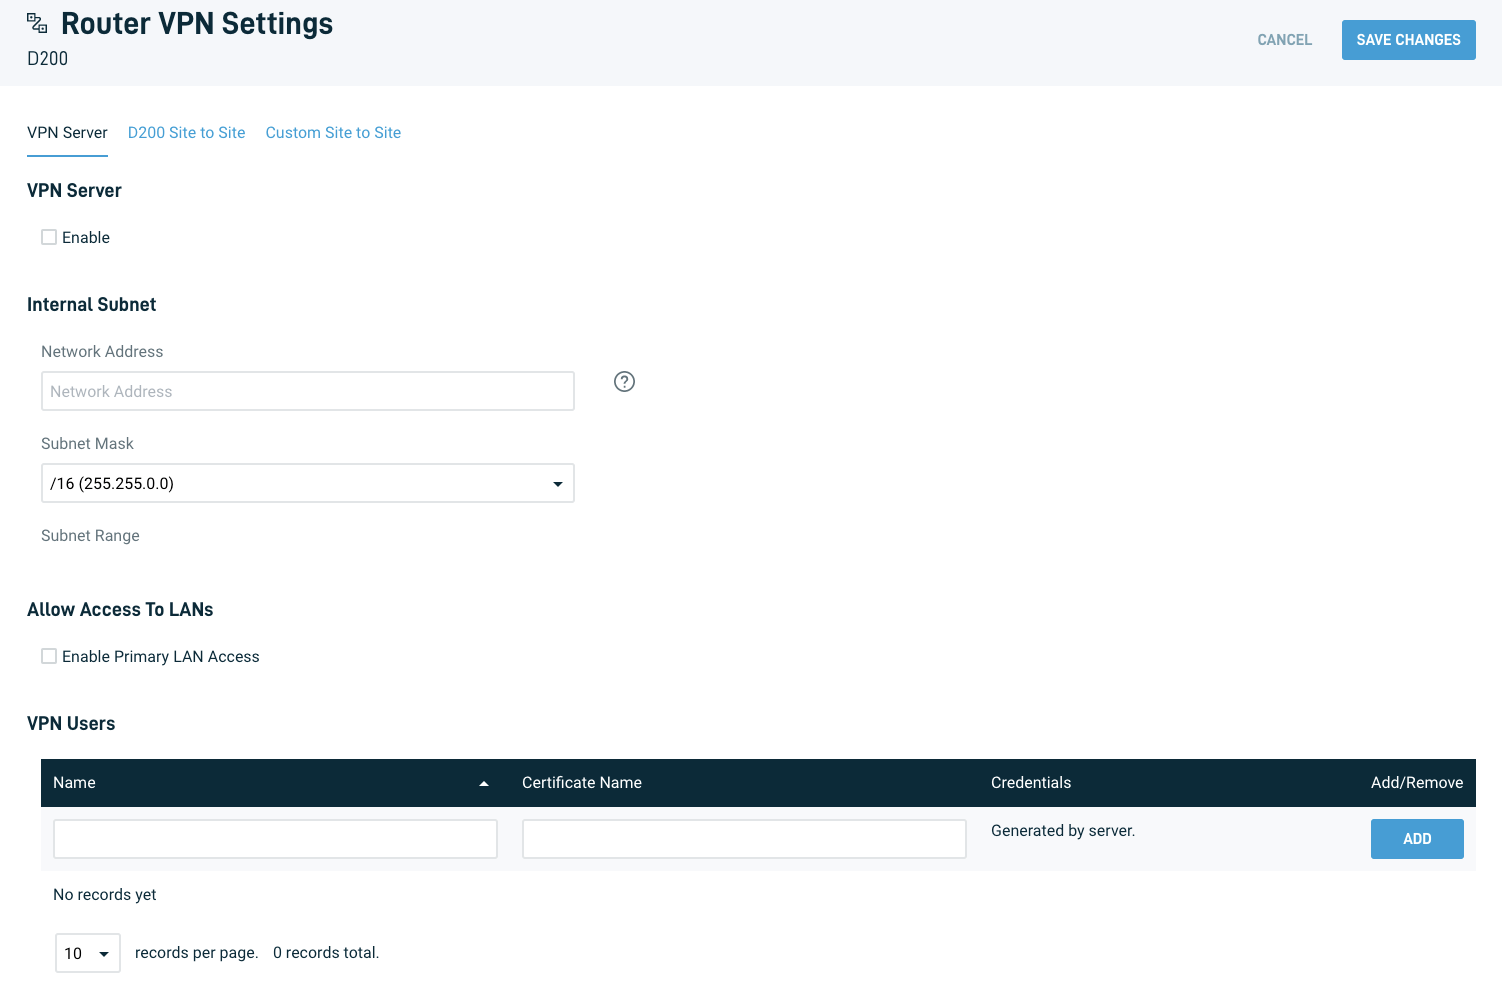
The Router VPN Settings page lets you create a VPN server or set up a site-to-site VPN. Click on a feature to learn more:
Router QoS Settings
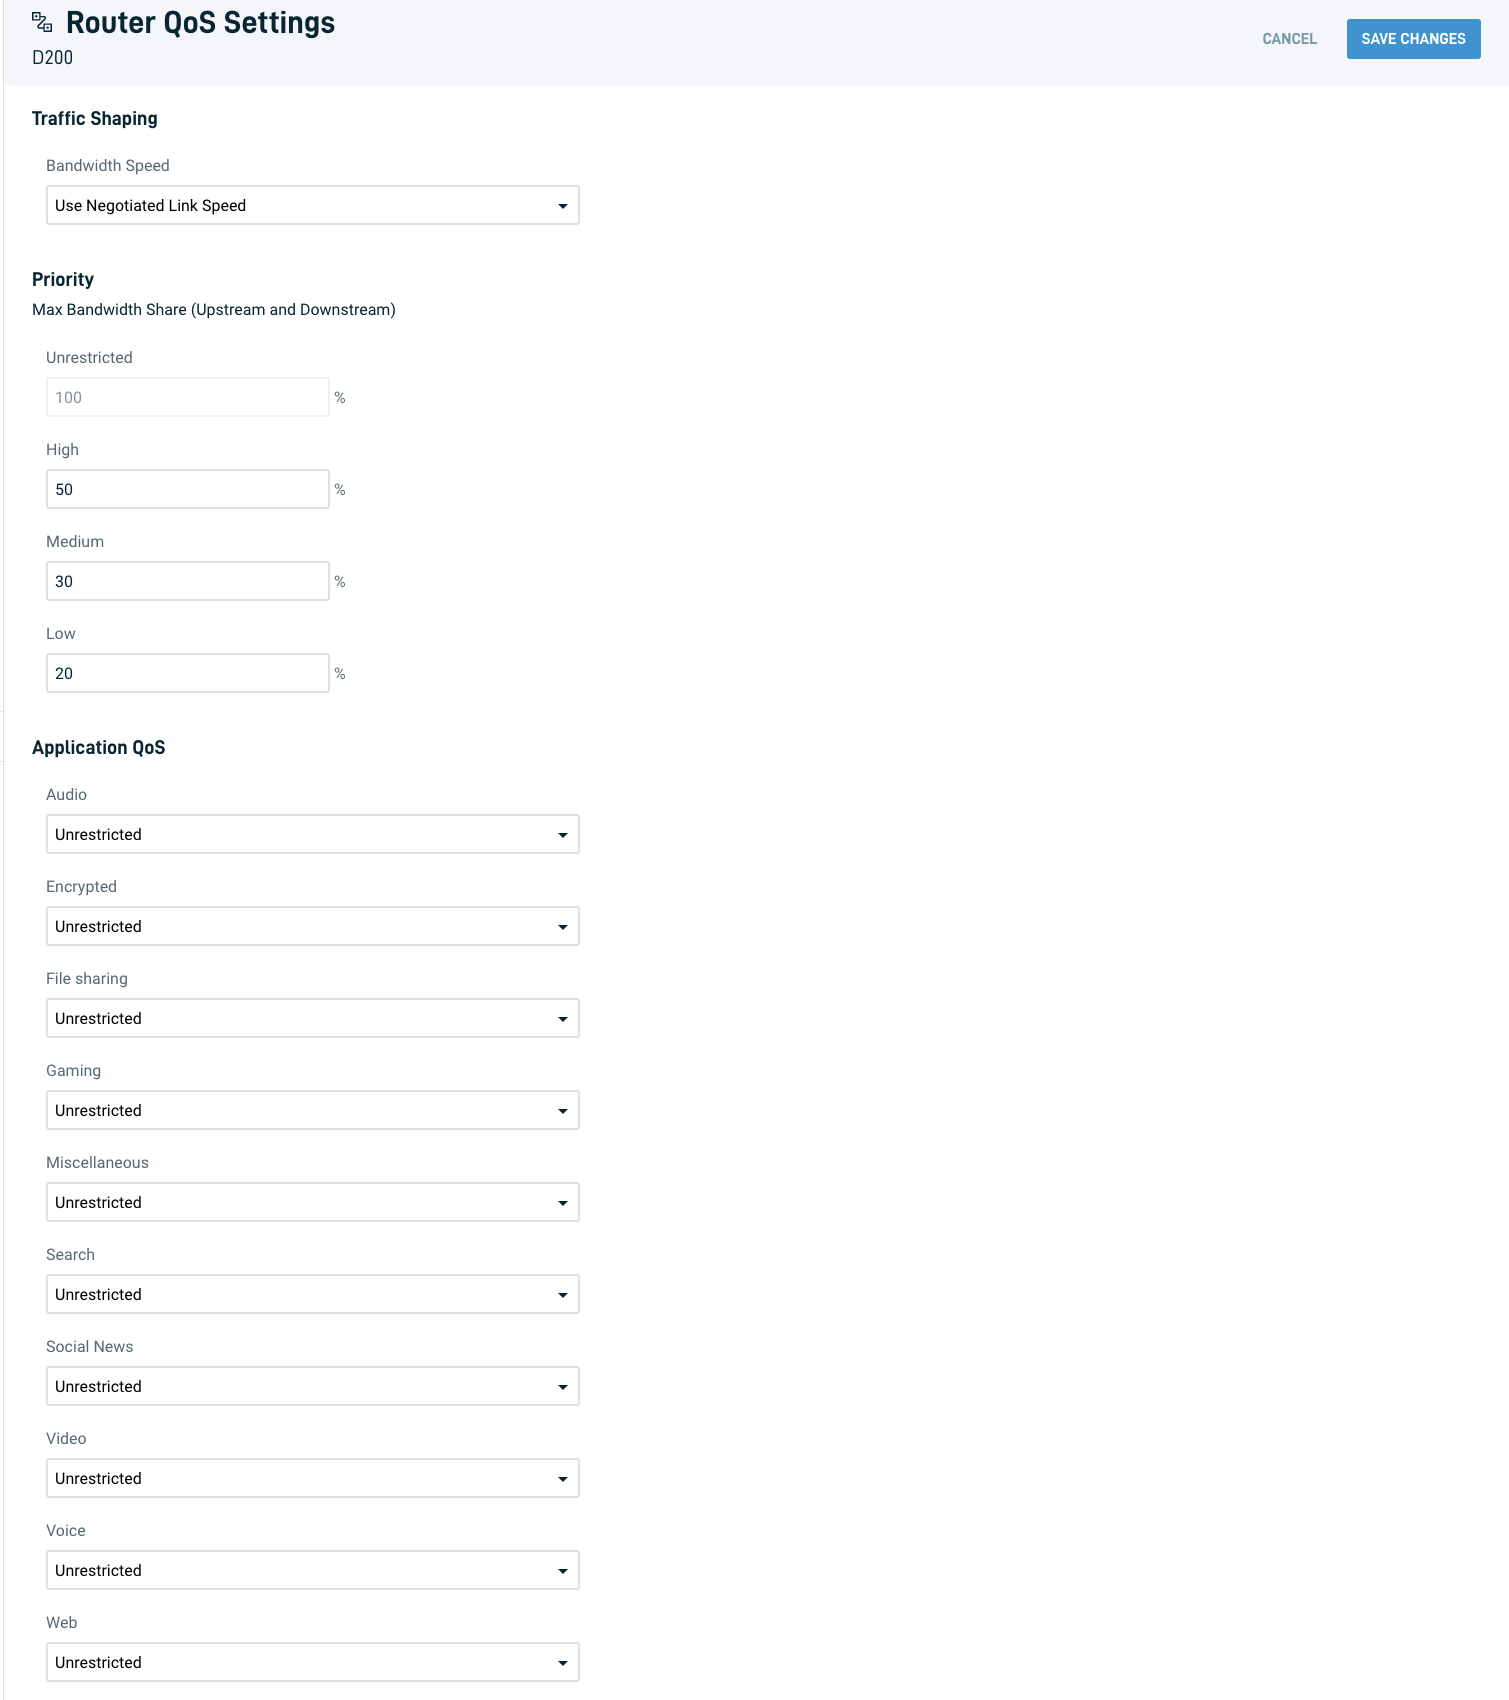
Figure 10: Router QoS Settings
The Router QoS Settings page lets you configure Quality of Service (QoS), which prioritizes application traffic for latency sensitive operations, such as VoIP or video conferencing. Read the Routers: Quality of Service (QoS) article to learn more.
Web Content Filtering Settings
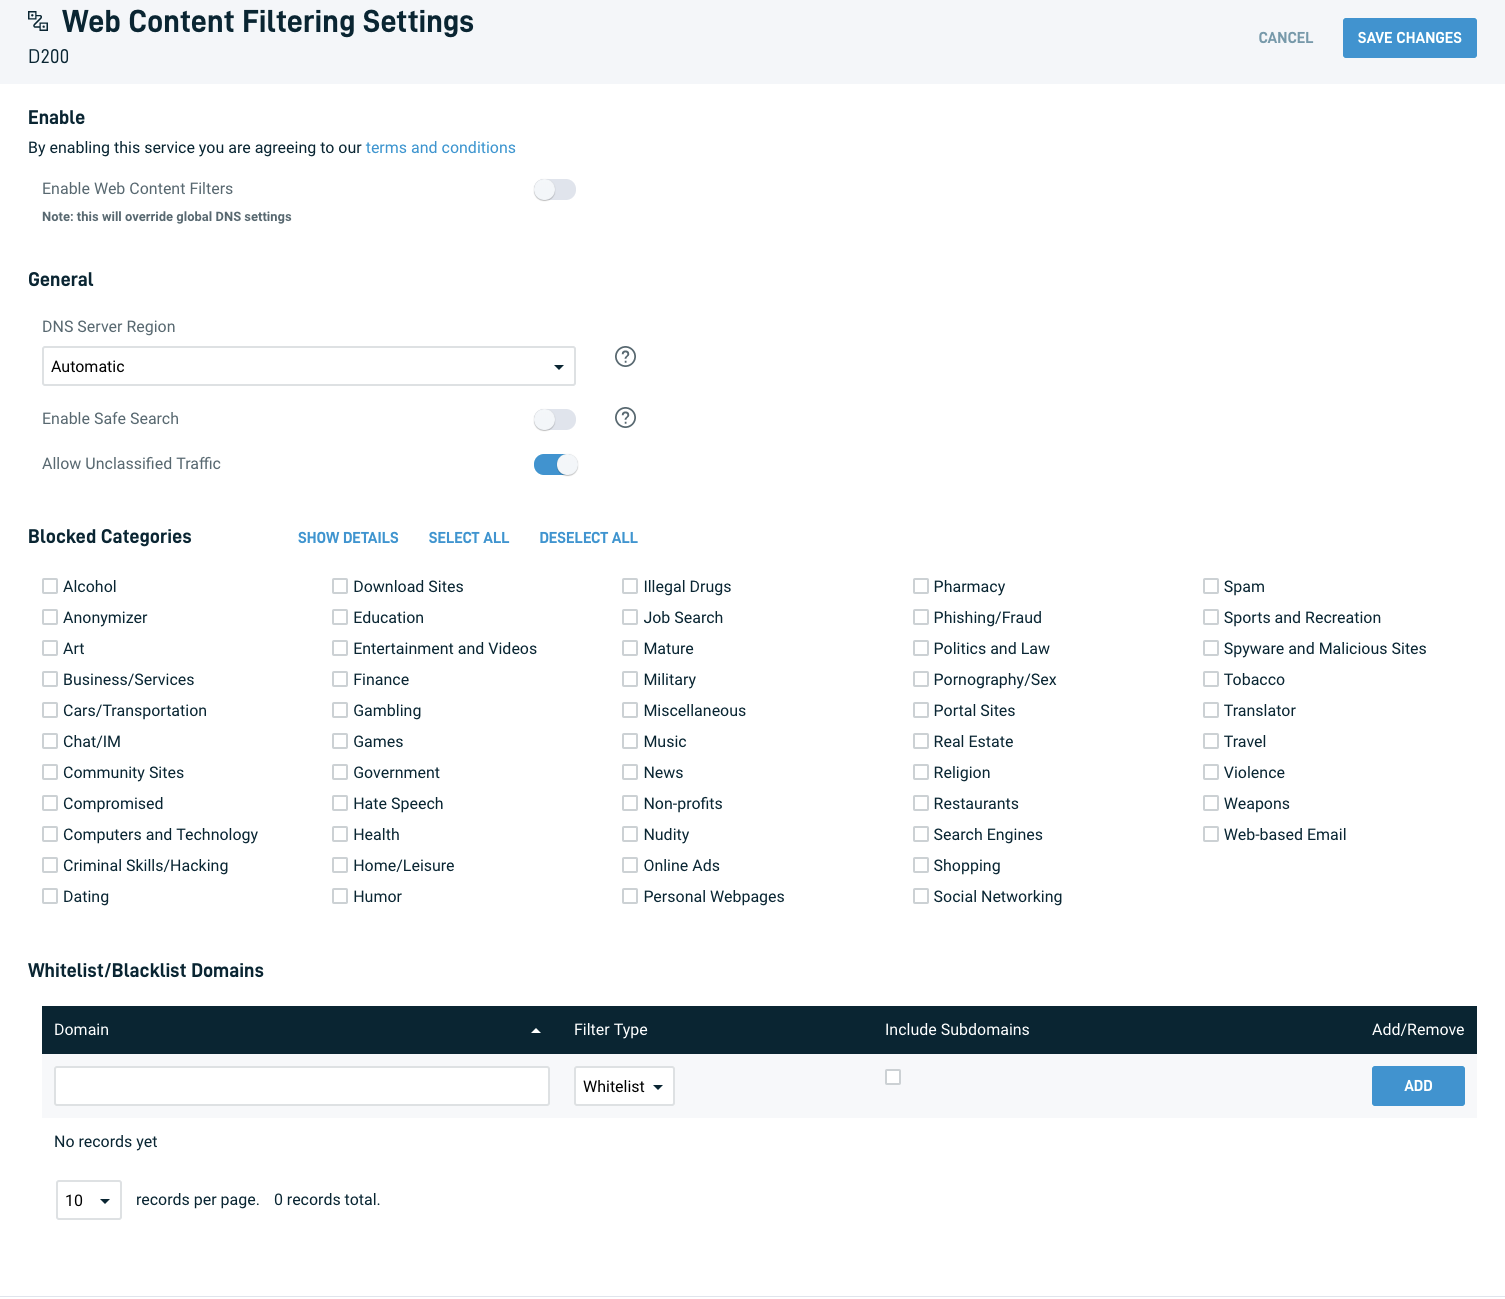
Figure 11: Web Content Filtering Settings
The Web Content Filtering Settings page lets you configure web content filtering, which proactively filters web content at the DNS level, and can allowlist/blocklist traffic per domain. Read the Routers: Web Content Filtering article to learn more.
